Introduction: The Soul of Culinary Craft—Why Stock and Broth Matter
Every memorable meal begins with a foundation. In the world of refined culinary craft, that foundation is often a pot of simmering stock or broth—an aromatic elixir capable of transforming ordinary ingredients into extraordinary experiences. Whether you’re a home cook seeking to elevate your everyday meals or an aspiring chef chasing the nuances of haute cuisine, mastering the art of stock and broth is an essential milestone. Yet, for all their humble reputation, these foundational liquids are shrouded in both tradition and innovation—encompassing everything from classic French techniques to inventive, ingredient-driven approaches inspired by the seasons.
But what separates a pedestrian broth from a soul-stirring one? It’s not just the ingredients, but a blend of technique, timing, and the right tools. This guide dives deep into the often-overlooked details: the must-have equipment that saves effort and enhances flavor, the nuanced techniques that unlock depth and clarity, and the seasonal inspirations that make every batch unique. We’ll also debunk persistent myths, troubleshoot common pitfalls, and provide a practical checklist to ensure your next stock or broth is your best yet. Get ready to discover how this time-honored craft can become the heartbeat of your culinary culture.
The Essential Tools for Stock and Broth Success
Stockpot Selection: Size, Material, and Features
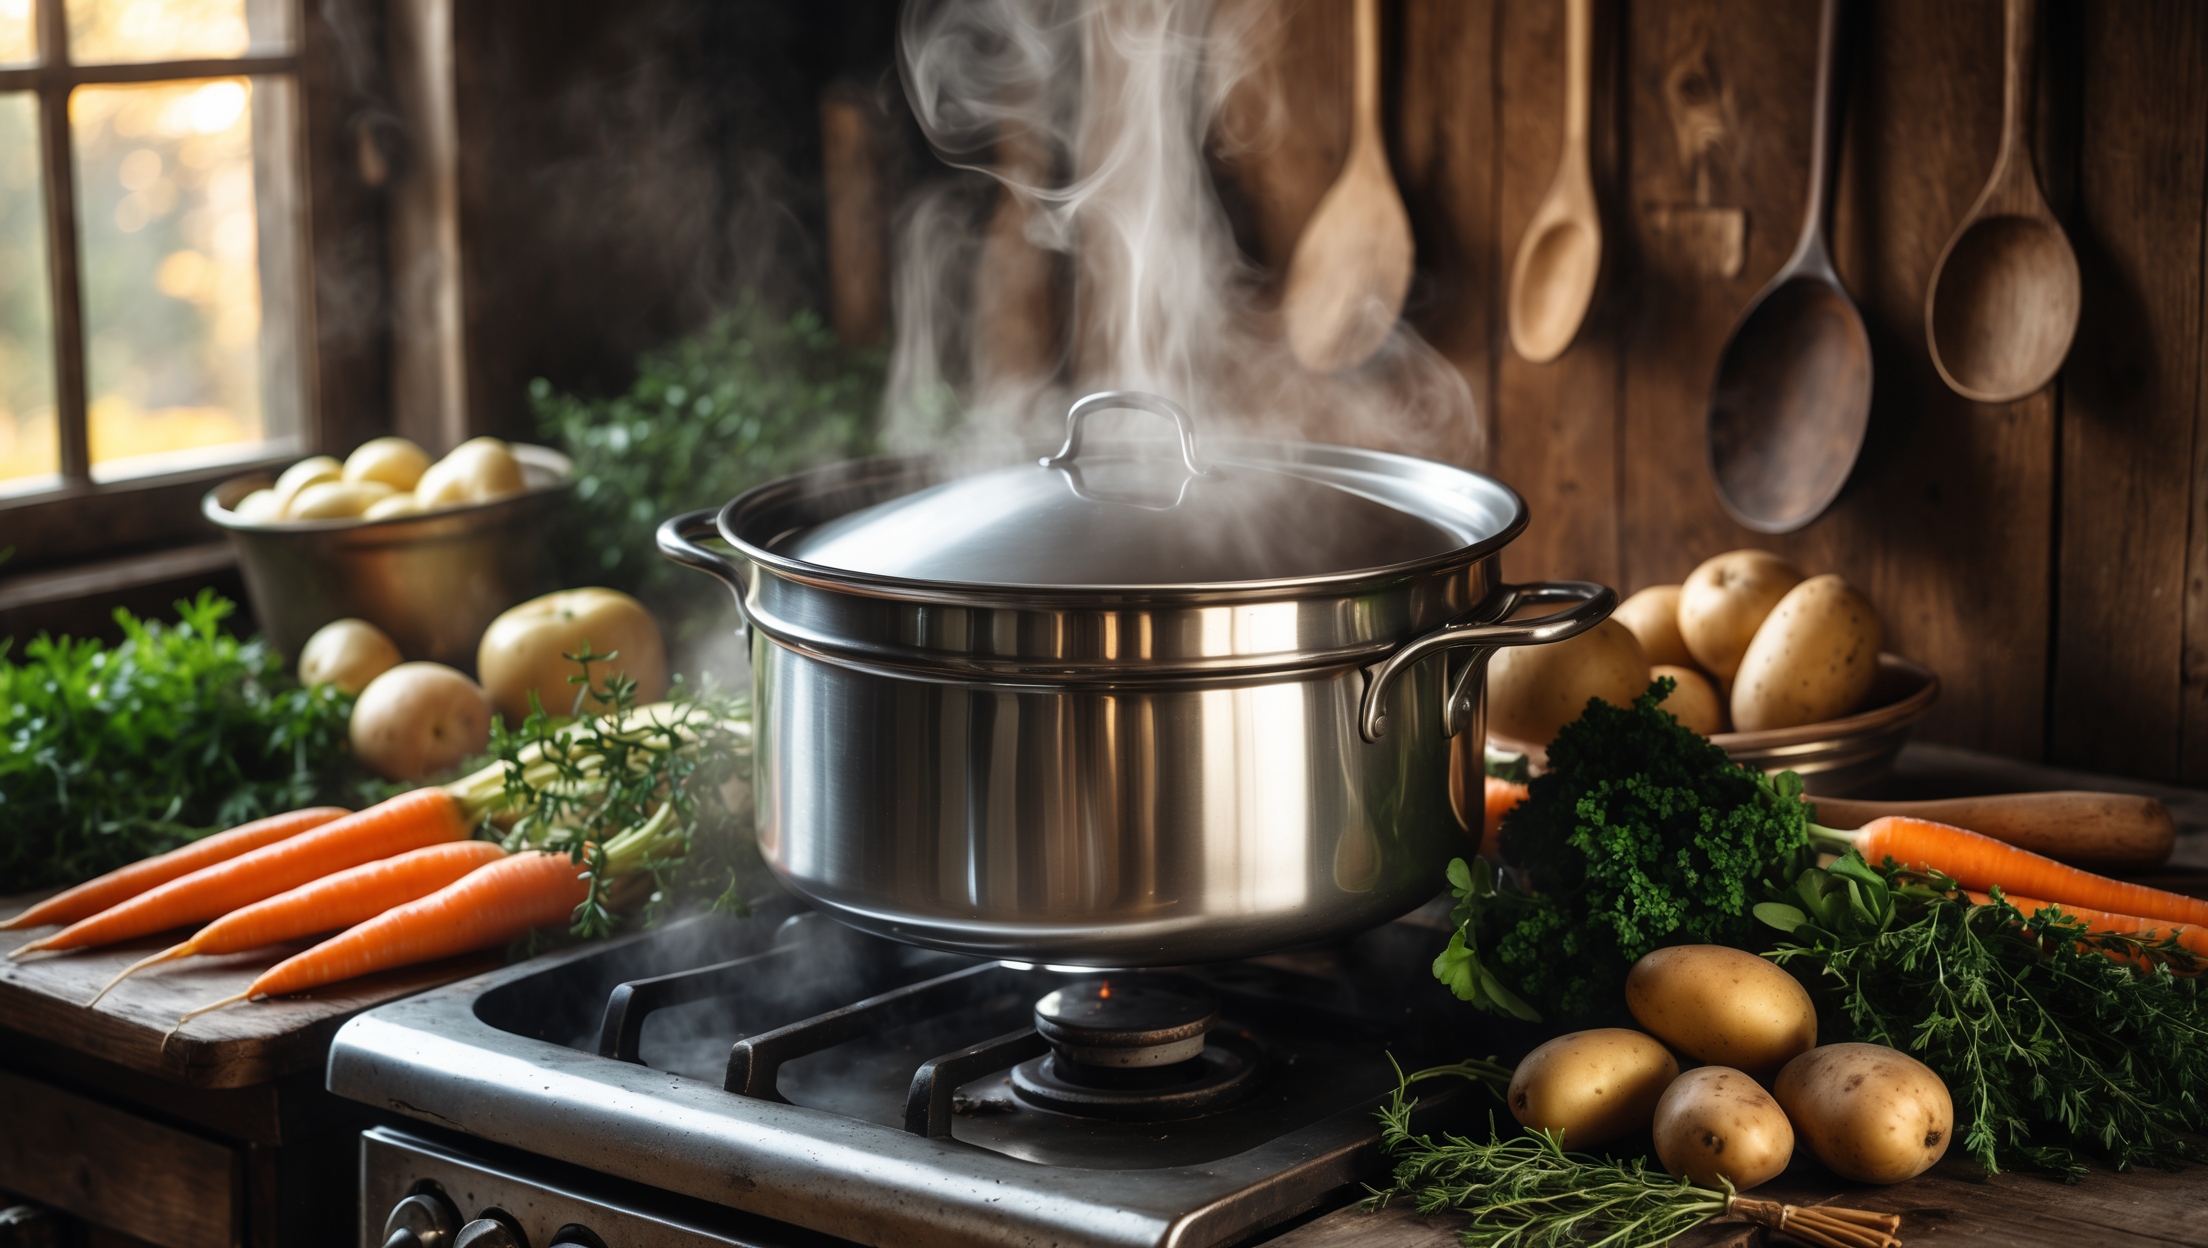
The foundation of every great stock or broth is the vessel you choose. For most home kitchens, a heavy-bottomed stainless steel stockpot of at least 8-12 quarts is ideal. Stainless steel resists reacting with acidic ingredients and offers even heat distribution, preventing scorching. For larger batches or serious enthusiasts, consider investing in a 16-quart pot.
- Heavy base: Prevents burning delicate ingredients during long simmers.
- Tall sides: Minimizes evaporation, concentrating flavors efficiently.
- Sturdy handles: Essential for safe, easy maneuvering when filled with hot liquid.
Avoid aluminum pots for long simmers, as they can impart metallic flavors, especially with acidic vegetables or tomatoes.
Strainers, Skimmers, and Clarifying Tools
Clarity distinguishes a masterful broth. Equip yourself with:
- Fine-mesh strainer: For removing solids and achieving a clean finish.
- Chinois (conical sieve): For extra-fine straining, especially important in consommé or clear broths.
- Spider skimmer: Allows easy removal of impurities and foam during simmering.
- Cheesecloth: For final filtering—essential for pristine presentation in refined dishes.
Other Indispensable Equipment
- Long-handled wooden spoon: For gentle stirring without scratching pot surfaces.
- Ladle: For portioning hot liquid safely and efficiently.
- Accurate kitchen thermometer: To monitor and maintain gentle simmering temperatures (85–95°C / 185–203°F).
- Ice bath setup: To rapidly cool stock and prevent bacterial growth before storage.
- Storage containers: BPA-free plastic or glass containers in various sizes for freezing or refrigeration.
Stock vs. Broth: Definitions, Differences, and When to Use Each
Defining Stock
Stock is made primarily from animal bones, often with a small amount of attached meat and connective tissue. The focus is on extracting collagen and minerals, resulting in a gelatin-rich, body-full liquid. Aromatics (onion, carrot, celery, herbs) enhance flavor, but the goal is a neutral, versatile base for sauces, soups, and braises.
Defining Broth
Broth is typically made from meat (sometimes with bones), simmered with vegetables and seasonings. Broth is lighter, more flavorful on its own, and is often served as a finished soup. It’s generally seasoned, unlike stock, which is left unseasoned for flexibility in finished dishes.
When to Use Each
- Stock: Best for sauces, gravies, risotto, braises—where body and gelatin add luxurious texture.
- Broth: Perfect as a sipping soup, for poaching, or as a base for lighter soups where clear, direct flavor is desired.
Building Flavor: Bones, Meat, Vegetables, and Water
Choosing Bones for Stock
The best stocks rely on a mix of bones:
- Knuckle and joint bones: High in collagen for gelatinous texture.
- Marrow bones: Add richness and mouthfeel.
- Meaty bones: Contribute flavor and color.
Roast bones for brown stock (beef, veal, poultry) to deepen flavor and color. For white stocks (chicken, fish, vegetable), skip roasting for a lighter result.
Meat and Aromatics
Meat adds depth to broth; for pure stock, use bones with some attached meat. Classic aromatics include onion, carrot, celery, and garlic. Layer in herbs (thyme, parsley, bay leaf) tied in a bouquet garni for easy removal.
The Water Factor
Use cold, filtered water to start—impurities in tap water can muddy flavors. Add enough to just cover solids, ensuring optimal extraction without dilution.
Seasonal Inspiration: Elevating Stocks and Broths Year-Round
Spring
- Vegetables: Leeks, spring onions, asparagus ends, baby carrots.
- Herbs: Tarragon, chervil, parsley stems, fresh dill.
- Inspiration: Light, fragrant broths for poaching delicate fish or spring vegetables.
Summer
- Vegetables: Corn cobs, tomato trimmings, zucchini, bell pepper cores.
- Herbs: Basil, cilantro, chive blossoms.
- Inspiration: Sweet, aromatic stocks for chilled soups and quick sauces.
Autumn
- Vegetables: Mushroom stems, squash peels, celery root, parsnip.
- Herbs: Sage, thyme, rosemary.
- Inspiration: Earthy broths for hearty stews and risottos.
Winter
- Vegetables: Cabbage cores, leek greens, turnip, onion skins.
- Herbs: Bay leaf, juniper, dried thyme.
- Inspiration: Rich, warming stocks for braises and noodle soups.
Mastering Technique: Step-by-Step to Exceptional Stock
1. Blanch (for Stock Only)
If clarity is your goal, blanch bones in boiling water for 3–5 minutes, then rinse. This removes surface impurities for a cleaner broth.
2. Roast (for Brown Stocks)
Spread bones and vegetables on a sheet tray. Roast at 425°F (218°C) for 30–45 minutes, turning occasionally, until deeply browned.
3. Simmer, Don’t Boil
Combine bones, aromatics, and cold water in your stockpot. Gently bring to a simmer—never a boil. Vigorous boiling emulsifies fat and proteins, resulting in a cloudy, greasy stock.
- Ideal temperature: 85–95°C (185–203°F).
4. Skim Frequently
During the first hour, foam and impurities rise to the surface. Skim with a spider or ladle to promote clarity and flavor.
5. Add Vegetables and Herbs at the Right Time
Add aromatics after the initial skimming for optimal freshness. Overcooking vegetables can release bitterness or muddle flavors.
6. Simmer Time
- Chicken stock: 4–6 hours
- Beef/veal stock: 8–12 hours
- Vegetable stock: 45–90 minutes
- Fish stock: 30–45 minutes
7. Strain and Cool
Strain through a fine-mesh sieve lined with cheesecloth for maximum clarity. Rapidly chill over an ice bath to prevent bacterial growth. Store in airtight containers.
Common Mistakes and How to Avoid Them
- Boiling instead of simmering: Leads to cloudy, greasy stock.
- Overcrowding the pot: Prevents proper extraction; use appropriate pot size.
- Under-salting or over-salting: Stock should be unseasoned; salt later to taste in final dishes.
- Neglecting to skim: Results in off flavors and murky appearance.
- Adding delicate vegetables too early: Leads to bitterness and muddied flavors.
- Poor cooling practices: Slow cooling can breed bacteria—always use an ice bath for rapid chilling.
Myths Debunked: Stock and Broth Edition
- Myth: “Longer is always better.”
Truth: Overcooking can leach unpleasant flavors and bitterness—stick to recommended times. - Myth: “You must use fancy bones or cuts.”
Truth: Even trimmings and leftover bones create excellent stocks; just ensure freshness and balance. - Myth: “Vegetable stock is bland.”
Truth: Layering seasonal vegetables, mushrooms, and herbs creates deeply flavorful, versatile stocks. - Myth: “You can’t freeze stock.”
Truth: Stock freezes beautifully—just leave room in the container for expansion.
Storing, Labeling, and Using Your Stock and Broth
Proper Storage Methods
- Refrigeration: Use within 3–4 days.
- Freezing: Lasts up to 6 months. Freeze in 1-cup or ice cube portions for easy use.
- Labeling: Always date and specify type (e.g., “roast chicken stock, Jan 2024”).
Fat Removal and Clarification
Once chilled, excess fat will solidify on top—remove for a cleaner finish. For ultra-clear broth, use egg-white clarification (as in consommé).
Creative Uses
- As a poaching liquid for fish, poultry, or vegetables.
- Deglazing pans for sauces.
- Cooking grains or legumes for added depth.
- Blending with seasonal purees for quick soups.
- Steaming dumplings or delicate greens.
Seasonal Stock & Broth Checklist
- Choose bones and vegetables in peak season for best flavor.
- Rotate aromatics and herbs to match seasonal dishes.
- Keep a freezer bag for accumulating trimmings and bones.
- Schedule a monthly stock-making day for year-round supply.
- Label and rotate freezer stock for freshness.
Conclusion: Elevate Every Dish—And Every Season—With Thoughtful Stock and Broth
The journey to culinary mastery is paved with attention to the foundations. Mastering stock and broth is more than a technical exercise—it’s a celebration of ingredient stewardship, seasonal rhythm, and the small rituals that define kitchen craft. With the right tools in your arsenal and a few expert techniques, the process becomes meditative and deeply rewarding, yielding a pantry staple that’s endlessly versatile.
Let stock and broth become your culinary signature. Experiment with seasonal ingredients. Invest in quality equipment that brings joy to the process. Share your creations with friends and family, and notice how even the simplest meals gain new resonance. Whether you’re simmering a traditional bone stock, crafting a vibrant vegetable broth, or exploring international variations, remember: every ladleful carries the story of your kitchen’s care and creativity.
So the next time you stand over a gently bubbling pot, you’ll know it’s more than water and scraps—it’s the heart of your table, crafted with intention and inspired by the seasons. Here’s to stock and broth as the soul of taste, craft, and culinary culture—one batch at a time.


In my cafe’s kitchen, we mostly have aluminum stockpots instead of stainless steel. You mention stainless steel is best for preventing reactions and scorching. Would using aluminum drastically affect the flavor or safety of our stocks, or are there workarounds for small businesses on a tight equipment budget?
Using aluminum stockpots for making stock is generally safe, especially if you avoid acidic ingredients like tomatoes or vinegar, which can react with the metal and affect flavor. For standard stocks with mostly bones, water, and vegetables, any flavor difference should be minimal. Just make sure pots are well-maintained and free from deep scratches. Upgrading to stainless steel is ideal long-term, but for now, your aluminum pots should work fine with a little care.
The article mentions debunking myths about stock and broth—what are some common mistakes people make with timing or technique that lead to cloudy or bland results?
A few common mistakes can make stock or broth cloudy or bland. Boiling too vigorously instead of gently simmering stirs up impurities, causing cloudiness. Skipping the step of skimming off foam and fats as they rise can also muddy the liquid. For blandness, using too little meat, bones, or aromatics, or not simmering long enough, are typical issues. Seasoning too early can sometimes mute flavors instead of enhancing them.
If I’m just starting out and only have a smaller pot, will adjusting simmer time or ingredient quantities still result in a flavorful broth, or is it better to wait until I can get a proper 8-12 quart stockpot?
You can absolutely make a delicious broth with a smaller pot. Just reduce the ingredient quantities to fit your pot and keep the simmer time similar—this will concentrate the flavors. Skim regularly and avoid overcrowding the pot, so everything cooks evenly. No need to wait for a large stockpot to get started!
I’m always worried about burning ingredients during a long simmer. Besides the heavy base you recommend, are there any essential troubleshooting tips or specific tools for avoiding scorching, especially in a busy commercial kitchen where pots might be left unattended for short periods?
In busy commercial kitchens, using a flame tamer or heat diffuser under your pot can help distribute heat evenly and reduce hot spots that cause scorching. Stirring occasionally, even if briefly, is important. For extra protection, consider induction burners with precise temperature control or stock pots with built-in double bottoms. If you must leave pots unattended, set a timer to check them regularly and keep liquids topped up to prevent ingredients from sticking and burning.
You mention that the right technique and tools can prevent common pitfalls like burning ingredients or losing too much liquid to evaporation. Could you share specific troubleshooting tips for someone who’s had their stock turn cloudy or bitter in the past?
If your stock has turned cloudy, try simmering gently rather than boiling, and avoid stirring too much, as vigorous agitation can break up solids and cloud the liquid. For bitterness, steer clear of using too many bitter vegetables like cabbage or broccoli, and remove onion skins. Also, avoid overcooking—most stocks are best after 4 to 6 hours. Always skim off foam as it forms, and use fresh, not charred, bones or vegetables.
You mention debunking myths and troubleshooting stock-making problems—could you outline some common mistakes beginners make that end up ruining broth, and how to quickly fix them if I realize halfway through cooking?
Some common mistakes include boiling instead of simmering, which can make your broth cloudy and greasy, and adding salt too early, which might result in overseasoning. If your broth turns cloudy, try straining it through a fine mesh or cheesecloth. If it’s too salty, add chopped raw potatoes to absorb some salt, then remove them after simmering a bit. Always skim the foam early to keep flavors clean.
I noticed you recommend a heavy-bottomed stainless steel stockpot for making broths and stocks. Could you elaborate on how much of a difference the pot’s material really makes in the final flavor and texture? Are there any circumstances where enamel-coated or nonstick would work just as well?
The material of your stockpot really does influence the outcome. A heavy-bottomed stainless steel pot distributes heat evenly and prevents scorching, which is key for clear, clean-tasting broths. Enamel-coated pots can work well too, as long as they’re heavy and not chipped. Nonstick pots aren’t ideal for long simmering; the coating can degrade and may not allow for proper fond development, which adds depth of flavor. For best results, stick to stainless or enamel-coated for stocks and broths.
You mention seasonal inspiration in creating unique stocks and broths. Could you share some examples of how ingredients might change from season to season and what adjustments in technique or equipment, if any, you would suggest?
Seasonal inspiration means making the most of what’s fresh each season. In spring, you might use asparagus, peas, or ramps for lighter, brighter broths, simmering them briefly to preserve their delicate flavors. Summer stocks can feature tomatoes, corn cobs, or zucchini, with a shorter cook time to avoid bitterness. Autumn invites heartier vegetables like squash or mushrooms, which benefit from longer simmering for depth. In winter, root vegetables and tough greens can be slowly simmered for robust, warming broths. Equipment stays the same, but you may want a fine mesh strainer for delicate broths or a pressure cooker for extracting deeper flavors from denser ingredients.
As someone who frequently makes large batches for my café, I’m wondering if there are specific features or materials I should prioritize when scaling up to bigger stockpots beyond the 16-quart size the article mentioned.
When scaling up to stockpots larger than 16 quarts, look for heavy-gauge stainless steel for durability and even heating. Reinforced handles are crucial for safe lifting, and a thick, flat bottom helps prevent scorching. A well-fitting lid retains heat and moisture, and if available, try to get a pot with a spigot for easier draining. Make sure your stove can support the size and weight of larger pots, too.
I’m curious about the seasonal inspiration part—do you have specific recommendations for what kinds of vegetables or aromatics work best in stock during different times of the year, especially when certain ingredients aren’t as fresh or available?
Absolutely, tailoring your stocks to the season is both practical and delicious. In spring, try using young leeks, peas, and asparagus trimmings. Summer stocks benefit from corn cobs, tomatoes, and fresh herbs like basil or tarragon. For fall, root vegetables like carrots, parsnips, and squash add depth, while winter is great for hearty onions, garlic, and dried mushrooms. If fresh ingredients are scarce, dried herbs, frozen veggies, or even scraps saved from cooking can still make a flavorful base.
You mention the importance of heavy-bottomed stainless steel pots for making broth, but I only have a ceramic-coated Dutch oven at home. Will that still work for long simmers, or should I be concerned about flavor or safety?
A ceramic-coated Dutch oven will work very well for making broth and long simmers. The coating helps prevent sticking and burning, and the heavy construction ensures even heat distribution. Just avoid using metal utensils to protect the coating, and you shouldn’t have any flavor or safety issues. Your results should be just as delicious.
I’m curious about the different handle options on stockpots. The article talks about sturdy handles, but are there specific materials or types of handles that make it easier to lift large, heavy pots safely at home?
When it comes to stockpots, look for handles made of stainless steel or silicone-coated metal. These materials stay cooler and provide a secure grip. Handles that are riveted to the pot rather than welded tend to be sturdier and safer for lifting heavy, full pots. Wide, rounded handles are also easier on the hands, especially when using oven mitts.
You mention troubleshooting common pitfalls and maximizing flavor, but I always seem to end up with cloudy stock. Does that mostly come down to technique, or could my choice of pot be affecting the clarity?
Cloudy stock is usually more about technique than the type of pot you use. The main culprits are boiling too vigorously, not skimming impurities early on, or stirring during simmering. Gently simmering and regularly skimming foam will help keep your stock clear. A heavy-bottomed pot can help maintain a gentle, even simmer, but the key is your cooking method.
For someone with limited kitchen space who can’t invest in multiple pot sizes, would you suggest prioritizing a larger stockpot or starting with something more mid-sized? How much does pot size really impact the final flavor and texture of a broth?
If space is tight, a mid-sized pot (around 5-6 quarts) is a versatile choice and can handle most stock and broth recipes for everyday cooking. Pot size mainly affects batch quantity rather than flavor—what matters more is not overcrowding the ingredients and allowing enough water for proper simmering. As long as everything fits comfortably, your broth’s flavor and texture won’t be compromised.
The article talks about drawing inspiration from seasonal ingredients to make each batch unique. Could you share some practical examples of what to use in spring or fall, and how much of a difference these substitutions actually make in the flavor?
In spring, you might add asparagus ends, fresh peas, or green garlic to your stock, which gives a lighter, brighter flavor. For fall, try butternut squash peels, parsnips, or a touch of apple, which bring a richer, earthier depth. Even small swaps like these can noticeably shift the aroma and taste, making your stock feel more suited to the season.
When you mention using a heavy-bottomed stainless steel stockpot to prevent scorching, does that mean aluminum pots should be avoided even if they’re thick? I’ve always wondered how much the material really impacts flavor and safety, especially when simmering acidic ingredients for hours.
Aluminum pots, even when thick, can react with acidic ingredients like tomatoes or wine, potentially affecting both flavor and safety over long simmering times. Stainless steel, especially with a heavy bottom, is non-reactive and better at preventing scorching and off-flavors. If you do use aluminum, opt for anodized versions, which are less reactive, but for best results with stocks and broths, stainless steel is preferred.
You mentioned that timing and technique are just as important as ingredients for a soul-stirring stock. Can you provide more details on how long to simmer different types of stock, and how to tell when it has reached the right depth of flavor?
For chicken stock, simmer gently for about 4–6 hours; beef or veal stock benefits from 8–12 hours, while vegetable stock only needs 1–2 hours. The stock is ready when it smells rich, tastes deeply savory, and has a full-bodied mouthfeel. If the flavor seems thin, keep simmering and taste occasionally until it develops the desired depth.
You mentioned that stainless steel pots are recommended because they resist reacting with acidic ingredients. Are there any specific brands or materials home cooks should avoid, particularly if they want to experiment with more acidic broths or stocks?
Yes, when working with acidic ingredients like tomatoes or vinegar in broths and stocks, it’s best to avoid unlined aluminum and cast iron pots. These materials can react with acids, which may affect the flavor and appearance of your stock. Instead, stick with stainless steel or enameled cast iron pots from reputable brands; these are safe and easy to clean after acidic cooking.
You mention seasonal inspirations for stocks and broths—could you give an example of how to adjust the ingredient list as the seasons change, especially if I want to keep my menu fresh for regular customers?
Absolutely! In spring, you can include tender greens like asparagus, peas, or fresh herbs such as tarragon and chives for a lighter broth. During autumn, try root vegetables like parsnips, carrots, and squash, along with warming spices. This approach lets you highlight what’s freshest and in season, keeping your stock-based dishes vibrant and appealing for returning guests.
You mentioned minimizing evaporation to concentrate flavors when simmering broth. Do you usually leave the lid on or off during the process, and how does that choice impact the depth of flavor or clarity of the final result?
Leaving the lid off allows more water to evaporate, which concentrates the flavors but can also result in a cloudier broth as agitation occurs. Keeping the lid on limits evaporation, so the flavors are milder but the broth stays clearer. For a rich, deeply flavored stock, simmer partially covered to balance evaporation and clarity. For a very clear broth, simmer gently with the lid mostly on.
When selecting the size of a stockpot, is there a downside to using a much larger pot than needed for a small household? I want to avoid wasting energy or ending up with diluted flavors.
Using a much larger stockpot than you need can lead to a couple of issues. First, it often takes more time and energy to heat up a large pot, which isn’t very efficient for small batches. Second, with extra space, your ingredients can be too spread out, which may cause flavors to become diluted. For a small household, choosing a 6- to 8-quart pot is usually ideal for both efficiency and flavor.
When you mention minimizing evaporation with taller pots, how do you balance that with wanting to concentrate flavors in your stock? Is there a rule of thumb for lid-on versus lid-off simmering to control evaporation?
Minimizing evaporation with taller pots helps keep your stock from reducing too quickly, but if you want to concentrate flavors, you actually want some evaporation. A good rule is to simmer uncovered (lid-off) if you want a richer, more concentrated stock, and partially cover or cover with the lid if you want to retain more liquid for a lighter flavor. You can always adjust by simmering uncovered at the end to reduce further if needed.
I noticed you mentioned troubleshooting common pitfalls with stock and broth, but what are some signs that I may be over-extracting flavors or making my broth cloudy, and how can I fix that if it happens?
Over-extraction often shows up as a bitter or overly strong flavor, while a cloudy broth is usually caused by boiling too hard or not skimming impurities. To fix cloudiness, carefully strain your broth through a fine mesh or cheesecloth. If the flavor is too strong or bitter, try diluting with a bit of water and simmering gently—never boil—next time for a clearer, balanced result.
As someone who only cooks in small batches, is an 8-12 quart stockpot really necessary, or could I get by with a smaller pot and still achieve good depth of flavor?
You can definitely achieve great depth of flavor using a smaller pot if you usually cook in small batches. Just make sure not to overcrowd your ingredients, and consider simmering a bit longer to extract maximum flavor. A 4- to 6-quart pot works well for most small-batch stocks and broths.
I’d love some troubleshooting advice—when I make broth, it often turns out cloudy instead of clear. Based on your techniques, what are the most common mistakes causing this, and how can I avoid them?
Cloudy broth is often caused by boiling too vigorously, which stirs up proteins and fats into the liquid. To keep your broth clear, always bring it gently to a simmer rather than a rolling boil. Also, skimming off any foam or scum that rises during the first hour of cooking helps a lot. Avoid stirring too much and start with cold water for best results.
The article mentions stainless steel is best for resisting reactions with acidic ingredients. How big of a problem are these reactions if I only have an old aluminum pot available for making broth? Should I be concerned about taste or safety if I use what I have?
Using an old aluminum pot can cause some reactions with acidic ingredients like tomatoes or vinegar, which may affect the flavor and sometimes give your broth a metallic taste. While occasional use is unlikely to pose a significant health risk, repeated use can lead to pitting in the pot and more aluminum leaching into your food. If you notice off flavors or your pot is heavily worn, it’s a good idea to switch to stainless steel when possible.
You mentioned seasonal inspiration for broth-making. Could you give some examples of how you might change your stock ingredients or techniques depending on the time of year? I’m interested in trying something new each season.
Seasonal broth-making is a great way to keep things fresh and exciting. In spring, you might add asparagus ends, young leeks, and fresh herbs like chives. For summer, try corn cobs, tomatoes, and basil stems. Autumn is perfect for adding squash peels, mushrooms, and sage. In winter, root vegetables like parsnips, turnip, and hearty greens work well. Adjust simmering times for delicate spring veggies versus heartier winter ingredients.
You mention that stainless steel is preferred for stockpots due to its even heat distribution and resistance to reacting with acidic ingredients. Are there any situations where an enameled cast iron or aluminum stockpot might actually be advantageous, or would you advise strictly against those materials for broths and stocks?
Enameled cast iron stockpots can be great for slow simmering stocks because they retain heat very well and are non-reactive, making them safe for acidic ingredients. However, they’re heavier and take longer to heat up. Aluminum conducts heat efficiently and is lightweight, but unless it’s anodized, it can react with acidic foods and affect flavor. For occasional use, both can work, but stainless steel remains the most versatile and reliable for frequent stock making.
In the section about stockpots, you mention stainless steel for its non-reactive properties and heat distribution, but are there any situations where using an enameled cast iron or even a ceramic pot would be preferable, especially for making smaller batches?
Enameled cast iron and ceramic pots can work well for making smaller batches of stock or broth, especially when you want steady, gentle heat and easy cleanup. Enameled cast iron retains heat exceptionally well and is also non-reactive, making it great for long, slow simmering. Ceramic pots are less common but suitable for small, slow-cooked amounts. Just be mindful that both materials are heavier and can be more fragile than stainless steel.
If I am just getting started and don’t want to invest in a large stockpot right away, is there a certain minimum size or any low-budget kitchen tools you can recommend to still get rich flavor in homemade broth without overspending?
You can absolutely make delicious broth without a large stockpot. A 4- to 6-quart saucepan or Dutch oven works well for most small batches and is usually more affordable. A basic fine-mesh strainer is also handy for removing solids. Use kitchen scraps like vegetable peels and chicken bones to build flavor, so you get the most out of every ingredient.
When you mention seasonal inspiration for broths, do you have specific suggestions for what to add in spring or fall? I’d love tips on how to adapt my basic recipes to take advantage of what’s fresh during different times of the year.
Absolutely! In spring, try adding ingredients like asparagus, peas, leeks, or fresh herbs such as chives and parsley to your broths for a bright, delicate flavor. For fall, think about root vegetables like carrots, parsnips, sweet potatoes, and aromatic herbs like sage and thyme. These not only enhance the broth’s depth but also celebrate the flavors of each season.
When you mention that a heavy base prevents burning delicate ingredients during long simmers, what’s the best way to tell if a pot has a heavy enough base at the store? Is there a rule of thumb for weight or thickness I should look for to avoid scorching?
To check if a pot has a heavy enough base, pick it up and feel the weight—heavier pots usually have thicker bases that distribute heat evenly. Look for bases that are at least a quarter inch thick or have an encapsulated disk (often visible as a metal layer on the bottom). Avoid lightweight or thin-bottomed pots, as these tend to cause scorching during long simmers.
For someone cooking in a small apartment kitchen with limited storage, what would you consider the most essential pieces of equipment to invest in for quality broth, and are there ways to adapt your recommendations for a tighter budget or less space?
For a small apartment kitchen, a sturdy medium-sized stockpot (around 6-8 quarts) is the most essential tool for making quality broth. If storage is tight, look for a pot with a nesting lid or one that can double as your main soup or pasta pot. A fine-mesh strainer is also useful and takes up little space. On a budget, you can skip specialized ladles and large skimmers—regular kitchen tools will do just fine. Focus on multipurpose equipment to save both money and space.
For someone cooking in a small kitchen, does investing in a large 12-quart stockpot make sense, or are there techniques for achieving deep flavor and minimal evaporation with smaller pots?
A large 12-quart stockpot is helpful for big batches, but you can absolutely create rich, flavorful stocks in smaller pots. Try simmering gently with the lid partially on to reduce evaporation, use less water to concentrate flavor, and consider making smaller, more frequent batches. Roasting bones and vegetables before simmering also deepens flavor, even in a compact pot.
If I wanted to streamline the stock-making process for a busy week, are there any must-have tools beyond a good stockpot that really save time without compromising flavor or clarity?
A fine-mesh strainer or chinois is excellent for quickly clarifying your stock without losing flavor. An immersion blender can help extract more from the vegetables before straining, if you like a heartier stock. For speed and convenience, a large pressure cooker or Instant Pot can drastically cut down the cooking time without sacrificing taste or clarity.
I noticed you highlight the need for tall-sided stockpots to minimize evaporation. If I only have a wide, shallow pot, are there any adjustments I should make to maintain depth of flavor and prevent my broth from reducing too quickly?
Using a wide, shallow pot can cause your broth to evaporate faster. To work around this, try lowering the heat to a gentle simmer and keep the lid partially on to trap more steam. You might also top up with a bit of hot water if the liquid reduces too much during cooking—just add it gradually to avoid diluting the flavor too much.
You mention stainless steel stockpots with heavy bases and tall sides for making stock or broth. Would using a slow cooker or Instant Pot give similar results, or is there a big difference in flavor and clarity when using traditional pots?
Using a slow cooker or Instant Pot can definitely make stock and broth more convenient, and you’ll still get good flavor. However, traditional stainless steel stockpots allow for more evaporation and better control over simmering, which can lead to a clearer stock with more concentrated flavor. Slow cookers and Instant Pots often trap more moisture and fat, sometimes making the broth a bit cloudier or less intense. If clarity and depth of flavor are your priorities, a stovetop stockpot is ideal, but for ease, the other options work well.
You mentioned the importance of technique and timing when making stock or broth. Could you break down how long I should actually simmer chicken bones versus beef bones to get the best flavor and clarity?
For the best flavor and clarity, simmer chicken bones for about 4 to 6 hours. This is enough time to extract flavor without making the broth cloudy. For beef bones, a longer simmer of 8 to 12 hours works well, allowing the gelatin and richness to fully develop. Always keep the simmer gentle and occasionally skim off any foam for a clear, flavorful result.
The article touches on the importance of technique and timing when simmering stock. Could you share how long you typically simmer your broths and what signs you look for to avoid over-extracting flavors or making them cloudy?
For most broths, I simmer gently for 2 to 4 hours, while stocks made with bones can go up to 6 hours. I keep the liquid at a gentle simmer rather than a rolling boil to prevent cloudiness. If the broth starts to look murky or develops a bitter taste, that’s a sign it’s been over-extracted. Skimming foam and fat regularly also helps keep it clear.
You mention that stainless steel stockpots are ideal because they resist reacting with acidic ingredients. In your experience, is there a noticeable flavor difference if I use enameled cast iron instead, especially for long simmers with a lot of tomatoes or wine?
Enameled cast iron is also a great option for stocks and broths because its enamel coating prevents direct contact between the food and the metal, so it won’t react with acidic ingredients like tomatoes or wine. In my experience, there’s no noticeable flavor difference between stainless steel and enameled cast iron, even for long simmers. Both materials work well for maintaining pure, clean flavors.
I noticed the guide talks about seasonal inspiration for stocks and broths. Could you give an example of how you’d adapt your base ingredients for different times of year? I’d love ideas for spring versus winter.
For spring, you might use light, delicate vegetables like asparagus, peas, fennel, and fresh herbs in your stock or broth, which create a brighter flavor. In winter, heartier ingredients like carrots, parsnips, leeks, and root vegetables add warmth and depth. You can also add mushrooms or dried herbs in winter for a richer taste. Adjusting your base this way lets you match flavors to the season.
You mention that tall sides help minimize evaporation and concentrate flavors. If I only have a wide, shorter pot at home, will that seriously affect my stock, or can I adjust the cooking time to compensate?
Using a wide, shorter pot will lead to more evaporation, which can make your stock reduce faster and possibly intensify the flavors too much or leave you with less liquid. You can compensate by either lowering the heat to keep the simmer gentle or covering the pot partially with a lid to slow evaporation. Just check the liquid level occasionally and add a bit of water if needed to maintain your desired volume and flavor.
You talk about using seasonal ingredients for unique stocks and broths—do you have any suggestions for quick swaps during busy weeks when I might not have all the fresh items on hand?
Absolutely, when fresh seasonal ingredients aren’t available, you can quickly swap in frozen vegetables like peas, corn, or spinach, and even use dried mushrooms for added depth. Pre-chopped mirepoix mixes from the store are a real time-saver, too. Herbs can be substituted with dried versions, and a splash of lemon juice or a dash of vinegar can add brightness if you don’t have fresh citrus or herbs.
I noticed you mention both traditional techniques and more innovative, seasonal approaches to making stock and broth. For a busy parent trying to maximize both flavor and efficiency, are there certain tools or shortcuts you would recommend when adapting these methods at home?
For busy parents, a pressure cooker or Instant Pot is a real game changer—it cuts down simmering time dramatically while still extracting lots of flavor. Pre-chopping and freezing veggie scraps and bones can save time, too. Using bouquet garni bags or reusable herb infusers makes straining quick and mess-free. These shortcuts keep the process efficient without sacrificing taste or seasonal creativity.
You mention troubleshooting common pitfalls with stock and broth. What are some signs that my stock isn’t developing enough flavor during simmering, and is there anything I can do to fix it without starting over?
If your stock tastes bland or watery after simmering, that’s a sign it isn’t developing enough flavor. You can fix this by continuing to simmer with the lid off to reduce and concentrate the liquid. Adding a few aromatic vegetables, herbs, or a splash of soy sauce or wine can also help deepen the flavor without having to start over.
I noticed you mentioned stainless steel as the best material for stockpots to avoid reacting with acidic ingredients. Are there any affordable alternatives that still work well, especially for someone just starting out and not sure they’ll be making huge batches?
If stainless steel feels expensive, enameled steel or enameled cast iron stockpots are solid alternatives since their coating prevents reactions with acidic ingredients. For beginners making small batches, a sturdy enameled pot or even a heavy-duty nonstick soup pot will work. Just avoid aluminum or uncoated cast iron, as they can affect flavor and color. Many stores offer smaller, budget-friendly options in these safer materials.
You mention that stainless steel is ideal for stockpots because it resists reacting with acidic ingredients. Would there ever be a reason to use an enameled cast iron or copper pot for making stock or broth, or do those materials present complications with flavor or cleaning?
Enameled cast iron can also be a good choice for making stock or broth, as the enamel coating prevents any reaction with acidic ingredients and offers easy cleanup. However, copper pots are generally not recommended; unless they are lined, copper can react with acids and affect the flavor. Lined copper requires special care to avoid damaging the lining, so stainless steel or enameled cast iron is usually simpler and safer for stock making.
I noticed you mentioned debunking myths and troubleshooting common pitfalls in making stocks and broths. Would you be able to share an example of one persistent myth and how following it might negatively affect the flavor or clarity of the final product?
One persistent myth is that you must keep your stock at a rapid boil the entire time. In reality, boiling too vigorously agitates the ingredients and releases impurities, which can make the stock cloudy and give it a harsh taste. A gentle simmer is much better for drawing out flavors while keeping your stock clear and balanced.
When making seasonal stocks, what are some creative ingredient swaps you suggest? For instance, is there a safe way to incorporate non-traditional vegetables or herbs without risking bitterness or cloudy results?
You can definitely get creative with seasonal stocks by using ingredients like fennel bulbs, parsnips, or sweet potatoes instead of carrots for a different flavor. Fresh herbs such as dill or tarragon add a unique twist, but use them sparingly and add near the end of simmering to avoid bitterness. Avoid strong brassicas like broccoli and cabbage, as they can make your stock cloudy and overpowering. Strain well and simmer gently for the clearest results.
You mention that stainless steel stockpots are ideal because they resist reacting with acidic ingredients, but are there certain vegetables or ingredients I should always avoid using in a stock to prevent any off flavors, even with the right pot?
Yes, even with a stainless steel pot, some ingredients can make your stock bitter or overpowering. It’s best to avoid cruciferous vegetables like broccoli, cauliflower, and Brussels sprouts, as well as overly strong herbs or too many potato peels. These can introduce off flavors or cloudiness. Stick to classic aromatics like onions, carrots, celery, leeks, and a few herbs for a cleaner, well-balanced stock.
The article talks about avoiding common pitfalls and troubleshooting. Could you share an example of a typical mistake people make when simmering broth for long periods, and how to fix or prevent it in a busy kitchen environment?
A common mistake when simmering broth for a long time is letting it boil too vigorously, which can make the broth cloudy and muddy the flavors. To prevent this, keep the heat low so the liquid barely bubbles. In a busy kitchen, setting a timer to check every 30–60 minutes helps you adjust the temperature or add water if needed, keeping your broth clear and flavorful.
You mention that a heavy-bottomed stainless steel stockpot is best for making stock and broth. Are there any drawbacks to using enameled cast iron or aluminum pots instead, especially when it comes to flavor or maintenance?
Enameled cast iron pots retain heat well and are non-reactive, but they can be heavy and more prone to chipping if handled roughly. Aluminum pots heat quickly and are lightweight, but if they’re not anodized, they can react with acidic ingredients, which might alter the flavor of your stock or broth. Stainless steel is favored because it’s durable, easy to clean, and doesn’t interact with food flavors.
I see the article mentions stainless steel stockpots as ideal for home kitchens because they resist reacting with acidic ingredients. Are there situations where an enameled cast iron pot would be a better option, or would that affect flavor extraction or clarity?
Enameled cast iron pots are actually a good option for making stock or broth, especially if you already own one. The enamel coating prevents any reaction with acidic ingredients, so it won’t impact flavor extraction or clarity. These pots also retain heat well, which helps maintain a gentle simmer. Just be mindful that they’re heavier and take longer to heat up compared to stainless steel stockpots, but they won’t negatively affect your results.
You mention that stainless steel stockpots are best for preventing scorching and reacting with acids, but as a small café owner with a tight budget, would an aluminum pot be a reasonable alternative if I just watch it more closely? Are there specific ingredients I should definitely avoid if using aluminum?
Using an aluminum pot is workable if you keep an eye on the heat to prevent scorching, but be aware that aluminum reacts with acidic ingredients like tomatoes, vinegar, and wine. These can give your stocks or broths a metallic taste and may discolor the pot. If you mostly make broths without acidic elements, aluminum can be a budget-friendly option, just avoid recipes with strong acids or add those late in the cooking process.
When following seasonal inspiration, do you recommend changing up the essential tools as well, or do the basics like an 8-12 quart stockpot stay the same regardless of what ingredients you use?
The basics like an 8-12 quart stockpot, a fine-mesh strainer, and ladle remain essential no matter what seasonal ingredients you use. The core tools provide consistency and efficiency for any broth or stock. You might occasionally add specialty items, like a steamer basket for certain vegetables, but you don’t need to swap out your main tools with the seasons.
When making stock or broth, you mention the importance of both classic French techniques and newer, seasonal ingredient-driven approaches. Could you share an example of how a seasonal twist might change the standard stock process?
A seasonal twist could mean adding spring vegetables like asparagus and peas to your stock for a lighter, fresher flavor compared to the traditional mirepoix of carrots, celery, and onion. In autumn, you might introduce roasted squash or parsnips, which bring a sweeter, earthier note. Adjusting ingredients this way lets the stock reflect what’s fresh and available, giving each batch its own unique character.
When you talk about troubleshooting common pitfalls, what would you say is the most frequent mistake home cooks make when concentrating flavors, and how would you suggest avoiding it with the tools you mention?
One of the most frequent mistakes is reducing stock or broth too quickly over high heat, which can lead to bitter or overly intense flavors and even scorched bits. To avoid this, use a wide, heavy-bottomed pot for even heat distribution and simmer gently over low to medium heat. A fine-mesh skimmer can help remove impurities as you go, keeping flavors clean and balanced.
You mention seasonal inspiration for making unique batches of stock or broth. Could you share some examples of how you switch up ingredients or techniques between different times of the year, especially when certain vegetables or aromatics are at their peak?
Absolutely! In spring, I like to use asparagus ends, fresh peas, and young leeks for a lighter stock. Summer is great for adding corn cobs, tomato scraps, and basil stems for extra sweetness and aroma. During autumn, I switch to root vegetables like parsnips, carrots, and earthy mushrooms. In winter, hearty greens, garlic, and roasted onion skins add depth. Adjusting simmer times and roasting certain ingredients first can also enhance seasonal flavors.
The article talks about debunking myths and troubleshooting common pitfalls with stocks and broths. Could you expand on one or two of the most persistent myths that often trip up home cooks, and how to avoid those mistakes?
One common myth is that you must always skim every bit of foam from the surface for a clear stock. While skimming helps, clarity mostly comes from gentle simmering rather than boiling, which prevents ingredients from breaking up and clouding the liquid. Another myth is that longer cooking is always better. In fact, overcooking can make broths taste bitter or muddy. Instead, simmer stocks for the recommended time based on your ingredients—generally 4-6 hours for bone stocks and just 1-2 hours for vegetable broths.
You mentioned that stainless steel stockpots are ideal for preventing reactions with acidic ingredients and scorching, but are there situations where an enameled cast iron or even a ceramic pot might be preferable for certain stocks or broths?
Enameled cast iron and ceramic pots can be great alternatives, especially for slow-simmered broths where even heat retention is helpful. These materials also prevent reactions with acidic ingredients. Ceramic pots are popular for delicate broths, like Asian-style stocks, because of their gentle heat distribution. Enameled cast iron is excellent for making rich, gelatinous stocks that need steady, low heat. Just be mindful of the weight and care required for these types of cookware.
When scaling up to a larger 16-quart pot, are there specific techniques to avoid losing too much liquid to evaporation, or is it mainly a matter of adjusting the heat and covering the pot?
When using a large 16-quart pot, minimizing evaporation is mostly about controlling heat and using a lid. Keep the pot at a gentle simmer rather than a rolling boil, and cover it partially or fully to trap steam. You can also check periodically and add a bit more water if needed. A larger surface area means faster evaporation, so these steps help maintain your desired liquid level.
I’m curious if there are certain seasonal ingredients you find especially transformative in stocks or broths, and how should I adjust my technique or tool selection to get the most out of these changes?
Seasonal ingredients like spring asparagus, summer tomatoes, autumn squash, or winter root vegetables can really elevate your stocks and broths. For delicate vegetables (like asparagus), simmer gently and use a fine-mesh strainer to preserve subtle flavors. With heartier winter ingredients, a longer simmer in a heavy-bottomed pot helps extract deeper flavors. Adjusting your timing and choosing the right strainer or pot can help you capture each season’s essence.
You mentioned that minimizing evaporation with tall-sided pots helps concentrate flavors. If my pot is a bit shorter, is there a way to adjust the simmering process or timing so the broth doesn’t reduce too much and lose clarity?
If your pot is shorter, you can partially cover it with a lid while simmering. This will help reduce evaporation and keep your broth from reducing too much. You can also lower the heat further to maintain a gentle simmer, which helps preserve clarity. Keep an eye on the liquid level and add a bit of hot water if necessary to maintain the volume.
You mentioned a practical checklist and troubleshooting common pitfalls—could you share advice on what to do if my homemade broth ends up cloudy or lacking depth, even when following the recommended tools and techniques?
If your broth turns out cloudy, it often means it was boiled too vigorously or not skimmed enough—try simmering gently and skimming foam regularly next time. For broth lacking depth, consider roasting bones or vegetables before simmering, adding a splash of acid like vinegar or lemon, and simmering a bit longer. Fresh herbs and salt added at the end can also help boost flavor.
When it comes to incorporating seasonal inspiration into stocks, do you have guidelines for timing or amounts? For example, if I’m adding spring vegetables, should I adjust simmer time or quantities to avoid overpowering the base flavors?
When adding seasonal vegetables like spring greens or asparagus to your stock, add them during the last 15–20 minutes of simmering. These vegetables are delicate and release flavor quickly, so short cooking times help maintain a balanced base. Use moderate amounts—about one part seasonal veggies to three parts classic base ingredients—to avoid overpowering the core flavors of your stock.
In the section about stockpot selection, you mention both 8-12 quart options for home cooks and 16-quart pots for enthusiasts. Is there any downside to using a larger stockpot for smaller batches, or does it affect flavor or evaporation rates?
Using a larger stockpot for smaller batches does have a few drawbacks. With more exposed surface area, you’ll likely experience faster evaporation, which can reduce your liquid more than intended. Also, a shallow layer of ingredients may not extract as much flavor compared to a fuller pot. For best results, try to choose a pot size that matches the quantity you’re making so ingredients stay nicely submerged and flavors develop evenly.
You mention debunking persistent myths and troubleshooting common pitfalls when making stock and broth. Could you share an example of a common mistake people make with timing or technique, and how it can be avoided in practice?
One common mistake is boiling stock at too high a temperature for too long, which can make it cloudy and give it a harsh flavor. To avoid this, keep the pot at a gentle simmer instead of a rolling boil. This allows flavors to develop slowly and results in a clearer, more refined stock.
You mention that a heavy-bottomed stainless steel pot is ideal, but as a busy parent on a budget, is there a more affordable type of pot that still works reasonably well for making good stock, or does it really make that much difference?
A heavy-bottomed stainless steel pot helps prevent scorching, but you can still make excellent stock with other types of large pots, like an enameled Dutch oven or even a basic aluminum or nonstick stockpot. Just be sure to stir occasionally and keep the heat low to avoid burning. The most important thing is having enough capacity and a tight-fitting lid.
You mention seasonal inspirations for making each batch of stock unique—could you give some examples of ingredients to use during different times of the year, especially for restaurants trying to keep their menu fresh and interesting?
Absolutely! In spring, you might use asparagus ends, pea pods, or ramps for fresh flavors. Summer stocks can benefit from corn cobs, tomato scraps, or basil stems. For fall, try squash peelings, mushroom stems, and root vegetable trimmings. Winter stocks are great with leeks, parsnips, and hearty herbs like thyme and rosemary. Rotating these seasonal ingredients keeps your menu vibrant and highlights local produce.
You mention that stainless steel stockpots are best because they resist reacting with acidic ingredients. Do you think using enamel-coated cast iron pots would give similar benefits for stocks and broths, or are there drawbacks to that material?
Enamel-coated cast iron pots are a good alternative for making stocks and broths because the enamel layer prevents reactions with acidic ingredients, similar to stainless steel. However, these pots are usually heavier, which can make handling large batches a bit challenging. They also retain heat very well, so you’ll want to be careful with temperature control to avoid over-reducing your stock.
You mention a pot size of 8-12 quarts for most home kitchens. If I usually cook for just two people, is using a smaller pot going to change the final taste or clarity of my broth, or is batch size mostly a matter of convenience?
Using a smaller pot for making stock or broth when cooking for two people is absolutely fine and won’t negatively affect the taste or clarity, as long as you keep the ingredient proportions the same. The main reason for a larger pot is simply to make bigger batches for freezing or future use. Just be sure not to overcrowd your pot, so flavors extract evenly and you can skim impurities easily.
I like the idea of letting seasonal ingredients inspire each batch of broth, but do you have suggestions for balancing out strong flavors if they start to overpower the stock, especially when experimenting? I’ve ended up with some pretty intense broths when playing around with different vegetables.
When a broth gets too intense from strong vegetables, you can mellow it out by adding more neutral ingredients like water, mild root vegetables (like potatoes or carrots), or white mushrooms. Simmering with a handful of rice or a peeled potato for a bit can also absorb some of the strong flavors. Straining them out before serving helps restore balance without diluting the stock too much.
I like the focus on seasonal inspiration for stocks and broths. Could you share more about how to rotate different flavor profiles throughout the year, especially for a business menu that changes with the seasons?
Rotating flavor profiles seasonally is a fantastic way to keep your menu fresh. In spring, consider light broths with peas, asparagus, and fresh herbs. Summer works well for stocks with tomatoes and sweet corn. For fall, try rich broths with squash, mushrooms, and root vegetables. Winter stocks can be heartier, featuring parsnips, leeks, and warming spices. Adjust proteins and aromatics to match what’s abundant locally during each season for the best results.
You mentioned using an 8-12 quart pot for home kitchens, but I usually cook in smaller batches. Is there an ideal minimum pot size that still gives good flavor without things getting too concentrated or evaporating quickly?
If you prefer making smaller batches, a 4- to 6-quart pot works well for home stocks and broths. This size gives you enough volume for good flavor development, while also preventing too much evaporation. Just keep an eye on the simmer and partially cover the pot if needed to avoid over-reduction.
You mention that stainless steel stockpots are ideal because they resist reacting with acidic ingredients. Does that mean using an enameled or aluminum pot could negatively affect the taste or safety of my stock or broth?
Yes, using aluminum pots—especially if they’re uncoated—can cause acidic ingredients like tomatoes or wine to react, which may give your stock a metallic taste and potentially affect food safety over time. Enameled pots, on the other hand, are coated to prevent this reaction, so they’re a safe and flavorful option, much like stainless steel.
You mention the benefits of a heavy-bottomed stainless steel stockpot for making both stock and broth. Have you noticed a real difference in final flavor or clarity when comparing stainless steel to enameled cast iron or even aluminum pots? I’m trying to decide if I need to upgrade my old cookware for better results.
You’ll notice some differences depending on the pot material. Stainless steel stockpots offer even heating without reacting to acidic ingredients, which helps maintain a clean flavor and good clarity. Enameled cast iron can work well, but it’s heavier and heats less evenly, sometimes causing sticking or scorching during long simmering. Aluminum heats fast, but may react with acidic foods and can affect taste or color. Upgrading to stainless steel is a worthwhile investment if you’re looking for consistency and a neutral flavor profile in your stocks and broths.
I noticed the article talks about minimizing evaporation with tall-sided pots to concentrate flavors. Could you explain how much water loss is typical during a long simmer, and are there best practices for topping up liquid without diluting flavor?
During a long simmer, you can expect to lose anywhere from 10% to 25% of your liquid over several hours, depending on pot size, lid use, and heat level. To avoid diluting flavor when topping up, use hot water sparingly and only as needed—or, even better, add a bit of simmering stock or broth if you have extra on hand. Keeping the pot partially covered also helps control evaporation.
I’m often pressed for time on weeknights. Are there any tips for getting a rich, flavorful stock without having to simmer it for hours, or shortcuts that don’t sacrifice too much on taste?
You can get a flavorful stock in less time by using a pressure cooker or Instant Pot, which extracts flavors much faster than traditional simmering. Roasting your bones and vegetables before adding them to the pot also deepens the flavor. Adding umami-rich ingredients like dried mushrooms, tomato paste, or a splash of soy sauce can enhance the taste even in a short simmer.
You mention minimizing evaporation with tall-sided stockpots to concentrate flavor. If I’m making a smaller batch in a standard 6-quart pot, do you have tips to avoid losing too much liquid during the simmer? Should I adjust my cooking time or use a lid to help?
When making a smaller batch in a 6-quart pot, using a lid is a great way to control evaporation—just partially cover the pot so steam can escape but most moisture stays in. You can also simmer at a lower heat to reduce bubbling and loss. Adjusting cooking time isn’t usually necessary unless you notice the liquid level dropping quickly; in that case, shorten the simmer or add a bit more water as needed.
You mention the importance of a heavy-bottomed stainless steel stockpot to prevent scorching. Is there a noticeable difference in flavor or clarity between stocks made in stainless steel versus enameled cast iron or aluminum pots?
Yes, the type of pot can make a difference. Stainless steel stockpots don’t react with acidic ingredients and distribute heat evenly, which helps maintain clear and clean-tasting stocks. Enameled cast iron works well too, but it can be heavier and sometimes retains flavors from previous dishes. Aluminum conducts heat quickly but can react with acidic foods, sometimes resulting in a slightly metallic taste or cloudier stock. For the clearest flavor and appearance, stainless steel is often preferred.
I noticed the article recommends a stainless steel stockpot with a heavy base for making broths and stocks, but those can get pretty pricey. Is it okay to start out with an enameled or plain aluminum pot, or will that really affect the flavor and quality?
You can absolutely start with an enameled or plain aluminum pot if that’s what you have. While a heavy stainless steel pot offers better heat distribution and reduces the chance of scorching, enameled and aluminum pots can still produce excellent broths and stocks. Just keep an eye on the heat to avoid burning, and you’ll get good results until you’re ready to upgrade.
You mention that stainless steel is ideal for stockpots because it resists reacting with acidic ingredients. Is there any downside to using enameled cast iron or aluminum pots for making stocks and broths, or do they work just as well?
Enameled cast iron pots are a good option for making stocks and broths since the enamel coating prevents reactions with acidic ingredients, much like stainless steel. However, they can be heavier and sometimes pricier. Bare aluminum pots, on the other hand, can react with acidic foods, potentially affecting flavor and color. If you choose aluminum, anodized or lined versions are preferable for stock-making.
I’m interested in the troubleshooting section you touched on. What are the most common mistakes people make that result in cloudy or bland broths, and do you have any practical tips for rescuing a batch that doesn’t turn out as expected?
Cloudy broths often happen when the pot is boiled too vigorously or the ingredients aren’t skimmed regularly, causing impurities to mix in. Blandness can result from under-seasoning or not simmering long enough. To rescue cloudy broth, try straining it through cheesecloth. For blandness, simmer longer with extra aromatics or add a splash of soy sauce or fish sauce for depth.
You mention must-have equipment for stock and broth making, but as a college student with limited space and budget, what are the absolute essentials I should prioritize if I want to start making good stock at home?
If you’re just starting out and have limited space and budget, focus on getting a large, sturdy pot (at least 6 quarts) and a basic fine-mesh strainer. These two items will let you make and strain any stock or broth. A wooden spoon is also useful for stirring, but you can manage without specialty tools. You don’t need anything fancy—these basics will get you great results.
You mentioned that the choice of stockpot can really influence the outcome. As a small restaurant owner with limited kitchen space, is it better to invest in a higher-quality 8-quart pot or go bigger with something more affordable? Are there trade-offs in flavor or efficiency?
For a small restaurant, an 8-quart high-quality stockpot is often a wise investment if you make smaller batches frequently and need durability and even heating. Cheaper, larger pots may hold more, but they can heat unevenly, potentially affecting flavor and leading to scorching. A quality pot is more efficient and manageable in tight spaces, but if you regularly need to prepare large volumes, balancing the two with a mid-sized, decent-quality pot could be a practical compromise.
I’m curious about the part where you say tall sides on the pot help minimize evaporation. Is there ever a situation where letting more liquid evaporate is actually a good thing for certain types of stocks or broths?
Letting more liquid evaporate can be beneficial when you want a more concentrated stock or broth, as evaporation intensifies the flavors by reducing the volume. This is common when making demi-glace or rich, gelatinous broths for sauces. If you want this effect, you can use a wider pot or simmer longer, but keep an eye on the liquid level to avoid over-reducing.
I saw you’ll cover troubleshooting common pitfalls, but when simmering stocks, I sometimes end up with cloudy results. Are there specific tools or techniques you recommend to achieve that clear, restaurant-quality broth at home?
Achieving a clear broth starts with a gentle simmer—avoid boiling, which stirs up particles and causes cloudiness. Skim any foam or impurities from the surface frequently using a fine-mesh skimmer or ladle. For even better clarity, strain your finished stock through cheesecloth or a coffee filter. Starting with cold water and blanching bones before simmering can also help produce a crystal-clear broth.
You suggest using a heavy-bottomed stainless steel pot for even heat, but are there any reliable alternatives if I’m on a budget and can’t get a stainless stockpot yet?
If a stainless steel stockpot isn’t in your budget, a heavy-bottomed enameled cast iron pot or even a sturdy aluminum pot can work well. Just avoid thin, lightweight pots, as they can cause uneven heating and scorching. If you use aluminum, be aware that acids (like tomatoes) can react with it, so stick to neutral stocks and broths. Always keep the heat moderate to prevent burning.
You mention that a heavy-bottomed stockpot helps prevent scorching during long simmers. If someone only has a lightweight pot, are there specific techniques or adjustments you’d recommend to minimize burning or uneven cooking?
If you’re working with a lightweight pot, try using a heat diffuser or a thick baking sheet under the pot to distribute heat more evenly. Keep the heat low and stir your stock occasionally, especially if you notice ingredients sticking. You could also add a bit more liquid than usual and check the bottom of the pot regularly to prevent scorching during long simmers.
With seasonality in mind, how would you recommend adapting the standard techniques for making stock or broth when certain vegetables or bones aren’t readily available, especially if I want to keep my soup menu dynamic throughout the year?
To keep your soups dynamic and seasonal, swap in fresh, in-season vegetables and herbs for those that are unavailable. For example, use spring greens and asparagus in place of root vegetables in spring, or try mushrooms and squash in the fall. If certain bones aren’t available, experiment with poultry, fish, or plant-based alternatives. Adjust simmering times as needed based on your ingredient choices to achieve optimal flavor.
You mention that stainless steel stockpots are ideal for home kitchens thanks to even heat and non-reactivity. Have you found any noticeable differences in flavor or technique when using enameled or aluminum pots instead? Would love to hear if you think the investment in stainless is really worth it.
Stainless steel stockpots do have an edge because they’re non-reactive and distribute heat evenly, so flavors stay pure and consistent. Enameled pots are also non-reactive and work well, but can chip over time. Aluminum heats quickly but may react with acidic ingredients, subtly affecting taste. If you make stocks and broths often, a stainless pot is worth it for reliability and clean flavors.
You mentioned stainless steel stockpots are best for preventing reactions with acidic ingredients, but is there any advantage to using alternatives like enameled cast iron or copper for stocks and broths? I’d love to understand if there are situations where those would be preferable.
Enameled cast iron stockpots are great for maintaining steady heat and preventing metal reactions, making them a good alternative if you already own one. However, they tend to be heavier and usually more expensive. Copper pots heat very quickly and evenly, but they require a lining (like tin or stainless steel) to prevent reactions and are high-maintenance. For most home cooks, stainless steel remains the most practical, but enameled cast iron can shine for slow, gentle simmering.