Introduction: The Rise of Sous Vide in Home Kitchens
In recent years, sous vide has emerged from the realm of Michelin-starred restaurants and entered the home kitchen, revolutionizing the way culinary enthusiasts approach cooking. French for “under vacuum,” sous vide is the technique of vacuum-sealing food in a bag and cooking it in a water bath at a precisely controlled temperature. This method ensures unmatched consistency, texture, and flavor—qualities once limited to professional chefs. As modern home cooks seek greater control and creativity in their meals, sous vide offers a blend of science, art, and convenience. But precision cooking is more than just gadgetry; it’s a thoughtful process that demands the right equipment, safety protocols, and culinary know-how. In this guide, we’ll explore how you can master sous vide at home, avoid common pitfalls, select the best tools for your needs, budget wisely, and unleash a new realm of culinary potential. Whether you’re a curious beginner or a seasoned foodie eager to elevate your repertoire, this comprehensive guide will equip you with everything you need to embrace sous vide in your own kitchen.
What is Sous Vide? Understanding the Fundamentals
The Science Behind Sous Vide
At its core, sous vide is about precision. Food is sealed in a food-safe plastic pouch—often vacuum-sealed but sometimes zipped—and placed in a water bath held at a specific temperature by an immersion circulator or water oven. Unlike traditional cooking, where heat can be uneven and difficult to control, the water bath ensures every part of the food is cooked evenly to the desired doneness, never exceeding the set temperature. This technique is especially prized for producing perfectly cooked steaks, tender vegetables, delicate eggs, and even desserts.
Why Sous Vide?
- Consistency: Achieve the same perfect results every time.
- Enhanced Flavor: Vacuum-sealing locks in natural juices, infusing flavors more deeply.
- Convenience: Minimal active cooking time and easy meal prep.
- Versatility: Works with meats, seafood, vegetables, eggs, and more.
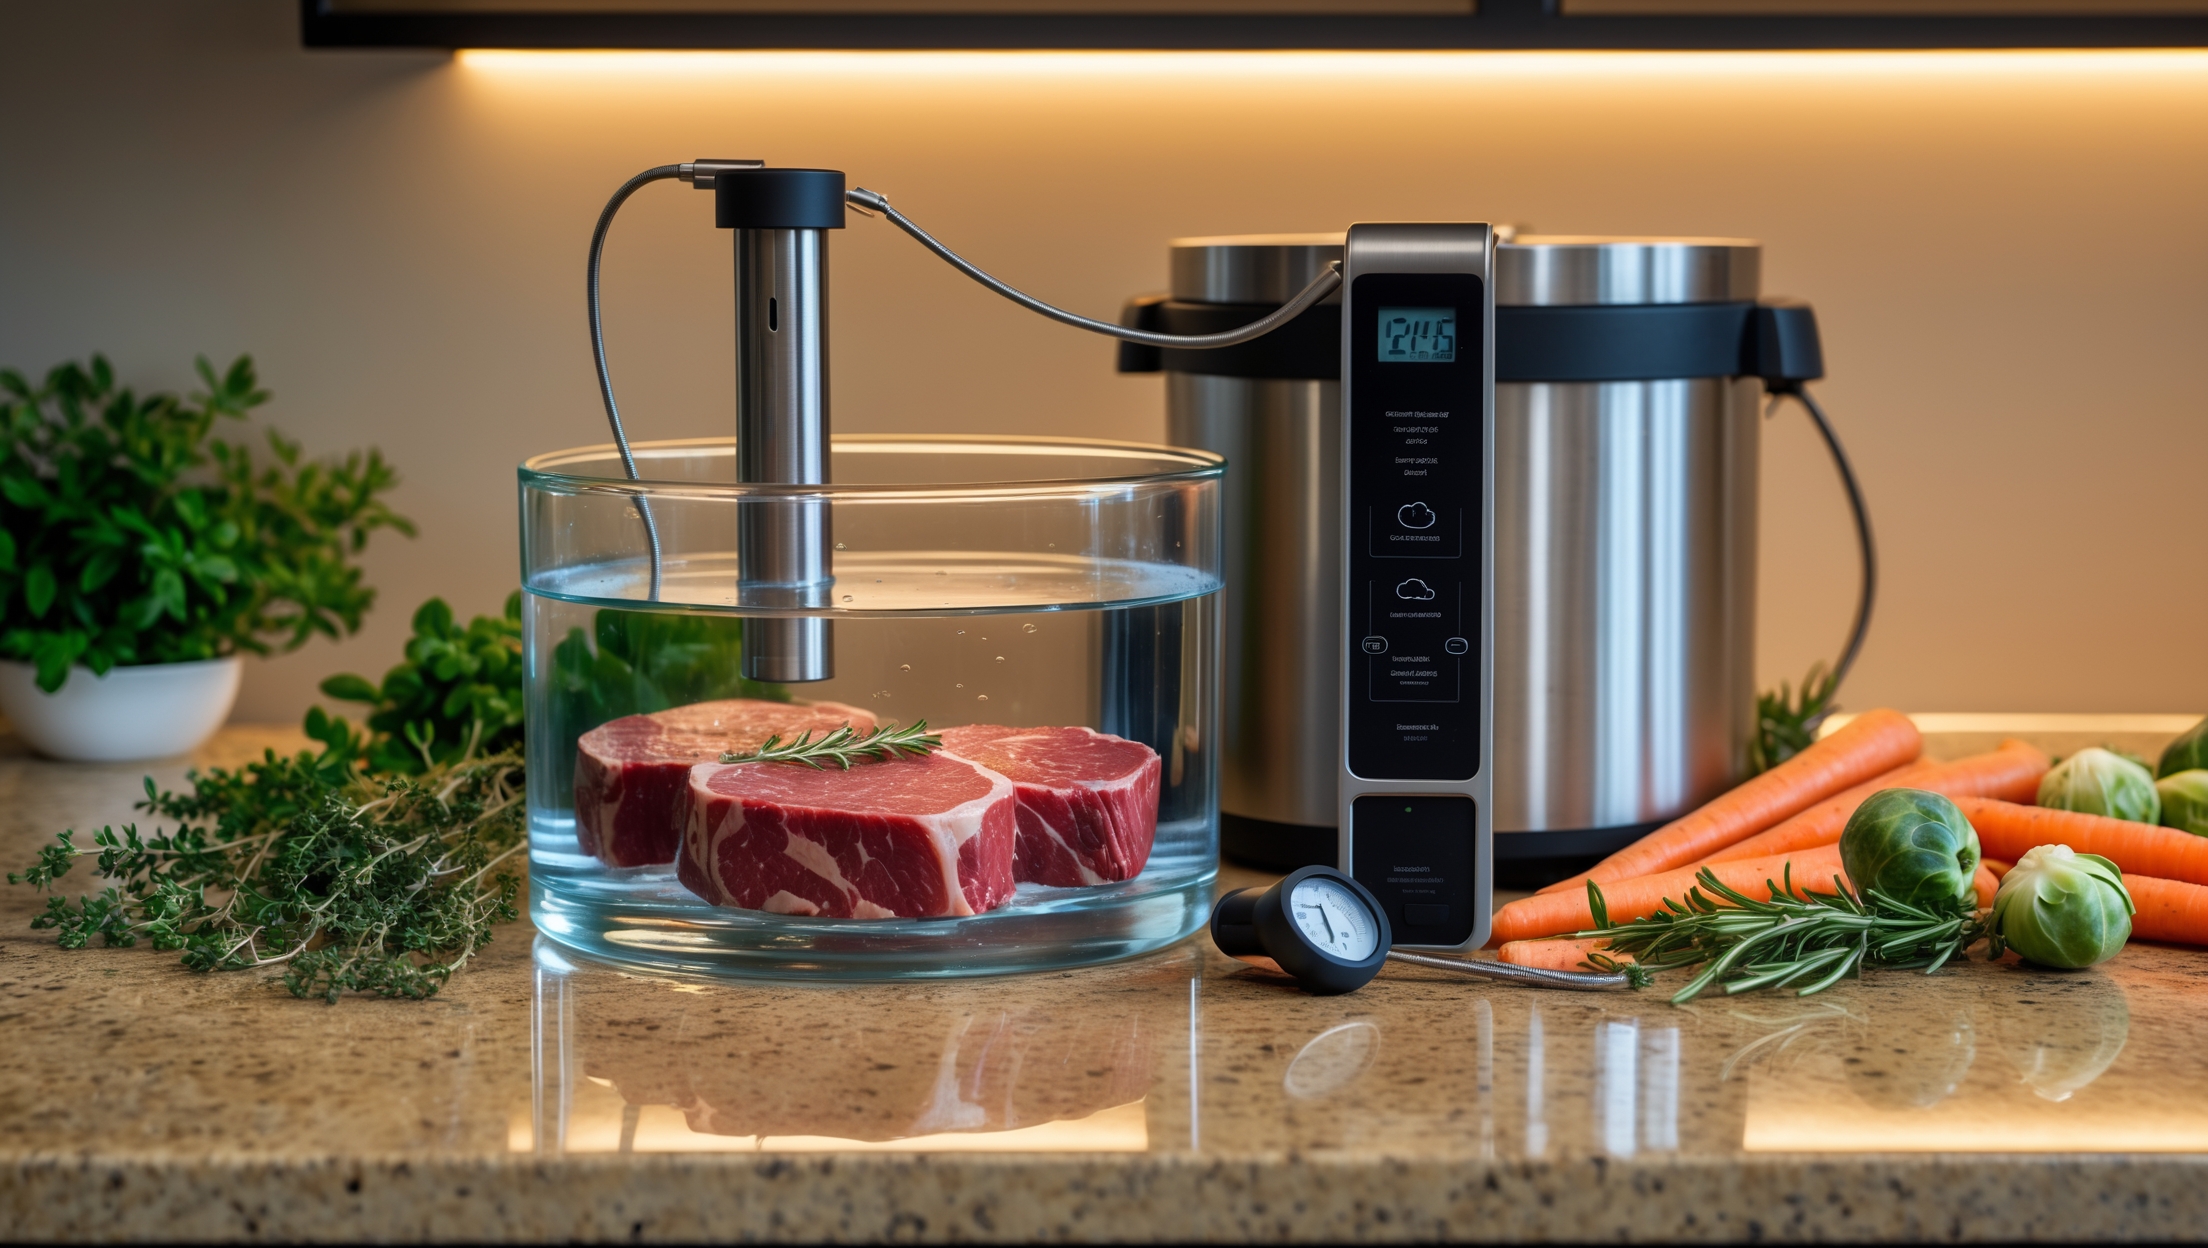
Essential Equipment: Building Your Sous Vide Setup
Immersion Circulators vs. Water Ovens
The heart of any sous vide setup is the device that heats and circulates the water. You’ll choose between two main types:
- Immersion Circulator: A wand-like device that clips to a container, heats, and circulates water. Popular for home use due to affordability and flexibility. Leading models: Anova, Joule, Instant Pot Accu Slim.
- Water Oven: An all-in-one unit (like the SousVide Supreme) with its own water tank. More expensive and bulkier, but offers set-it-and-forget-it simplicity and insulation.
Choosing a Water Container
Any large, heat-safe pot or container will work, but polycarbonate containers (like Cambro or Rubbermaid) are favored for their size and insulation. Consider a container with a fitted lid to minimize water evaporation during long cooks.
Vacuum Sealers and Alternatives
- Vacuum Sealer: Essential for meats and longer cooks. Entry-level models start around $40, while chamber vacuum sealers offer pro-level results for $300+.
- Zip-Top Bags: Suitable for most items, especially for beginners. Displacement method (slowly lowering the bag into water before sealing) removes air effectively.
Other Handy Tools
- Binder Clips: Secure bags to the side of the container, ensuring even submersion.
- Rack or Divider: Keeps multiple bags separated and ensures water flow.
- Digital Thermometer: Useful for double-checking water temperature or for post-sous vide searing.
- Blow Torch or Heavy Skillet: For finishing proteins with a perfect crust.
Budgeting for Your Sous Vide Kit
Building a sous vide setup doesn’t have to break the bank. A quality immersion circulator can be found for $80–$200. Budget $20–$40 for bags, $40+ for a basic vacuum sealer (optional), and $15–$30 for a suitable container. For less than $200, you can have a complete beginner-friendly kit. Higher-end enthusiasts might invest in chamber sealers, specialized containers, and premium accessories. Don’t forget to factor in the cost of quality ingredients—sous vide shines brightest with fresh, well-sourced foods.
Step-by-Step: Setting Up and Cooking Sous Vide
1. Preparing Ingredients
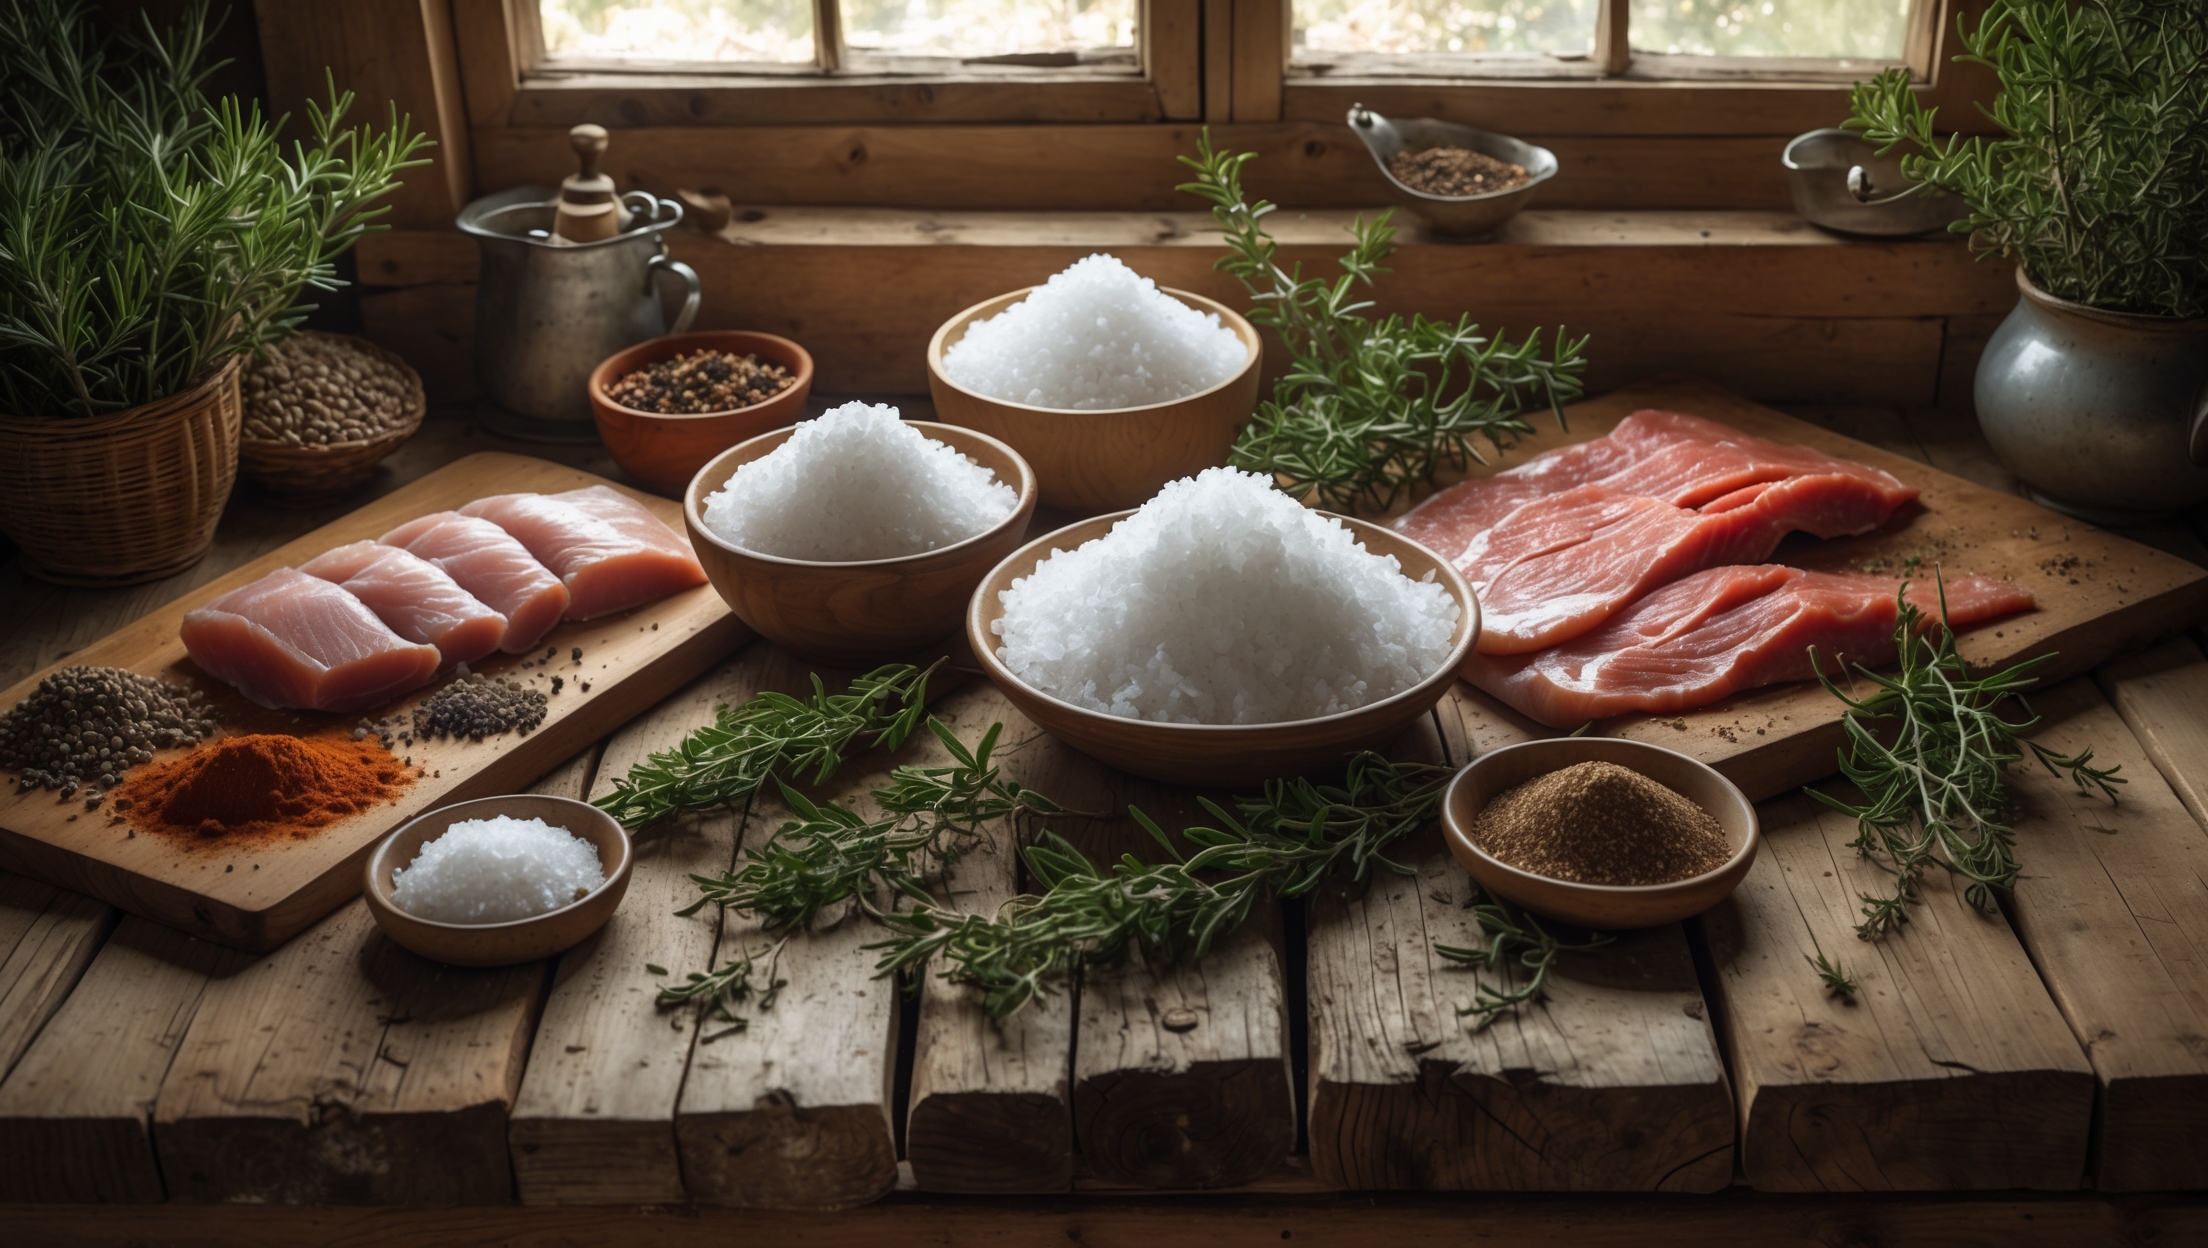
Start with high-quality, fresh proteins, vegetables, or even fruits. For meats, consider seasoning before sealing: salt, pepper, herbs, aromatics, or a touch of oil. For vegetables, a pinch of salt and a drizzle of olive oil is often enough.
2. Bagging and Sealing
- Vacuum Sealing: Place food in a vacuum bag, arrange it flat, and use your vacuum sealer. For liquids or marinades, freeze them first or double-seal to prevent messes.
- Zip-Top Bags: Use the water displacement method: slowly lower the bag into the water, letting pressure force air out, and seal just above the waterline.
3. Setting Up the Water Bath
- Fill your container with enough water to fully submerge your bags.
- Attach the immersion circulator and set your desired temperature.
- Allow the water to preheat—most models beep or alert you when ready.
4. Cooking Times and Temperatures
Precision is key. Follow recommended temperature and time guides—here are a few reliable benchmarks:
- Steak (medium-rare): 129°F (54°C) for 1–4 hours
- Chicken breast: 146°F (63°C) for 1.5–4 hours
- Eggs (soft-cooked): 145°F (63°C) for 45–60 minutes
- Carrots: 183°F (84°C) for 1 hour
Longer times can tenderize tougher cuts, but avoid overcooking delicate items. Use racks or weights to keep bags submerged and ensure even heating.
5. Finishing and Serving
After sous vide cooking, proteins often need a quick sear for color and texture. Pat dry, then sear in a ripping-hot skillet or with a kitchen torch for 30–60 seconds per side. Serve immediately, or chill rapidly in an ice bath for later use (meal prep magic!).
Safety First: Essential Sous Vide Safety Practices
Food Safety Guidelines
- Temperature Control: Always cook above 130°F (54°C) for meats to prevent bacterial growth. Don’t leave food at room temperature before or after cooking.
- Chilling and Storing: For batch cooking, chill cooked food rapidly in an ice bath before refrigerating. Store vacuum-sealed sous vide items in the fridge for up to a week or freeze for longer storage.
- Sealing Safety: Use food-grade bags free from BPA and phthalates. Avoid overfilling to ensure proper sealing.
- Water Level: Maintain water above the minimum mark to avoid dry-running your circulator. Cover the container with a lid or plastic wrap to reduce evaporation during long cooks.
Common Safety Mistakes to Avoid
- Cooking at too low a temperature (below 130°F for meats).
- Not chilling food rapidly after cooking if storing for later.
- Using non-food-safe bags or containers.
- Leaving the circulator running unattended for excessively long periods without checking water levels.
Cost Breakdown: Is Sous Vide Worth the Investment?
Initial Setup vs. Ongoing Costs
- Initial Equipment: $100–$250 for a complete, quality home setup.
- Bags: $10–$30 for a box of vacuum or freezer bags (lasts for many cooks).
- Electricity: Most circulators are energy-efficient, drawing similar power to a slow cooker.
Ongoing costs are relatively low—bags are the main recurring expense. For advanced users, a chamber vacuum sealer or specialized containers are optional upgrades.
Batch Cooking and Meal Prep Savings
- Buy proteins in bulk, portion, and cook sous vide for the week—reducing waste and food costs.
- Extend shelf life by vacuum sealing and chilling or freezing pre-cooked meals.
- Save on restaurant-quality meals by recreating them at home.
Beginner Mistakes to Avoid with Sous Vide Cooking
- Overcrowding Bags: Don’t cram too much food into one bag—water must circulate on all sides.
- Poor Seals: Double-check seals to avoid water ingress and flavor loss.
- Skipping the Sear: A finishing sear adds flavor and texture; don’t skip it for meats.
- Wrong Temperatures: Follow trusted recipes and avoid guesswork—precision is key.
- Ignoring Water Levels: Evaporation can expose bags and damage your circulator during long cooks.
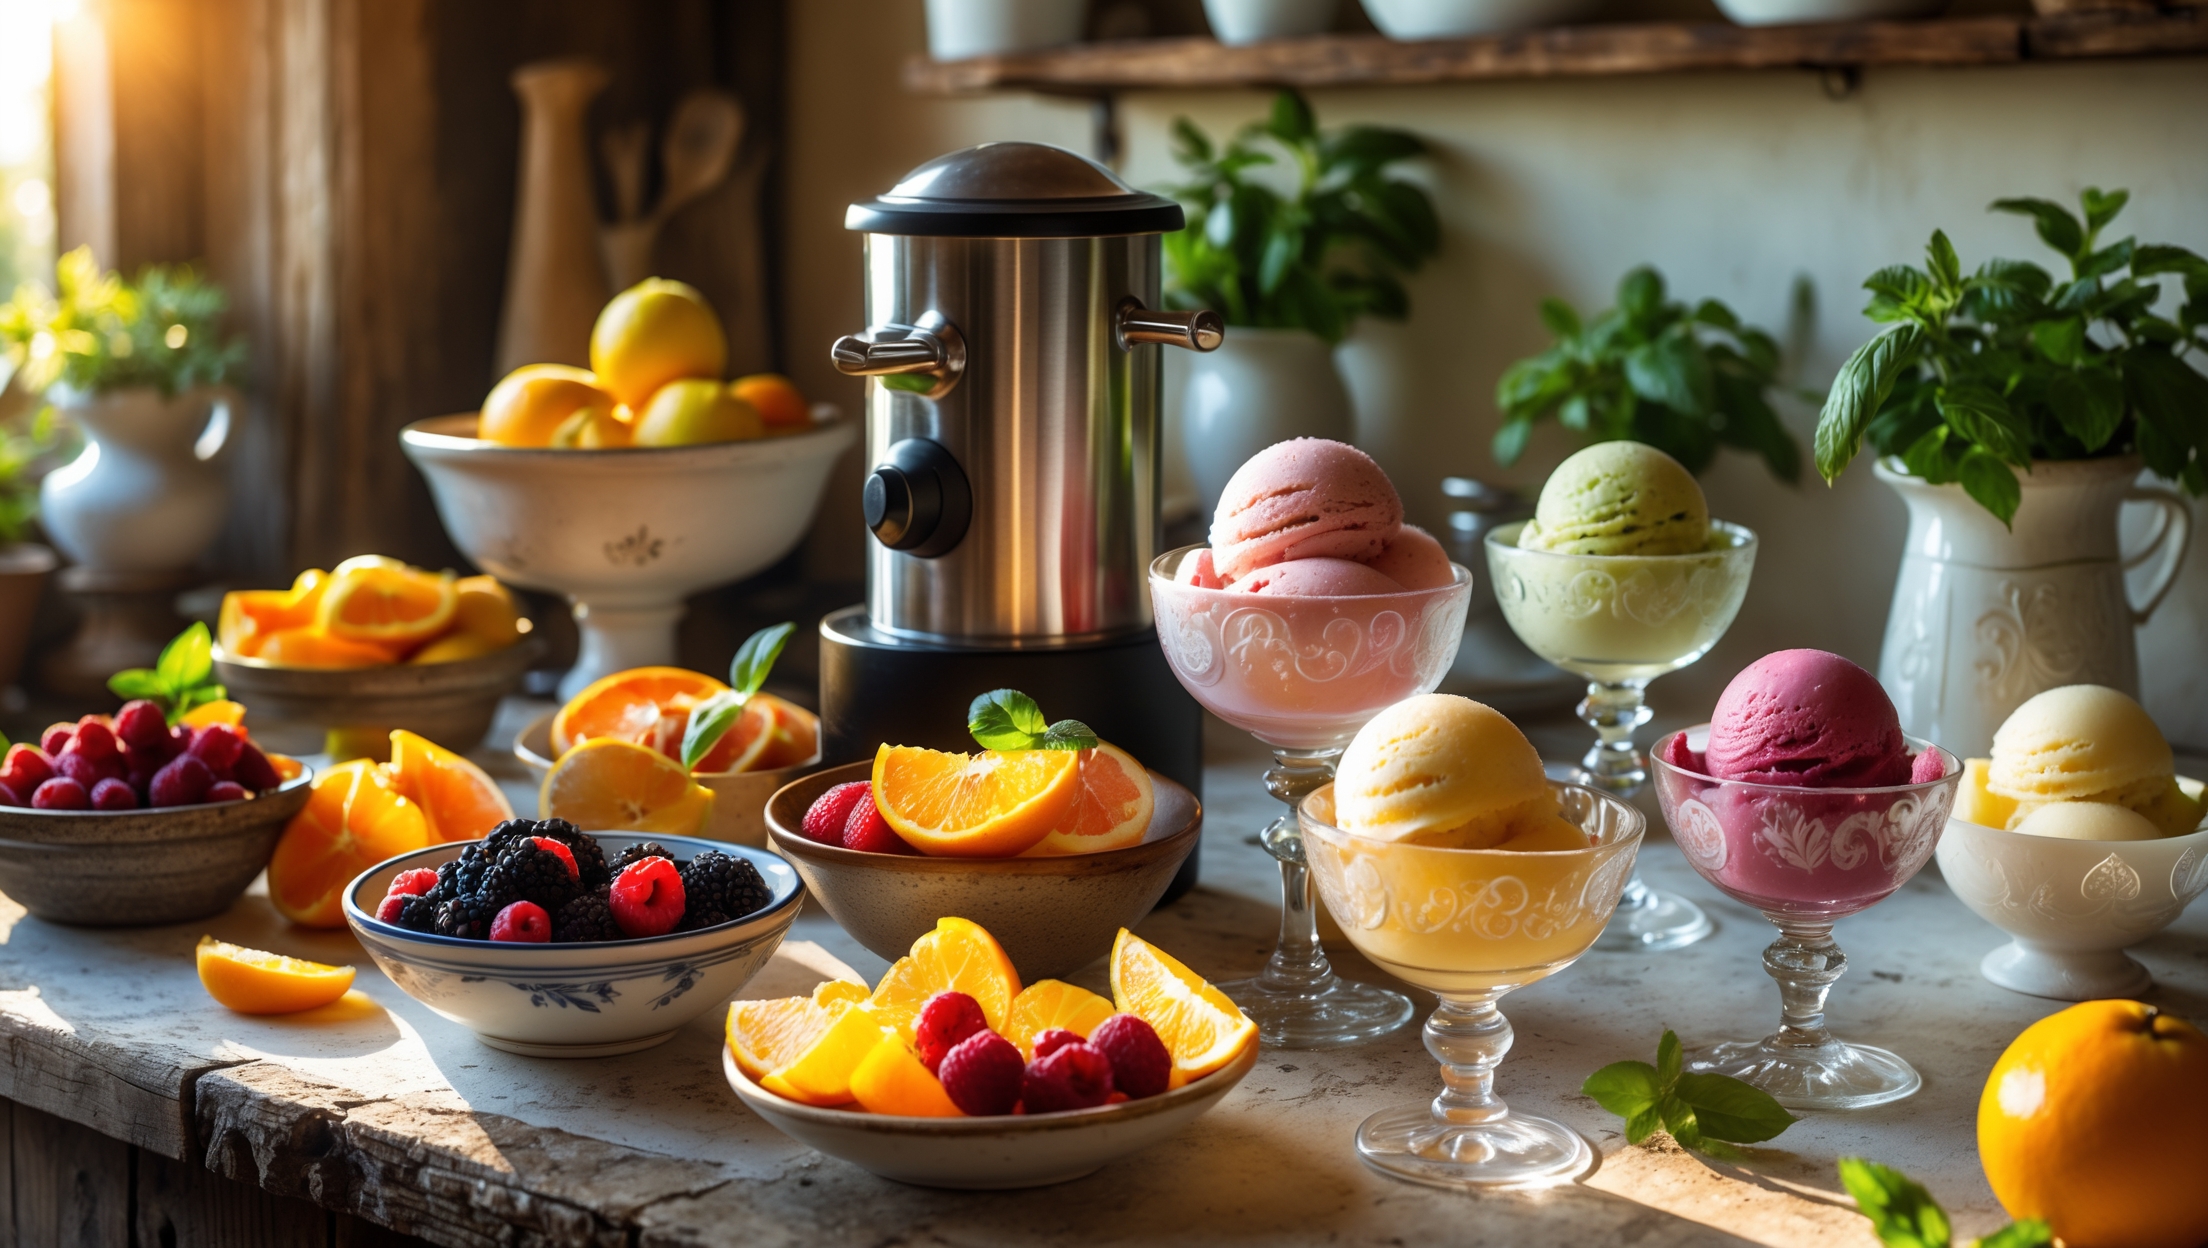
Trending Sous Vide Recipes and Inspirations
Protein Perfection
- Duck Breast: Sous vide eliminates guesswork and renders sublime fat. 135°F (57°C) for 2 hours, then sear skin-side down.
- Salmon: Achieve melt-in-your-mouth texture at 122°F (50°C) for 40–60 minutes.
- Pork Chops: No more dry chops—140°F (60°C) for 1–4 hours, then finish in a cast-iron pan.
Vegetarian and Vegan Delights
- Carrots with Thyme: Intensify sweetness and flavor, 183°F (84°C) for 1 hour.
- Beet Salad: Sous vide beets retain vibrant color and earthy flavor, 185°F (85°C) for 2 hours.
- Egg Bites: Blend eggs, cheese, and veggies, then cook in small jars at 172°F (78°C) for 1 hour—perfect for breakfast meal prep.
Desserts and Infusions
- Crème Brûlée: Silky-smooth every time—176°F (80°C) for 1 hour in small jars.
- Fruit Compotes: Gently cook berries or stone fruit at 185°F (85°C) for 30–60 minutes.
- Infused Spirits: Rapidly infuse vodka or gin with botanicals at 135°F (57°C) for 2 hours.
Maintenance and Care: Keeping Your Gear in Top Shape
Cleaning Your Immersion Circulator
- Unplug and allow to cool before cleaning.
- Wipe down the exterior and clean the heating coil and pump with a soft brush.
- Descale periodically with a 1:1 vinegar-water solution if you live in a hard water area.
Storage Tips
- Store circulators upright to avoid damaging the heating element.
- Keep vacuum sealers clean and dry; wipe down after each use and replace sealing strips as needed.
- Organize bags and accessories in a dedicated drawer or container for easy access.
Advanced Tips: Taking Your Sous Vide to the Next Level
Multi-Stage Cooking
Experiment with multi-stage cooking: sous vide a protein, chill, then finish in a smoker, oven, or grill for an extra layer of flavor. Try reverse-searing thick steaks or infusing marinades before sealing.
Flavor Layering
Use compound butters, infused oils, or aromatic sachets in the bag to build complex flavor profiles. For vegetables, add a splash of citrus or a pinch of spices before sealing.
Batch Cooking and Entertaining
Prepare multiple proteins or sides simultaneously using dividers. Sous vide is ideal for stress-free dinner parties—everything is cooked to perfection and ready to finish when guests arrive.
Conclusion: Elevating Your Culinary Culture with Sous Vide
Sous vide isn’t just another cooking trend—it’s a transformative method that empowers home cooks to achieve professional-level results with consistency and creativity. By demystifying the process and equipping yourself with the right tools, safety knowledge, and a spirit of experimentation, you’ll unlock new possibilities in your kitchen. From budget-friendly weeknight dinners to gourmet entertaining, sous vide delivers elevated taste, texture, and convenience. Whether you’re a beginner or a seasoned enthusiast, remember that the journey of culinary mastery is built on curiosity, precision, and care for ingredients. Start simple, learn from each meal, and gradually expand your repertoire. With sous vide, you’re not just cooking—you’re crafting memorable experiences and shaping your own stories of taste and craft. Step confidently into the world of precision cooking, and let every bite tell a story of culinary culture refined by science, passion, and a dash of adventure.

When it comes to selecting the best equipment, is there a major difference between using an immersion circulator versus a water oven for sous vide cooking at home? I’m deciding what to buy for my kitchen.
An immersion circulator is generally more compact, less expensive, and can be used with a variety of pots, making it versatile for most home kitchens. A water oven is bulkier and usually pricier, but it maintains temperature very evenly since it’s a self-contained unit. For most home cooks, immersion circulators offer enough precision and flexibility, unless you plan to cook large quantities regularly.
I’ve mostly used traditional stovetops for my business, so I’m curious—when you talk about sous vide producing better consistency and texture, does that apply equally to vegetables and meats? Are there foods that don’t work well with sous vide or might disappoint customers?
Sous vide is excellent for both meats and vegetables, offering precise temperature control that leads to uniform doneness and enhanced texture. Meats become especially tender, and vegetables retain vivid colors and flavor. However, some foods—like pasta, rice, or very delicate fish—may not yield great results and can be disappointing compared to traditional methods. Also, foods needing a crispy crust will require additional finishing after sous vide.
You mention that sous vide allows for more control and consistency, but I’m curious—how do you handle food safety when cooking at lower temperatures for long periods of time? Are there specific guidelines home cooks should follow to avoid any health risks?
Food safety is especially important with sous vide cooking since it uses lower temperatures. To minimize health risks, always cook meat above 130°F (54°C) and keep it at that temperature long enough to pasteurize it. Use a reliable thermometer and never leave food in the danger zone (40-130°F or 4-54°C) for too long. Vacuum seal food properly and chill it quickly if you’re not eating it right away. Following these steps will help ensure safe and delicious results.
I’m new to sous vide and a bit unsure about which immersion circulator to choose for a small kitchen. Are there any features I should prioritize for someone just starting out who doesn’t want to spend a lot up front?
For a small kitchen and a beginner’s budget, look for a compact immersion circulator with straightforward controls and reliable temperature accuracy. A model with a simple digital interface, adjustable clamp, and a lower wattage (around 800–1000W) should be enough for most home cooking needs. Make sure it’s easy to clean and fits your existing pots. You don’t need Bluetooth or Wi-Fi features to get started, so you can skip those to save money.
Budget is highlighted as a consideration when choosing sous vide tools. Do you have any recommendations for affordable vacuum sealers or alternatives that still provide consistent results without sacrificing too much on quality?
If you’re looking for an affordable vacuum sealer, several compact models under $50 work well for home sous vide. Brands like NutriChef and GERYON are popular for reliable sealing at a lower cost. Alternatively, you can use the water displacement method with high-quality zip-top freezer bags—this technique removes most air and delivers good results for many recipes without needing a sealer.
I noticed the guide mentions that sous vide is great for cooking things like steaks, vegetables, and even desserts. How long does it typically take to cook different foods with this method compared to traditional cooking methods?
Sous vide cooking usually takes longer than traditional methods because food is cooked gently at precise, lower temperatures. For example, steaks may take 1 to 3 hours sous vide compared to about 10–15 minutes by pan or grill. Vegetables can take 45 minutes to 2 hours, whereas boiling or steaming is much faster. Desserts like custards might take 1 hour instead of 40 minutes. The benefit is much more consistent and controlled results.
If I only have zip-top bags instead of a vacuum sealer, will I still get the same consistency and flavor benefits with sous vide, or is investing in a vacuum sealer worth it for better results?
You can absolutely use zip-top bags for sous vide and still achieve tender, flavorful results. Just use the water displacement method to push out as much air as possible before sealing. While a vacuum sealer makes things a bit more consistent and is useful for long or high-temperature cooks, for most home recipes, zip-top bags work very well and won’t hold you back from enjoying sous vide cooking.
You mentioned that sous vide offers unmatched consistency and flavor, but I’m wondering how strict the temperature control needs to be. Is there much room for error if I’m a beginner, or does a small change in temperature make a big difference with things like chicken or steak?
Sous vide is quite forgiving, especially for beginners. While precise temperature control is one of its main advantages, a change of 1 or 2 degrees Fahrenheit typically won’t ruin chicken or steak. However, larger temperature shifts can affect texture—chicken might end up less juicy, and steak could be less tender. Stick close to the recommended temperatures, but don’t stress over tiny fluctuations.
I’m new to sous vide and noticed there are different types of equipment like immersion circulators and water ovens. For someone on a smaller budget, which type would you recommend starting with, and are there any essential features I shouldn’t compromise on?
For beginners on a budget, immersion circulators are usually the best choice. They’re compact, affordable, and work with any large pot you already have. Make sure to choose a model with reliable temperature control, easy-to-read displays, and decent water circulation. A timer feature is helpful but not essential. You can always upgrade later as you get more comfortable with sous vide cooking.
You mentioned budget-wise choices for sous vide equipment. Are there any reliable immersion circulators or vacuum sealers you would recommend for someone who doesn’t want to spend a lot but still wants good results?
If you’re watching your budget but still want reliable sous vide results, several immersion circulators are worth considering. The Anova Nano and the Instant Pot Accu Slim often come up as affordable, dependable choices. For vacuum sealers, the NutriChef and Geryon models are popular for their balance of cost and performance. Both options should give you consistent results without breaking the bank.
I’m interested in trying sous vide but worried about the cost of new gadgets and accessories. Are there any affordable starter kits or budget-friendly options for beginners who want to see if sous vide is right for them before spending a lot?
You don’t need to spend a lot to get started with sous vide. There are basic immersion circulators available that are both reliable and budget-friendly. Many beginners use a regular pot for water and simple resealable freezer bags instead of pricier vacuum sealers. Look for starter kits or entry-level devices, which often go on sale, and see if a friend has equipment you can borrow to try before buying.
You mention that sous vide requires the right equipment and that some people use zippable bags instead of vacuum-sealed ones. Are there any significant differences in safety or results between these two types of bags, or is it more about convenience?
Vacuum-sealed bags are a bit more reliable for sous vide, as they remove more air, which ensures even cooking and reduces the risk of floating. Zippable freezer bags can work well too, especially for short cook times, but make sure to use high-quality, food-safe bags. Safety-wise, both options are generally safe if they’re BPA-free and intended for cooking, but vacuum sealing may better prevent leaks or water intrusion.
The article notes that sous vide excels at maintaining consistency and enhancing flavor, but I wonder if there are particular types of foods or recipes where sous vide is less effective or not recommended?
Sous vide is fantastic for many foods, but it can be less effective for items that need a crisp or crunchy texture, like fried chicken or roasted vegetables. Foods that rely on evaporation or caramelization may not turn out as intended using sous vide alone. Also, some delicate fish can become mushy if cooked too long. In these cases, finishing with traditional methods like searing, roasting, or frying is often recommended.
You talked about budgeting wisely when getting started with sous vide. If I’m just starting out and don’t want to invest a lot right away, which equipment or features should I prioritize to still get good results at home?
To get started with sous vide on a budget, focus on a reliable immersion circulator as your main investment. You can use a regular pot or a heat-safe container for water and resealable freezer bags for food instead of expensive vacuum sealers or specialized containers. Prioritizing accurate temperature control in the circulator will help you achieve great results right from the start.
I’m new to sous vide and a bit overwhelmed by all the equipment options mentioned. Is it okay to start with just a basic immersion circulator and zip-top bags, or do I really need a vacuum sealer right away for good results?
You can absolutely start with a basic immersion circulator and zip-top bags. Many home cooks get great results this way, especially for most meats and vegetables. Just try to remove as much air as possible from the bags before sealing. A vacuum sealer is a nice upgrade but not essential when you’re just starting out.
The guide talks about the importance of safety protocols when using sous vide. Could you explain what the main safety concerns are, especially when it comes to vacuum-sealing and cooking meat? I want to make sure I avoid any health risks.
When using sous vide, the main safety concerns include preventing bacterial growth and ensuring food is cooked to safe temperatures. Always use food-safe vacuum bags and make sure your hands, work surfaces, and equipment are clean to avoid contamination. For meat, cook at recommended temperatures and times to kill harmful bacteria—most meats should reach at least 130°F (54°C) for safety. Never leave food at room temperature before or after cooking. Once cooked, either serve immediately or chill quickly in an ice bath and refrigerate.
You mention that sous vide is especially good for steaks, vegetables, eggs, and even desserts. I’d love to know if there are any foods or types of dishes where sous vide isn’t recommended or doesn’t deliver a noticeable benefit compared to conventional methods.
Sous vide is fantastic for many foods, but it’s not ideal for everything. Foods that benefit from high-heat cooking, like crispy-skinned chicken or roasted vegetables, won’t get that crisp texture in a water bath. Also, delicate leafy greens or most pasta don’t do well sous vide. For dishes where texture from browning or crisping is essential, traditional methods are usually better.
I noticed the article mentions budget considerations for sous vide equipment. As a parent trying to cook for a family but not wanting to overspend, are there affordable circulator models you would recommend for beginners, or is it worth investing in a higher-end one from the start?
For family cooking on a budget, there are several reliable entry-level sous vide circulators from brands like Anova and Instant Pot, which often cost less than higher-end models but still offer great precision and results. Starting with one of these is usually sufficient for home use, and you can always upgrade later if you find yourself using sous vide frequently or need advanced features.
When starting out with sous vide at home, how much should I realistically budget for essential equipment like a reliable vacuum sealer and immersion circulator? Are there affordable starter options that still deliver precise results?
You can get started with sous vide for around $100 to $200. Reliable immersion circulators often start at about $70 to $120, while basic vacuum sealers can be found from $30 to $60. There are affordable brands that still offer good temperature control and consistent sealing, so you don’t have to invest in top-tier models right away. Many beginners also use sturdy zip-top bags with the water displacement method if you want to save even more.
If someone is starting out on a tight budget, are there any affordable immersion circulators or DIY alternatives that actually work well? And do you have any tips for keeping ongoing costs down, like reusing bags or using different containers for the water bath?
Affordable immersion circulators are available from brands like Anova, Inkbird, and Instant Pot, often going on sale for $60–$100. For a DIY option, some people use a digital thermometer and a slow cooker to maintain temperature, though it’s less precise. To keep costs down, you can reuse high-quality sous vide bags after washing them thoroughly and use large stock pots or even food-safe plastic containers instead of buying specialty water baths.
For someone who has always cooked steaks using a traditional pan or grill, how steep is the learning curve when transitioning to sous vide for meats? Are there any common mistakes that first-timers should watch out for to avoid over- or undercooking?
Transitioning from pan or grill to sous vide is actually quite manageable, since the equipment does much of the temperature control for you. Many find the process straightforward after an initial try or two. Common first-timer mistakes include not fully sealing the bag (which can let water in), setting the wrong temperature, or not finishing with a proper sear for flavor and texture. Double-check your settings, seal bags carefully, and always sear briefly after cooking for best results.
You talked about the importance of safety protocols with sous vide. Are there specific food safety risks unique to this method that I should be aware of, particularly when cooking meats for longer periods?
Sous vide cooking involves holding food at lower temperatures for extended periods, which can allow harmful bacteria to multiply if not done correctly. The main risks include undercooking and not reaching a high enough temperature to kill pathogens like Salmonella or Listeria. To minimize risks, always vacuum-seal correctly, keep water temperatures above 130°F (54°C) for meats, and chill food rapidly after cooking if you’re not eating it right away.
After cooking something like a steak sous vide, is it necessary to sear it afterward for texture and flavor, and if so, what’s the best method to do that without losing the benefits of precision cooking?
Searing your steak after sous vide is highly recommended because it adds that appealing crust and enhances flavor through the Maillard reaction. The best approach is to pat the steak dry after sous vide, then quickly sear it in a very hot skillet with a bit of oil for 30-60 seconds per side. This way, you get that perfect finish without overcooking the interior.
You mention budget considerations when selecting sous vide tools. What are the key features to prioritize for someone just starting out who doesn’t want to invest too much upfront, and are there any affordable brands you trust?
When starting out on a budget, look for a sous vide circulator that offers accurate temperature control, easy-to-use controls, and reliable safety features. A basic immersion circulator, rather than a full kit, can save you money. Brands like Anova and Instant Pot often offer entry-level models that are both reliable and affordable. Pairing the circulator with a standard pot and resealable freezer bags is a great way to keep costs low.
For someone on a tight budget trying to get into sous vide, what are the absolute essentials to start with, and where is it okay to save money versus splurge according to your guide?
To get started with sous vide on a budget, all you really need is an immersion circulator and a large pot you probably already own. According to the guide, it’s fine to save money by using heavy-duty zip-top bags for sealing food instead of a vacuum sealer at first. Splurge only on a reliable circulator; you don’t need a fancy container or expensive accessories right away. Start simple and upgrade as you go.
You mention that sous vide offers enhanced flavor by locking in natural juices. Does this technique work equally well with budget cuts of meat, or would I need to invest in higher-quality ingredients to get the best results?
Sous vide actually works wonders with budget cuts of meat. The gentle, precise cooking allows tougher, less expensive cuts to become tender and juicy, often bringing out flavors you might miss with traditional methods. You don’t need to invest in premium ingredients—just season well and let the sous vide process do its magic.
I’m interested in trying sous vide but not sure about the initial investment. Can you give some advice on how to budget wisely for the basic equipment without sacrificing quality, or are there any essential features to look for in a first-time setup?
To start sous vide cooking on a budget, focus on getting a reliable immersion circulator, which is the core device. Look for models with accurate temperature control, good customer reviews, and a timer function. A basic insulated container or even a large pot will work as a water bath. For sealing food, budget-friendly zip-top freezer bags can substitute for a vacuum sealer at first. This setup keeps costs down while ensuring you have quality essentials for great results.
The article mentions the importance of safety protocols when cooking sous vide. Could you elaborate on what specific food safety steps small food businesses should follow to avoid issues like bacteria growth when preparing items in bulk?
When preparing sous vide items in bulk, it’s essential to keep food out of the temperature danger zone (40°F–140°F) to prevent bacterial growth. Use vacuum-sealed bags, ensure accurate water bath temperatures, and always chill cooked items rapidly in an ice bath before refrigeration. Clearly label and date food, and avoid storing items for longer than recommended guidelines. Regularly sanitize equipment and keep detailed logs of both cooking and storage times to maintain consistent safety standards.
How do you handle meal planning with sous vide, especially during busy weeks? Can you prep several meals ahead using this technique, and if so, what’s the best way to safely store and reheat them for family dinners?
Sous vide is perfect for meal planning during busy weeks. You can prep and cook several proteins—like chicken, steak, or fish—in advance, then chill them in their sealed bags in the fridge for up to a few days. When you’re ready to eat, simply reheat the bags in the sous vide water bath at the original cooking temperature for 30-45 minutes. This keeps meals safe and perfectly cooked without drying them out.
You talk about unleashing new culinary potential at home with sous vide. Once I get comfortable with basic recipes like steak and eggs, what types of dishes or ingredients would you suggest for experimenting with more advanced sous vide techniques?
Once you have the basics down, you can branch out to more advanced dishes like sous vide duck breast, pork belly, or leg of lamb for tender, evenly cooked results. Seafood such as salmon, shrimp, or scallops also benefit from precise temperature control. You might also try infused spirits, poached fruit, or custards—sous vide allows for creative flavor infusions and delicate textures hard to achieve otherwise.
You mention that sous vide requires the right equipment and safety protocols. Are there any specific safety tips I should be aware of for home use, especially regarding food-safe plastic bags and preventing bacteria growth?
For home sous vide cooking, always use food-grade, BPA-free plastic bags designed for cooking, as regular bags may leach chemicals when heated. Make sure food is vacuum-sealed tightly to keep out air, which helps stop bacteria growth. Cook foods to the recommended temperatures and times to ensure safety, and chill or serve food right away after cooking. Clean your equipment thoroughly after each use to avoid cross-contamination.
You mention that sous vide cooking demands the right equipment and safety protocols. Are there any budget-friendly immersion circulators or vacuum sealers that still perform well for a beginner, or is it worth investing in higher-end models from the start?
You can definitely start with budget-friendly immersion circulators and vacuum sealers, as several entry-level brands perform well for home use. Many beginners find models under $100 reliable for everyday sous vide cooking. You don’t need to invest in high-end gear right away—focus on reputable brands with good reviews. As you cook more often, you can decide if upgrading is worthwhile for your needs.
After reading about the enhanced flavor you get from vacuum sealing, I’m wondering if regular zip-top bags work just as well as vacuum-sealed ones, or would that impact the final taste and texture for things like steak or veggies?
Vacuum-sealed bags are best for sous vide because they remove air completely, which helps food cook evenly and retain more flavor and moisture. Zip-top bags can work if you use the water displacement method to push out as much air as possible, but there might still be small air pockets. This can sometimes affect texture, especially with steaks or dense veggies, but for many home cooks, zip-top bags are an acceptable substitute.
I’m curious about the vacuum-sealing step. Is there a significant difference in results between using a zip-top bag with the water displacement method versus a dedicated vacuum sealer, especially when preparing meats or vegetables in larger batches?
When cooking small portions, the water displacement method with a zip-top bag works well and can deliver good results. However, for larger batches, especially with meats or dense vegetables, a vacuum sealer is more effective. It removes more air, ensuring even cooking and better texture. Vacuum-sealed bags are also more durable, reducing the risk of leaks or floating bags during long cooks.
I like the idea of precise temperature control for steaks, but how long does the whole sous vide process actually take compared to traditional pan-searing or grilling? Does it make weeknight cooking slower or faster overall?
Sous vide steaks usually take 1 to 2 hours to cook, depending on thickness, since the process involves prolonged gentle heating at a precise temperature. This is longer than pan-searing or grilling, which typically takes 10 to 20 minutes. While sous vide does require more time overall, most of it is hands-off, so you can prep other things or relax during cooking. For weeknights, it’s slower, but planning ahead can make it convenient.
The article highlights safety protocols for sous vide cooking—could you elaborate on what specific food safety steps home cooks should take, particularly regarding cooking meats at lower temperatures for longer periods?
When cooking meats sous vide at lower temperatures for longer times, it’s essential to vacuum seal food to prevent contamination, keep the water bath temperature above 130°F (54°C) to inhibit bacterial growth, and avoid leaving food in the temperature ‘danger zone’ (40–130°F) for more than two hours. Also, after cooking, serve food promptly or cool it rapidly in an ice bath before refrigerating.
You mentioned that sous vide is all about precision and control. Are there any foods or recipes where sous vide doesn’t work as well compared to traditional cooking methods?
Sous vide is great for many foods but isn’t ideal for everything. Foods that benefit from high heat and browning, like stir-fries or crispy-skinned poultry, don’t get the same results with sous vide alone. Also, some vegetables that need to be roasted or caramelized may not develop the same flavors. For these dishes, traditional cooking methods are often better.
When it comes to the safety protocols the guide talks about, what are some common pitfalls to watch out for, especially if I plan to prep meals in advance and store them for my café?
Some common pitfalls include not sealing bags properly, which can allow bacteria to enter, and holding food at unsafe temperatures before or after sous vide cooking. Always chill cooked food quickly—use an ice bath before refrigeration—and keep it below 40°F if storing. When reheating, ensure food reaches a safe temperature to prevent bacterial growth. Consistent, accurate temperature control is key for both quality and safety.
When starting out with sous vide, how important is the specific brand or price point of an immersion circulator? Am I missing out on essential features if I go for a budget option, or will even entry-level devices give me reliable precision?
Entry-level immersion circulators can provide reliable precision and are a great way to get started with sous vide cooking. Most budget models maintain accurate temperatures within a small range, which is key for sous vide. Higher-end devices might offer extra features like Wi-Fi, app controls, or faster water heating, but these aren’t essential for beginners. Focus on a model with good reviews for accuracy and durability, and you’ll be set to enjoy great results at home.
You touched on the importance of budgeting wisely for sous vide equipment. For a beginner who wants quality results without spending too much, what are the essential tools to start with, and are there any reliable lower-cost options you recommend?
To get started with sous vide on a budget, the main essentials are an immersion circulator and a reliable container, such as a large pot you might already own. For sealing food, reusable silicone bags or sturdy zip-top freezer bags work well and are affordable alternatives to vacuum sealers. Popular entry-level immersion circulators from brands like Anova or Inkbird often go on sale and deliver good performance without a steep price tag.
You mentioned that sous vide can help avoid common pitfalls in precision cooking. Could you explain what some of those pitfalls are for beginners, especially when it comes to making sure food is cooked safely?
Sous vide helps beginners avoid problems like overcooking, uneven doneness, and dry texture by keeping the water at a precise temperature. For safe cooking, one common pitfall is not using the right time and temperature for pasteurization—following recommended guidelines ensures harmful bacteria are eliminated. Also, food should be properly bagged and submerged to cook evenly, and equipment should always be clean to prevent contamination.
I see you mention that sous vide demands the right equipment and a wise budget. For a small restaurant owner trying to introduce sous vide cooking, do you have recommendations on what basic gear is essential without overspending?
For a small restaurant, you can start with a reliable immersion circulator, such as Anova or Joule, which are cost-effective and accurate. Pair it with a sturdy food-grade container for water baths and high-quality vacuum seal bags. A basic vacuum sealer should suffice for most needs. These essentials will let you introduce sous vide cooking efficiently without a big upfront investment.
I noticed you highlighted the need to budget wisely when choosing sous vide equipment. For a small business with limited funds, are there particular brands or features you’d recommend prioritizing to get reliable results without overspending?
For a small business on a budget, look for sous vide machines with accurate temperature control and decent water circulation—these features matter most for consistent results. Brands like Anova and Inkbird offer reliable immersion circulators at reasonable prices. Skip advanced Wi-Fi features if you don’t need them, and focus on durability and ease of cleaning. Pairing a basic circulator with sturdy polycarbonate containers can help you save while still maintaining quality.
I’m curious about the different types of vacuum sealers and bags you’d recommend for someone just starting out. Are there certain brands or features that are safer or more reliable for home sous vide cooking, especially when budgeting is a concern?
For beginners on a budget, a handheld or basic external vacuum sealer is usually sufficient and easy to use. Popular brands like FoodSaver and NutriChef offer reliable options that aren’t too pricey. Look for sealers with a strong, consistent seal and the ability to handle moist foods. For bags, use BPA-free, sous vide–compatible vacuum bags or rolls—many store brands work well. Avoid regular plastic storage bags, as they may not withstand sous vide temperatures safely.
After the food is cooked sous vide, is it necessary to finish it off with a quick sear or other technique for texture and flavor, or can some foods be served straight from the bag?
Some foods cooked sous vide, like steak or chicken, really benefit from a quick sear after cooking to develop a flavorful crust and improve texture. However, delicate items such as fish or eggs can often be served straight from the bag without additional finishing. It depends on the dish—searing is mostly for foods where a crisp exterior is desirable.
I’m interested in using sous vide for vegetables as well as meats. Are there noticeable differences in cooking times or temperatures when preparing different types of food, and does this guide cover tips on adjusting for those variations?
Yes, there are definitely differences in sous vide cooking times and temperatures between vegetables and meats. Vegetables generally require higher temperatures and sometimes longer cooking times than most meats. The guide covers these variations and offers detailed tips on how to adjust both time and temperature for different kinds of food, helping you get the best texture and flavor from each ingredient.
The guide talks about using sous vide for different kinds of food, including eggs and desserts. Are there certain foods that are trickier for beginners, and if so, do you have tips or recommended starting points to avoid common pitfalls early on?
Some foods can be trickier for sous vide beginners, especially eggs and some desserts like custards, since they require precise timing and temperature. For an easier start, try proteins like chicken breasts, steak, or salmon, which are very forgiving and deliver great results. When you’re ready to try eggs or desserts, closely follow trusted recipes and use an accurate thermometer to avoid overcooking. Begin with simple recipes and work your way up as you get comfortable with the process.
The piece talks about using sous vide for steaks and vegetables, but I’m curious how it works for desserts. Are there any simple dessert recipes or tips you’d recommend for beginners experimenting with sous vide at home?
Sous vide is great for desserts because it allows for gentle and precise temperature control, which is perfect for custards, puddings, and even cheesecakes. A simple starter is sous vide crème brûlée—just mix cream, sugar, yolks, and vanilla, portion into jars, and cook at 176°F (80°C) for about an hour. You can also try sous vide poached fruit or chocolate pots. Use mason jars or sealed bags, and make sure they’re submerged evenly.
You mentioned sous vide is especially good for things like steaks and vegetables. Are there specific types of meals that don’t turn out well with this technique, or foods you would recommend avoiding when first starting out?
Sous vide is fantastic for many foods, but it’s not ideal for everything. Foods that need a crispy or crunchy texture, such as fried chicken or battered dishes, won’t develop that crust in a sous vide bath. Also, delicate fish like flounder can become mushy, and foods meant to be eaten raw, like salads, aren’t suitable. For beginners, it’s best to avoid these and focus on proteins like steak, chicken, or hearty vegetables.
The article mentions that sous vide requires certain safety protocols. Are there specific food safety risks I should watch out for with longer cooking times, and how can I prevent any issues when cooking things like chicken or eggs?
With sous vide, longer cooking times at lower temperatures can increase the risk of bacteria growth if foods aren’t heated sufficiently. To stay safe, always cook chicken and eggs at or above the recommended temperature (usually 140°F/60°C or higher) for the advised time. Make sure to chill and store cooked food promptly if you’re not serving it right away. Using a calibrated thermometer and following trusted time-temperature guidelines will help you avoid any food safety issues.
I’m new to sous vide and a little confused about the difference between using an immersion circulator and a water oven for the water bath. Do they produce the same results, or is one better for a beginner with a small kitchen?
Both immersion circulators and water ovens can achieve the same precise temperature control needed for sous vide cooking, so the results are similar. For a beginner with a small kitchen, an immersion circulator is often more convenient because it’s compact and you can use it with your own pots or containers. Water ovens are bulkier and take up more counter space, but they’re all-in-one units. Most home cooks start with an immersion circulator for its flexibility and easier storage.
When selecting sous vide equipment for a home kitchen on a limited budget, what features are truly essential? Are there any affordable entry-level immersion circulators or accessories you recommend for beginners without compromising on safety or results?
When picking sous vide gear on a budget, focus on an immersion circulator with accurate temperature control, a simple interface, and reliable safety features like overheating protection. Many entry-level models offer these basics without frills. For accessories, a sturdy food-safe bag (zip-top bags work for beginners) and a large pot are sufficient to start. Brands like Anova Nano or Instant Pot Accu Slim are often budget-friendly and reliable for home use.
The article highlights how sous vide excels at cooking steaks, eggs, and vegetables with precision. How much time should I factor in for cooking these different foods, and does the process vary significantly depending on the type of dish?
Cooking times for sous vide do vary depending on the food. Steaks usually take 1 to 4 hours, depending on thickness and desired doneness. Eggs can range from 13 minutes for soft-boiled to around an hour for custardy textures. Vegetables generally require longer, often 45 minutes to 2 hours, since they soften more slowly. Each type of food also has an ideal temperature to achieve the best results, so adjusting both time and temperature is important for different dishes.
With sous vide relying on precise temperature control, what are some common mistakes beginners make in terms of safety or technique? Do I need to worry about food safety more than I would with grilling or baking?
With sous vide, one common mistake is not fully submerging food or allowing bags to float, which can lead to uneven cooking and potential safety issues. It’s also important to use proper, food-safe bags and keep water temperatures above 130°F (54°C) to prevent bacteria growth. While sous vide is very safe if done correctly, you should follow time and temperature guidelines carefully—food safety is equally important as with grilling or baking, but the risks are different. Always finish proteins with a quick sear to kill surface bacteria and improve texture.
I noticed the article mentions both immersion circulators and water ovens as tools for sous vide. Could you explain the differences between these two options and whether one is better for beginners on a tight budget?
Immersion circulators are compact devices that clip onto your own pot and heat the water, making them affordable and easy to store—perfect for beginners on a tight budget. Water ovens are all-in-one units with integrated baths, usually pricier and bulkier. For most home cooks starting out, an immersion circulator is the better choice due to its lower cost and flexibility.
You mention that sous vide can help with consistency and convenience, which sounds perfect for weeknight dinners. How much advance time should I plan for if I want to try making steak or chicken sous vide on a typical workday?
For steak, you’ll want to set aside about 1 to 2 hours for sous vide cooking, plus a few minutes for searing after. Chicken breasts typically need 1 to 2 hours as well. You can even start the process before you leave for work if your sous vide machine has a timer, or prep everything in advance and refrigerate until you’re ready to cook.
The article mentions the importance of picking the right equipment and budgeting wisely. For someone just starting out, is it worth investing in a separate vacuum sealer and special bags, or can I get decent results with basic zip bags and a cheaper circulator?
You can absolutely start with basic zip-top bags and an affordable immersion circulator. For most foods, the water displacement method with zip bags works well, especially for beginners. A separate vacuum sealer and specialized bags become more useful as you cook larger quantities or want to store food long-term, but they’re not essential to get good sous vide results when starting out.
I’m interested in getting started with sous vide at home, but I’m a little overwhelmed by all the equipment options. Do you recommend a particular type of immersion circulator or water oven that balances quality with a reasonable budget for beginners?
For beginners, an immersion circulator is usually the most budget-friendly and versatile option. Brands like Anova and Instant Pot offer reliable models with user-friendly controls and precise temperature accuracy, often for under $150. A water oven is more expensive and bulkier, so it’s better suited if you’re cooking large quantities regularly. Start with an immersion circulator, a large pot, and some resealable bags, and you’ll be set to explore sous vide cooking at home.
You mention that sous vide is precise because the water bath holds a specific temperature, but I’m wondering how important it is to have a high-end immersion circulator versus a more affordable model. Are there significant differences in results or just convenience features?
Both high-end and more affordable immersion circulators can achieve excellent sous vide results, since precision in temperature control is the main factor. Most budget models are accurate within a degree or two, which is sufficient for home cooking. Premium models often add features like Wi-Fi, faster heating, or quieter operation, but these are mostly about convenience rather than improving food quality.
You mentioned that sous vide is especially good for perfectly cooked steaks and tender vegetables. How long does it actually take to cook a meal with this method compared to traditional cooking, and is there a noticeable difference in flavor for everyday family recipes?
Sous vide generally takes longer than traditional methods—steaks, for example, might need 1 to 3 hours in the water bath, compared to about 15–20 minutes on a grill or pan. Vegetables can take 30 minutes to an hour. The payoff is more consistent doneness and noticeably juicier, more flavorful results. Many people find that even simple family recipes taste richer and are less likely to dry out with sous vide.
You mentioned vacuum-sealing is often used but sometimes zippered bags work too. Is there a noticeable difference in results between using a regular ziplock bag versus a proper vacuum sealer for things like steak or vegetables?
A vacuum sealer removes all the air, which helps ensure even cooking and better results, especially for thicker cuts like steak. Ziplock bags can work for many foods if you use the water displacement method to push out most air, but they’re not as reliable for long cooks or items that need to stay fully submerged. Vacuum sealing usually gives more consistent texture and flavor over time.
I’m curious about the safety side of sous vide. Are there any special food safety protocols I should follow when cooking things like chicken or fish this way to make sure it’s safe to eat?
When cooking chicken or fish sous vide, it’s important to ensure the food stays at a safe temperature long enough to pasteurize it. For poultry, keep the temperature at least 140°F (60°C) for the recommended time, and for fish, generally 130°F (54°C) or higher is safe. Always use fresh, high-quality ingredients, vacuum seal properly, and refrigerate or eat cooked food soon after finishing to avoid bacteria growth.
I’m new to sous vide and a bit concerned about the safety part mentioned in the article. What specific safety protocols should I follow when vacuum sealing and cooking meats at home to avoid foodborne illnesses?
When vacuum sealing and cooking meats with sous vide, always use fresh, high-quality ingredients and keep everything clean. Set your sous vide bath to at least 130°F (54°C) for meats to prevent bacterial growth. Seal foods tightly, and avoid overfilling bags. Chill or serve food promptly after cooking; if storing, rapidly cool in an ice bath before refrigerating. Never leave foods in the danger zone (40–130°F or 4–54°C) for extended periods.
I’m pretty new to sous vide and I see you mention the need for the right equipment and safety protocols. Are there any food safety concerns with cooking at lower temperatures for long periods, and how do I make sure I’m doing it safely at home?
Cooking sous vide does involve food safety considerations, mainly because food is held at relatively low temperatures for extended periods. To keep things safe, always use a reliable sous vide device that maintains a consistent temperature. Make sure to cook foods at or above 130°F (54°C) to prevent the growth of harmful bacteria, and avoid leaving food in the danger zone (40–130°F or 4–54°C) for too long. Once finished, serve food promptly or chill it quickly in an ice bath if storing for later.
You mention the importance of safety protocols with sous vide. Could you elaborate on what specific steps home cooks should follow to ensure food safety, especially when preparing meats or eggs using this method?
To ensure food safety with sous vide, always vacuum seal foods properly and use safe, heat-stable bags. Cook meats and eggs at or above recommended minimum temperatures for the right amount of time to pasteurize them—typically at least 54°C (129°F) for beef and 63°C (145°F) for chicken. Chill cooked food rapidly if not serving immediately by placing sealed bags in an ice bath, then refrigerate. Always avoid leaving food in the temperature ‘danger zone’ (4°C–54°C or 40°F–129°F) for extended periods.
I’m curious about the food safety protocols you hinted at in the guide. Are there specific temperatures or practices you recommend to avoid any risks when cooking things like chicken or eggs sous vide at home?
Absolutely, food safety is very important when sous vide cooking. For chicken, it’s recommended to cook at least 60°C (140°F) for a minimum of 27.5 minutes, which will pasteurize it safely. For eggs, 63°C (145°F) for about 45 minutes is popular for soft texture and safety. Always use fresh ingredients, vacuum seal properly, and chill leftovers quickly in an ice bath before refrigerating to minimize any risk.
The article highlights how sous vide infuses flavors more deeply than traditional methods. Are there particular types of marinades or ingredient combinations that work especially well with this technique, or tips for preventing flavors from becoming too concentrated in the sealed bag?
Sous vide works well with simple marinades and fresh herbs, since the sealed bag intensifies flavors over time. Lightly salt your proteins, then add aromatics like garlic, citrus zest, or fresh thyme for balanced results. Avoid overly strong ingredients like too much soy sauce or liquid smoke, as they can become overpowering. If you’re worried about intensity, try using less marinade or infusing for a shorter time before cooking sous vide.