Introduction: The Allure of Artisan Ice Cream
Few culinary experiences evoke nostalgia and excitement quite like a scoop of thoughtfully crafted ice cream. Once relegated to simple vanilla and chocolate, today’s frozen desserts reflect a vibrant landscape of creativity, seasonality, and technique. Artisanal ice cream isn’t just about indulgence—it’s a celebration of taste, craft, and culture, resonating with food lovers seeking both comfort and innovation.
For home cooks and aspiring creators, making artisan ice cream at home offers a unique opportunity to experiment with flavors, master new techniques, and impress friends and family with your culinary prowess. But achieving that perfect scoop—creamy, balanced, and beautifully nuanced—requires more than a basic recipe. From understanding the science of freezing to selecting the right tools, and from budgeting for quality ingredients to capturing emerging culinary trends, mastering artisan ice cream is a delicious journey of discovery.
This guide will delve into the essential equipment, practical budgeting, step-by-step processes, and flavor inspiration to help you craft exceptional ice cream at home. Whether you’re a curious beginner or a seasoned kitchen enthusiast, you’ll find actionable tips and expert insights to elevate your frozen creations to a truly artisan level.
Essential Tools and Equipment for Artisan Ice Cream
Ice Cream Makers: Choosing the Right Model
The heart of home-crafted ice cream lies in the machine. While it’s possible to make ice cream without dedicated equipment, a reliable ice cream maker ensures a smoother texture and consistent results. Here are the main types:
- Compressor Ice Cream Makers: These self-refrigerating units allow for back-to-back batches and precise temperature control. Ideal for ambitious creators but pricier ($250–$500).
- Freezer Bowl Machines: More affordable ($40–$100), these require pre-freezing a bowl. They’re reliable for occasional use but limit you to one batch per freeze.
- Manual and Old-Fashioned Churns: Fun for family projects, these require more effort but can yield excellent results with the right technique.
For most home artisans, a mid-range freezer bowl model balances cost with performance. If you plan to experiment with multiple flavors or produce larger quantities, investing in a compressor model pays off in versatility and convenience.
Supporting Tools for Precision and Quality
- Instant-Read Thermometer: Essential for monitoring custard temperatures and preventing curdling during base preparation.
- Digital Scale: Precision matters in ice cream—measure ingredients by weight for consistency, especially stabilizers or mix-ins.
- Fine Mesh Sieve: For straining custards and purees, ensuring a silky-smooth base.
- Flexible Silicone Spatulas: Perfect for scraping every bit of base from the bowl and folding in delicate ingredients.
- Ice Cream Containers: Airtight, freezer-safe containers with flat lids prevent freezer burn and preserve texture.
- Whisks and Mixing Bowls: Stainless steel or glass bowls resist odors and are easy to chill for faster base cooling.
While not mandatory, tools like a stand mixer (for whipped bases) or a rotary evaporator (for advanced flavor extraction) can further expand your creative possibilities.
Budgeting for Artisan Ice Cream: Cost Breakdown and Smart Tips
Ingredient Costs: Quality vs. Quantity
Artisan ice cream relies on premium ingredients, but costs can add up quickly. Here’s a typical cost breakdown for a standard batch (about 1.5 quarts):
- High-Quality Dairy (Cream & Milk): $5–$8
- Egg Yolks (for custard bases): $1–$2
- Sugar: $0.50–$1
- Flavorings (vanilla, cocoa, fruit, etc.): $2–$10 (varies widely by choice; vanilla beans and pistachios are premium)
- Stabilizers (optional): $0.50–$1
Estimated base cost: $9–$22 per batch. Homemade artisan ice cream is more affordable than premium store-bought pints (which can exceed $8 per pint), especially if you make several batches and source ingredients wisely.
Equipment Investment and Maintenance
Initial Outlay: Expect to spend $50–$500 on an ice cream maker, depending on features. Supporting tools may add another $50–$100, but most kitchens already have basics like bowls and whisks.
Maintenance: Clean equipment thoroughly after each use to prevent off-flavors and ensure longevity. Compressor units need occasional servicing; budget $20–$50/year for maintenance or replacement parts.
Budget-Saving Strategies
- Seasonal Purchasing: Buy fruit and flavorings in peak season for savings and superior taste. Freeze or preserve extras for future batches.
- Bulk Ingredients: Purchase dairy, sugar, and stabilizers in bulk if you make ice cream regularly.
- DIY Mix-Ins: Make your own fudge swirls, jams, or brittle instead of buying pre-made. It’s cheaper and allows full flavor control.
- Reuse Containers: Save sturdy containers from store-bought ice cream for homemade batches.
The Science and Craft of Ice Cream: Step-by-Step Setup
Understanding Ice Cream Bases
There are two primary base styles:
- Custard Base (French Style): Uses egg yolks, resulting in a rich, creamy texture. Requires gentle cooking and straining.
- Philadelphia Base (American Style): Eggless, relying on cream, milk, and sugar. Lighter and faster to prepare, but less creamy.
For the artisan touch, experiment with both and explore add-ins like mascarpone, buttermilk, or coconut cream for dairy-free versions.
Step-by-Step: Crafting the Perfect Batch
- Base Preparation: Whisk together dairy, sugar, and (if using) egg yolks. Heat gently to dissolve sugar and cook eggs (for custard) to 170–175°F, stirring constantly. Avoid boiling.
- Flavor Integration: Add flavorings—infuse vanilla beans, steep spices, or blend in fruit purees while warm for depth. Strain through a fine sieve for smoothness.
- Chill Thoroughly: Rapidly cool the base in an ice bath. Refrigerate at least 4 hours (ideally overnight) for proper maturation; this allows fats to crystallize and flavors to meld.
- Churn: Pour the base into your ice cream maker per manufacturer’s instructions. Churn until thick and creamy (typically 20–30 minutes).
- Add Mix-Ins: Fold in chocolate chunks, nuts, swirls, or fruit at the end of churning to preserve texture.
- Ripen: Transfer to a chilled, airtight container. Press parchment onto the surface to prevent ice crystals. Freeze at least 4 hours for a scoopable texture.
Pro Tips for Consistency and Texture
- Stabilizers: Small amounts of tapioca starch, gelatin, or commercial stabilizers prevent iciness and preserve mouthfeel.
- Alcohol or Invert Sugar: A splash of liqueur or use of glucose syrup lowers freezing point for a softer scoop, but don’t overdo it—too much inhibits freezing.
- Emulsification: Properly blend fats and liquids for a stable, creamy base. Homogenize with an immersion blender if needed.
Trendsetting Flavors: Inspiration from Today’s Culinary Scene
Seasonal and Local Flavors
- Spring: Strawberry-rhubarb sorbet, sweet pea-mint, elderflower-lemon
- Summer: Roasted peach-basil, black sesame, blueberry-lavender
- Autumn: Pumpkin-spice with brown butter, apple-cider caramel, chai-pear
- Winter: Blood orange-pistachio, toasted hazelnut, spiced chocolate-cherry
Leverage local produce and herbs for distinctive taste and community connection.
Global Influences
- Japanese-Inspired: Miso-caramel, matcha-white chocolate, yuzu
- Indian-Inspired: Cardamom-rose, saffron-pistachio (kulfi style), mango lassi
- Latin American: Cajeta (goat’s milk caramel), guava-cheese, horchata-cinnamon
Modern Techniques and Savory Twists
- Umami and Cheese: Roquefort-honey, mascarpone-fig, olive oil-sea salt
- Spirits and Cocktails: Bourbon-pecan, Negroni sorbet, piña colada
- Fermentation and Aged Ingredients: Crème fraîche, miso, black garlic
Push boundaries with savory or boozy flavors, always balancing sweetness and salt to achieve harmony.
Maintenance and Food Safety Best Practices
Sanitation and Equipment Care
- Disassemble and wash all machine parts with hot, soapy water after each batch. Dry thoroughly to prevent mold.
- Sanitize bowls, utensils, and containers to avoid cross-contamination, especially when working with eggs or dairy.
- Inspect gaskets and seals regularly on compressor machines; replace if cracked or worn.
Ingredient Storage and Shelf Life
- Label and date all batches; homemade ice cream is best within 2–3 weeks due to lack of commercial preservatives.
- Store at a consistent freezer temperature (<-18°C/0°F) to prevent melting and recrystallization.
- Cover surface with parchment or plastic wrap before sealing containers to reduce freezer burn.
Allergen and Food Safety Considerations
- Clearly label batches with common allergens (nuts, dairy, eggs).
- Pasteurize custard bases to 170–175°F to ensure food safety.
- When using alcohol or raw ingredients, inform tasters and research safe consumption levels.
Serving, Presentation, and Lifestyle Inspiration
Creative Plating and Pairings
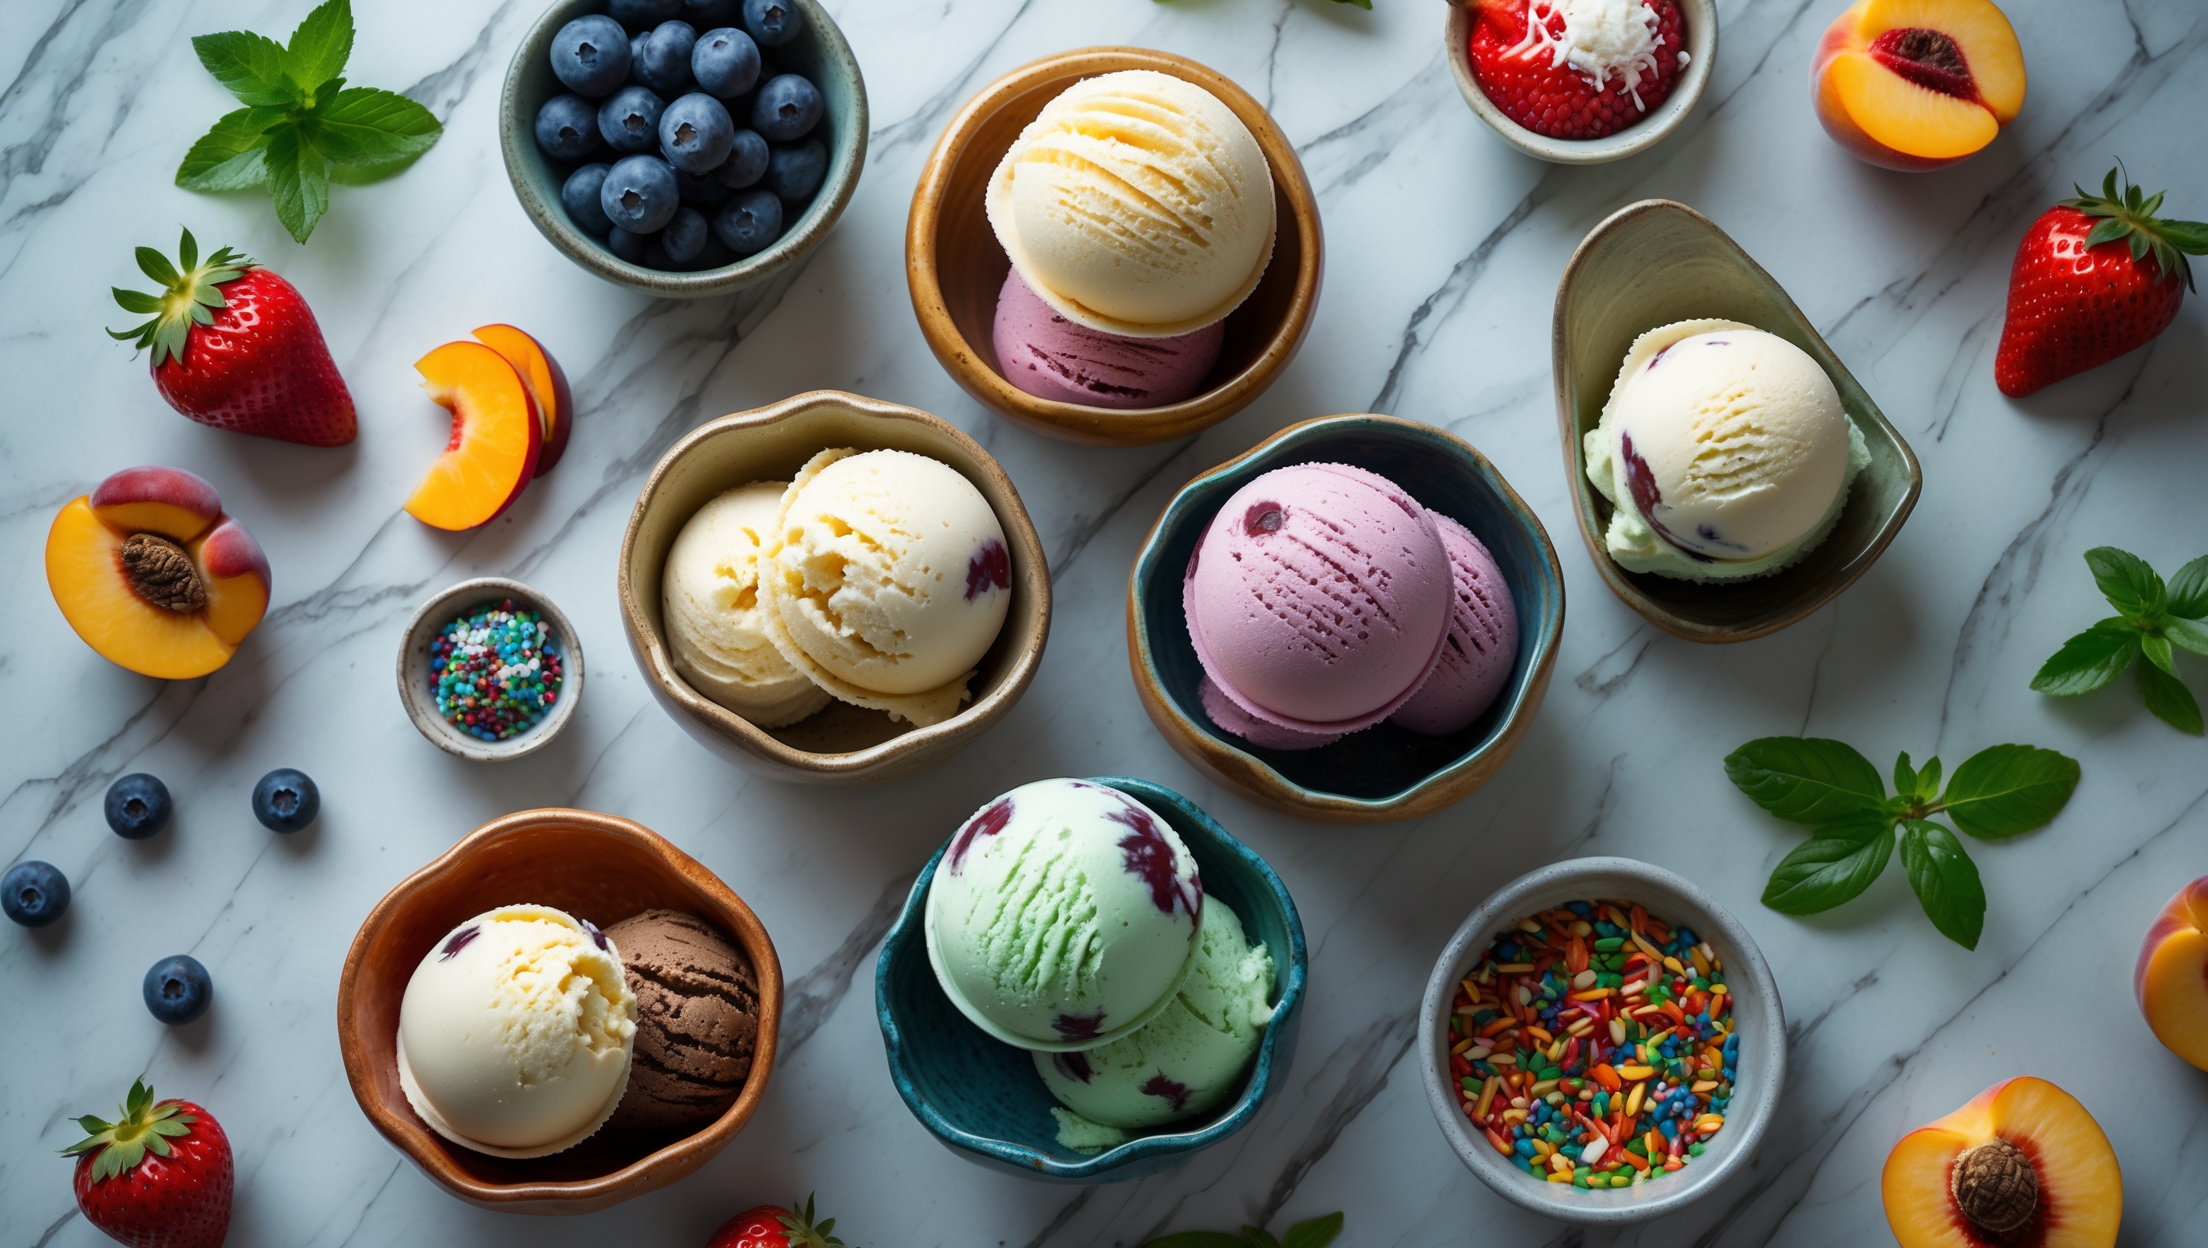
- Serve in handmade ceramic bowls, vintage glassware, or edible cookie cones for an artisan touch.
- Garnish with fresh herbs, candied nuts, or edible flowers to elevate visual appeal.
- Pair with seasonal desserts—think olive oil ice cream with roasted figs or sorbet alongside spiced shortbread.
Entertaining and Gifting Ideas
- Host a DIY ice cream bar with assorted flavors and toppings for gatherings.
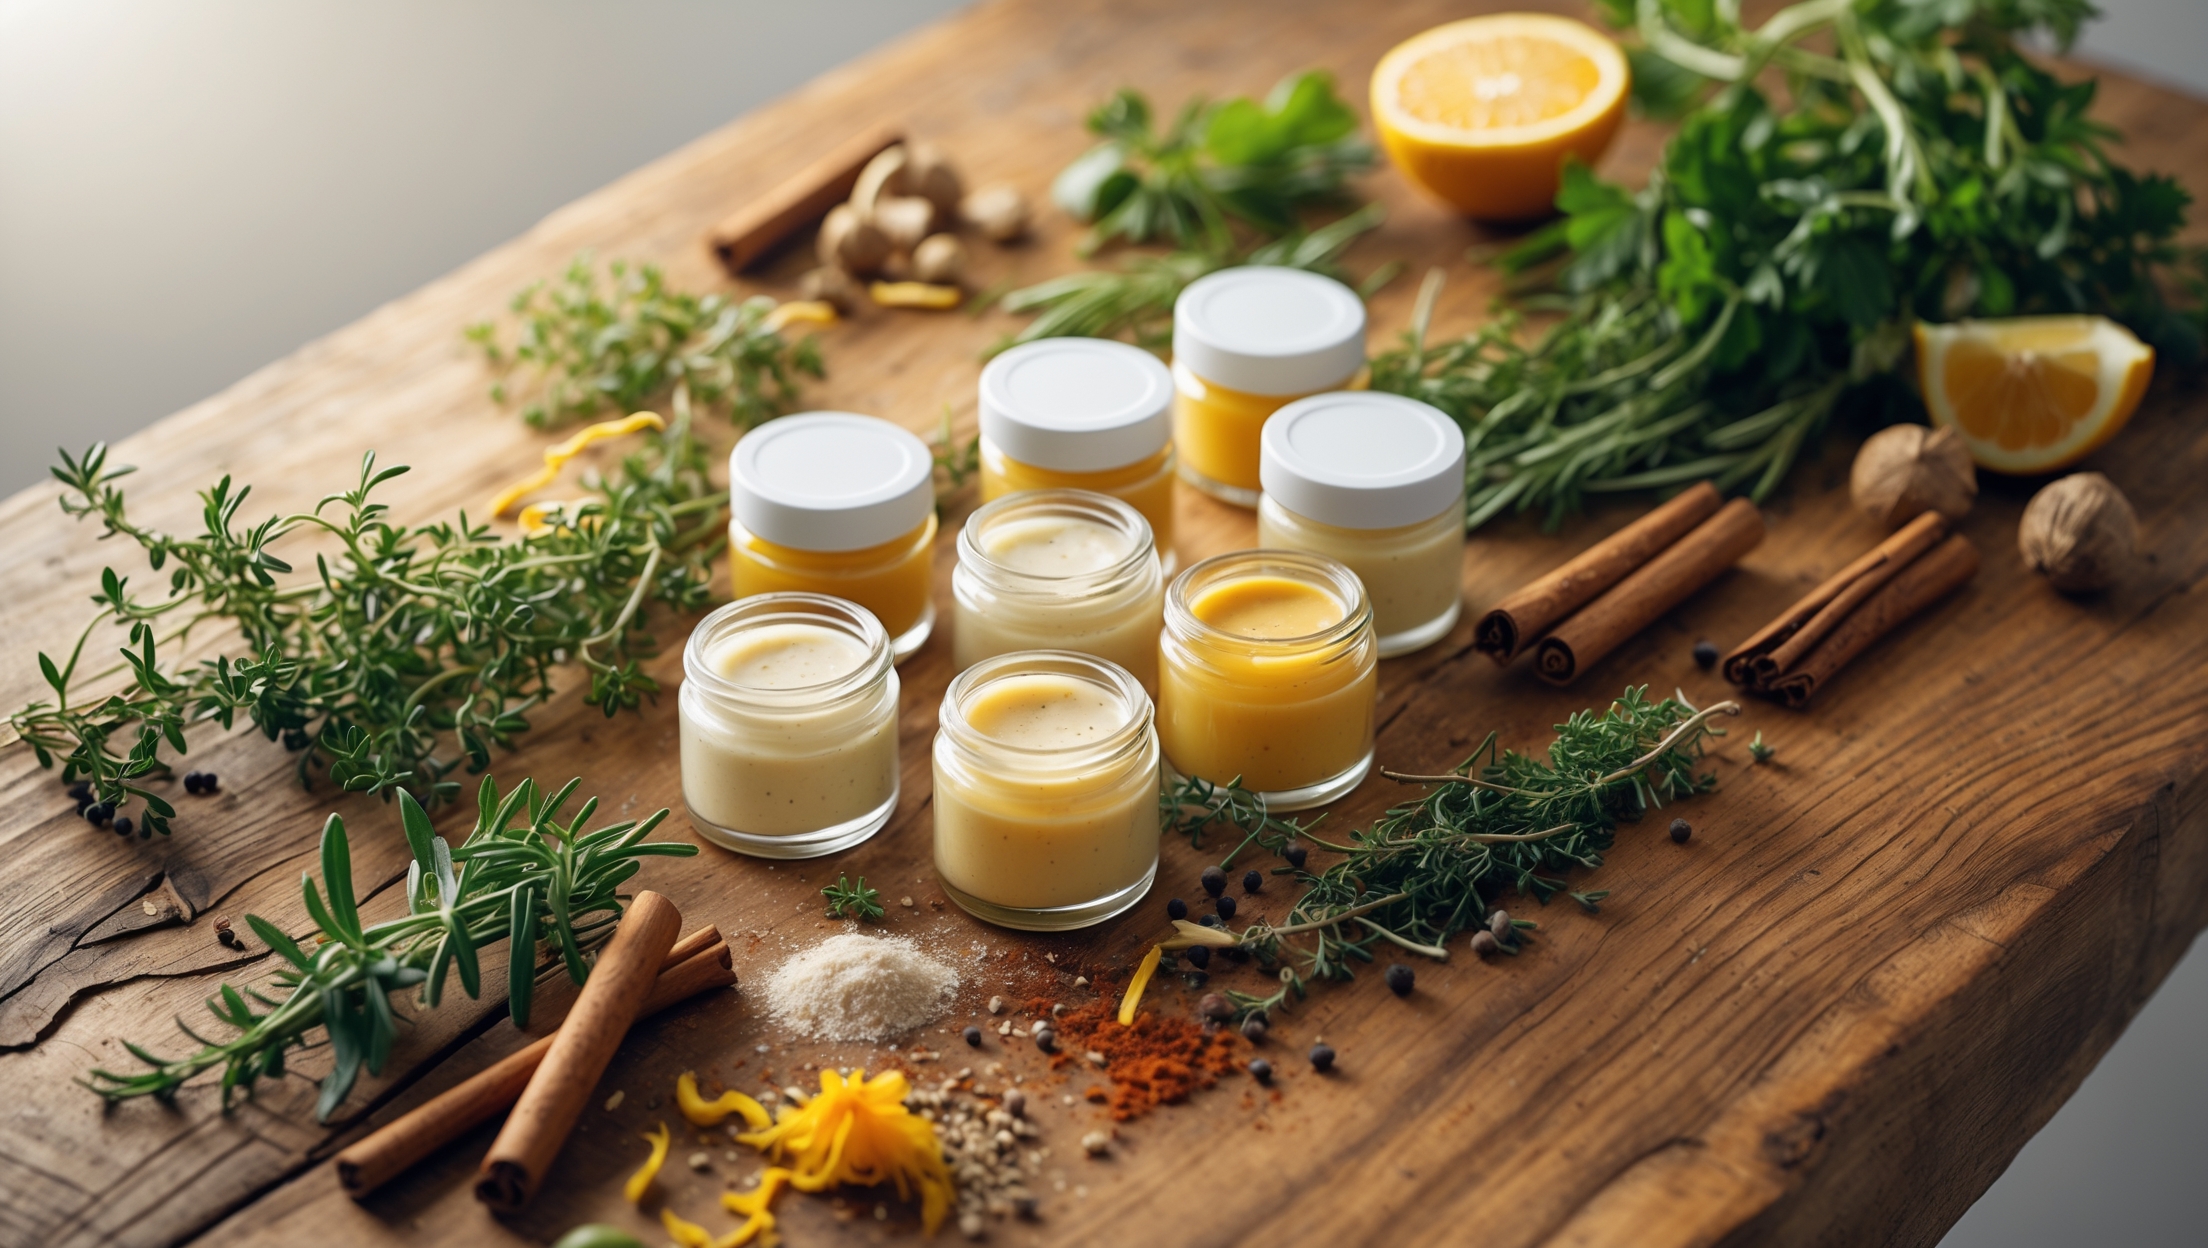
- Package small batches in reusable jars with custom labels for thoughtful gifts.
- Collaborate with local producers (honey, jams, coffee) to co-create signature flavors.
Documenting and Sharing Your Creations
- Photograph finished scoops in natural light for social sharing.
- Keep a recipe journal to track tweaks and seasonal experiments.
- Engage with online artisan ice cream communities for feedback and inspiration.
Conclusion: Your Journey into Artisan Ice Cream
From humble beginnings to bold, trendsetting flavors, artisan ice cream at home embodies the spirit of discovery and delight. With the right tools and a thoughtful approach to ingredients and technique, you can create frozen desserts that rival the best boutique parlors—while infusing each batch with your personal touch and culinary curiosity.
Beyond the scoop, artisan ice cream is an invitation to connect: with the seasons, with local producers, and with family and friends who gather to savor your creations. Each batch is a canvas for creativity—whether you’re swirling in sun-ripened berries, infusing global spices, or crafting a new classic from pantry staples. Mastering the craft also means embracing best practices in safety and maintenance, ensuring every mouthful is both delicious and trustworthy.
As you embark on your artisan ice cream journey, remember that perfection is less about flawless execution and more about the joy of experimentation and sharing. With every new flavor, every refined technique, and every satisfied smile, you’re building a legacy of taste, craft, and culinary culture—one scoop at a time.
You talk about the science of freezing being important for getting that perfect scoop. Could you explain a bit more about what kinds of mistakes beginners usually make with freezing or texture, and how to avoid them?
One common mistake beginners make is not chilling the ice cream base thoroughly before churning, which leads to larger ice crystals and a grainy texture. Also, overfilling the machine or not letting it churn long enough can result in a soupy consistency. To avoid these issues, always chill your base until it’s very cold—ideally overnight—and don’t exceed your machine’s capacity. Churn until the mixture is thick and creamy, then freeze it promptly for the smoothest texture.
When it comes to budgeting for quality ingredients, do you have recommendations for where to find unique or seasonal flavors without overspending, especially for someone just starting to make artisan ice cream at home?
For unique or seasonal ice cream flavors on a budget, try local farmers’ markets or ethnic grocery stores, as they often offer fresh and interesting produce affordably. You can also experiment with small amounts of spices, herbs, or extracts from bulk bins. Frozen fruit is a cost-effective way to enjoy out-of-season flavors, and joining a local produce co-op can unlock great deals on unusual ingredients.
Could you expand on the step-by-step process for incorporating trendy or more complex flavors at home? I’d love to know how you balance unusual mix-ins so they don’t overpower the classic creamy texture.
To incorporate trendy or complex flavors, start by infusing your base: steep ingredients like herbs, teas, or spices in the warm milk/cream mixture before chilling and churning. For mix-ins like candied fruit, swirls, or brittle, fold them in after churning but before freezing. Use small amounts at first and taste as you go—this lets you adjust so the mix-ins add interest without dominating the creamy texture or classic flavor.
When budgeting for quality ingredients and equipment, do you have any tips for prioritizing where to splurge versus where it’s okay to save a little? For example, is the machine itself more important than sourcing premium dairy or mix-ins?
When budgeting, it’s usually best to invest in a good-quality ice cream machine first, since it directly affects texture and consistency. For ingredients, premium dairy makes a noticeable difference, so prioritize quality milk and cream over expensive mix-ins. With flavorings and add-ins, you can often find good options at reasonable prices, so it’s fine to save there unless a specific ingredient is the star of your recipe.
Could you elaborate on the science of freezing mentioned in the introduction? I sometimes end up with icy texture instead of that creamy artisan result, so I’m curious what common mistakes home cooks make during the process.
The science of freezing artisan ice cream centers on forming tiny ice crystals for that creamy texture. If the mixture freezes too slowly, larger crystals form, making the ice cream icy. Common mistakes are not chilling the base thoroughly before churning, using too little fat or sugar, or overfilling the machine. Make sure your base is very cold, churn quickly, and avoid skimping on cream or sugar, as both help inhibit large ice crystals.
When it comes to mastering artisan ice cream techniques at home, could you elaborate on how to troubleshoot common issues like iciness or lack of creaminess, and what steps can home cooks take during preparation to avoid these problems?
To prevent iciness in homemade ice cream, make sure your base is well-chilled before churning and avoid over-churning, which can create larger ice crystals. Adding a bit of alcohol or corn syrup can also help keep the texture smooth. For more creaminess, use a higher fat content cream and ensure the mixture is thoroughly emulsified. Straining the base before churning removes lumps for a silkier finish.
If we don’t have room for another appliance, are there any tips from the article for making artisan-style ice cream without a dedicated machine, or would that compromise the texture too much?
The article suggests that while an ice cream maker helps with texture, you can still achieve artisan-style results without one. Try the no-churn method by whipping cream and folding in condensed milk and your chosen flavors. For better texture, freeze the mixture in a shallow tray and stir it every 30 minutes for a few hours to break up ice crystals, resulting in a smoother consistency.
Could you share more about how the texture of ice cream made with a freezer bowl machine compares to one made with a compressor model? I’m trying to figure out if the higher price for a compressor is really justified for a home kitchen.
Ice cream made with a compressor machine often has a smoother, creamier texture because it can chill and churn the mix more consistently and at lower temperatures. Freezer bowl machines can make good ice cream, but sometimes the texture is a bit icier or less dense, especially if the bowl isn’t frozen thoroughly. If you make ice cream frequently or want a very fine, professional-style texture, a compressor model can be worth the investment. For occasional use, a freezer bowl machine still does a solid job.
You mention budgeting for quality ingredients as part of the artisan ice cream journey. Are there particular ingredients or brands you recommend for achieving that nuanced, creamy texture without breaking the bank?
For a creamy texture without overspending, look for high-fat dairy like local heavy cream or whole milk, as store brands often work well. For sugar, standard granulated usually suffices. When it comes to vanilla, pure extract gives great flavor, though some budget-friendly brands still offer good results. If using eggs, farm-fresh is best but not essential. A little investment in quality chocolate or fruit puree pays off, but you can often find good options in the baking or frozen aisles of larger supermarkets.
Can you clarify how the results differ between compressor ice cream makers and freezer bowl machines, aside from the batch size? For someone new to making artisan ice cream, is the texture difference very noticeable?
Compressor ice cream makers can chill and churn your mix simultaneously, resulting in smoother, creamier ice cream because they freeze more quickly and evenly. Freezer bowl machines rely on a pre-frozen bowl, which can warm up during churning and sometimes lead to a slightly grainier texture. For beginners, you may notice that compressor machines produce more consistently silky results, but freezer bowl models can still make delicious ice cream with careful timing.
I noticed the article mentions compressor ice cream makers can be quite expensive compared to freezer bowl models. For someone who plans to make small batches just occasionally, is the quality difference significant enough to justify investing in the pricier compressor type?
If you plan to make small batches only occasionally, a freezer bowl model should serve you well and deliver excellent results with a bit of planning. The quality difference with compressor models is most noticeable when making large or multiple batches in a row, due to faster chilling and convenience. For occasional use, the investment in a compressor machine usually isn’t necessary unless you want ultimate ease or plan to experiment frequently.
I noticed the article mentions budgeting for quality ingredients. Do you have any advice on where to source unique or seasonal ingredients affordably, especially for a business starting out and aiming to offer trendsetting flavors?
For sourcing unique and seasonal ingredients affordably, local farmers’ markets and produce co-ops are excellent starting points—many offer bulk pricing for businesses. You can also connect directly with local growers or food hubs for fresh, lesser-known fruits and herbs. Ethnic grocery stores often stock unusual spices and additions at competitive prices. Building relationships with suppliers might also lead to discounts or early access to seasonal items.
You mentioned mastering the science of freezing for a good scoop. Can you explain what common mistakes home cooks make that affect the texture, and how your recommended tools help avoid these issues?
Home cooks often struggle with icy or grainy ice cream because of uneven freezing or insufficient churning. Not chilling the base thoroughly or overfilling the machine can cause these problems. Using a quality ice cream maker ensures even freezing and constant agitation, which keeps ice crystals small for a smoother texture. Also, using a thermometer and an airtight container, as suggested in the article, helps maintain the right temperature and prevents ice formation on the surface.
For someone just starting out with ice cream making, about how much should I expect to spend on essential equipment and ingredients? I want to try this at home without breaking the bank but still want a creamy, professional result.
You can get started making quality ice cream at home for about $60–$150. Entry-level ice cream makers typically cost $40–$80, while basic tools like mixing bowls, spatulas, and measuring cups add around $20–$30. Standard ingredients such as cream, milk, sugar, and eggs might cost $10–$20 for several batches. This setup should let you make creamy, professional-style ice cream without overspending.
You mentioned budgeting for quality ingredients. Are there certain ingredients where it’s okay to save money, or do you really notice a big difference if you splurge on everything, like vanilla beans versus extract?
You can definitely prioritize where to splurge. Using real vanilla beans makes a noticeable difference in flavor, but for some mix-ins or stabilizers, lower-cost options work fine. For basics like milk and sugar, standard versions are usually sufficient, but investing in high-quality cream and any standout flavorings (like chocolate or fruit purees) will really elevate your ice cream.
You mentioned that the guide will discuss practical budgeting for quality ingredients. Are there any tips for sourcing seasonal or unusual ingredients for those looking to experiment with unique flavors without overspending?
For experimenting with unique ice cream flavors on a budget, try visiting local farmers’ markets for fresh, seasonal produce, which is often more affordable and flavorful. Ethnic grocery stores can be a great source for unusual spices or fruits at lower prices. Also, consider buying small amounts of specialty ingredients in bulk sections, or swap with friends who are also experimenting. Preserve seasonal finds by freezing or making purees to enjoy year-round.
I noticed you mentioned compressor ice cream makers are much pricier than freezer bowl machines. For someone just starting out, is the higher price of a compressor model worth the investment in terms of final ice cream quality and versatility, or would a beginner be better off sticking with a freezer bowl machine?
Compressor ice cream makers do offer more convenience and consistently smoother results, since they can churn batch after batch without needing to pre-freeze bowls. However, for most beginners, a freezer bowl machine is perfectly capable of making delicious ice cream and is much more budget-friendly. Unless you plan to experiment a lot or make ice cream very frequently, starting with a freezer bowl model is usually a practical choice.
When deciding between a compressor ice cream maker and a freezer bowl machine, how big of a difference does it actually make in terms of ice cream texture and flavor? Is it worth saving up for the more expensive option if I plan to experiment with a lot of unique flavors?
A compressor ice cream maker does make a noticeable difference, especially if you’re experimenting with many unique flavors. It chills the mixture quickly and consistently, resulting in smoother texture and better incorporation of mix-ins. Freezer bowl machines can work well for simple batches, but they may lead to icier results and require pre-freezing. If you’re serious about texture and want to make multiple batches or try complex flavors, saving up for a compressor model is usually worthwhile.
You mentioned that mastering artisan ice cream involves understanding the science of freezing. Could you provide more details or resources on what home ice cream makers should pay attention to regarding temperature or timing to get that perfect creamy texture?
To achieve creamy artisan ice cream, focus on freezing your base quickly to minimize ice crystal formation. Chill your mixture before churning—it should be as cold as possible, ideally around 4°C (39°F). Most home machines work best if their bowl is frozen solid, so freeze it overnight. Start churning as soon as you pour in the base, and stop once it thickens to a soft-serve consistency (usually 20-30 minutes). Immediately transfer it to a pre-chilled container to harden in the freezer. Consistent, low temperatures throughout the process are key for smooth results.
I noticed you mentioned budgeting for quality ingredients—do you have recommendations for balancing ingredient costs when experimenting with small-batch, trendsetting flavors at home, particularly for owners on a tight budget?
When experimenting with small-batch trendsetting flavors, consider buying ingredients in smaller quantities from bulk bins or local markets to reduce waste and cost. Prioritize versatile, high-impact ingredients—like concentrated extracts, fresh herbs, or seasonal fruits—that can be used in multiple recipes. Also, try sharing ingredient costs with fellow ice cream makers or friends to further stretch your budget while still exploring new flavor profiles.
When mastering new artisan ice cream techniques at home, what are some common pitfalls you see people encounter with texture or freezing, and how can those be addressed early on to avoid wasted ingredients?
A few frequent issues include ice crystals forming due to an overly wet base, or dense, icy texture from insufficient churning or incorrect freezing temperatures. To avoid this, chill your base thoroughly before churning, use the right ratio of fats and sugars, and avoid overfilling your ice cream maker. Also, freeze the finished ice cream quickly in a shallow container to lock in creaminess and reduce ice crystals.
I noticed you mentioned compressor ice cream makers allow for back-to-back batches but come with a higher price tag. For someone just starting out but wanting to eventually experiment with multiple flavors in one day, is it better to invest in a compressor model up front, or will a freezer bowl machine suffice for a while?
If you’re new to making ice cream, a freezer bowl machine is a good starting point since it’s more affordable and lets you experiment with different recipes. However, you’ll need to refreeze the bowl between batches, which can slow things down if you want to try several flavors in one day. If you know you’ll be making lots of back-to-back batches often, investing in a compressor model from the start could save time and effort in the long run.
If I’m new to crafting more adventurous flavors at home, could you provide more details on the step-by-step process for balancing unique add-ins while still achieving that creamy texture described in the article?
To balance adventurous add-ins while keeping your ice cream creamy, start by making your base and churning it until it thickens but is still soft. Add unique ingredients like fruit purees, spices, or chunks once churning is nearly done to prevent them from freezing hard or making the mix icy. Aim for small, well-blended pieces and avoid too much liquid or alcohol, which can upset the texture. Fold in the add-ins gently before finishing the freeze.
The article suggests experimenting with unique flavors at home. Do you have recommendations for family-friendly, trendsetting flavors that kids and adults might both enjoy, without requiring hard-to-find ingredients?
Absolutely! Some family-friendly, trendy flavors you could try include honey lavender, cookie dough swirl, or chocolate peanut butter pretzel. For fruit lovers, strawberry cheesecake or mango swirl are always popular. These flavors use ingredients that are easy to find at most supermarkets, so you can have fun experimenting without needing specialty items.
I’m new to making ice cream at home and wondering, aside from the price difference, what are the main pros and cons of compressor machines versus freezer bowl models when it comes to texture and ease of use?
Compressor machines let you make multiple batches in a row and tend to produce creamier, smoother ice cream because they freeze the mixture quickly and evenly. They’re also more convenient since you don’t need to pre-freeze a bowl. Freezer bowl models are lighter and easier to store, but you have to freeze the bowl ahead of time, and results are sometimes less consistent in texture, especially if your freezer isn’t very cold.
The article says mastering artisan ice cream involves budgeting for quality ingredients. Are there specific ingredients you recommend splurging on, and are there any good budget-friendly brands you’ve found for things like vanilla or chocolate?
Splurging on high-quality vanilla and chocolate really makes a difference in artisan ice cream. For vanilla, pure vanilla beans or real extract (not imitation) are best—Madagascar and Tahitian beans are favorites among home makers. For chocolate, look for couverture chocolate or well-reviewed cocoa powders. If you’re on a budget, some supermarket brands like Rodelle (vanilla) or Ghirardelli (chocolate) offer good flavor at a reasonable price.
You talk about budgeting for quality ingredients—do you have any tips for sourcing affordable but high-quality mix-ins, especially if I want to try trendier artisan flavors without spending a fortune?
To keep costs down, try shopping for high-quality mix-ins like nuts, chocolate, or dried fruits at bulk food stores or during sales at specialty markets. For trendier artisan flavors, consider making your own mix-ins—like caramelized nuts or fruit compotes—using seasonal produce, which is often more affordable and fresh. You can also split bigger packages with friends to access premium products for less.
I noticed you mention both compressor and freezer bowl ice cream makers. For someone who plans to make ice cream occasionally but wants really smooth texture, is the extra cost of a compressor model worth it, or can a freezer bowl machine deliver similar results with the right technique?
If you only make ice cream occasionally, a good-quality freezer bowl machine can still produce smooth results, especially if you chill your base thoroughly and don’t overfill the bowl. However, compressor models do offer a more consistent texture and convenience, since you don’t need to pre-freeze the bowl. If smoothness is your top priority and you don’t mind the extra cost, a compressor machine is worth considering, but you can achieve great results with a freezer bowl and careful technique.
For someone totally new to making artisan ice cream at home, which step in the process tends to be the trickiest to master and are there any common beginner mistakes to watch out for?
The trickiest step for beginners is often churning the ice cream base just right—too little and it stays icy, too much and it gets grainy. A common mistake is not chilling the base thoroughly before churning; this can lead to poor texture. Make sure to follow recipes closely, especially on temperature and timing, for the smoothest results.
When it comes to experimenting with trendsetting flavors at home, do you have suggestions for sourcing specialty ingredients without breaking the bank? Sometimes it feels like high-quality add-ins push the budget up pretty quickly.
Absolutely, specialty ingredients can add up, but there are a few ways to keep costs down. Try buying in small quantities from bulk bins at local markets or ethnic grocery stores, where unique items like spices and extracts are often more affordable. Online shops sometimes offer sampler packs, which let you try different flavors without committing to big jars. Don’t forget that fresh herbs, seasonal fruits, and even pantry staples like nuts or teas can create gourmet flavors for less.
I noticed you mentioned both compressor and freezer bowl ice cream makers. For someone who plans to experiment with small batch flavors but doesn’t want to spend too much upfront, would you recommend starting with a freezer bowl machine? Are there any tips for improving texture if you go with the more affordable option?
A freezer bowl ice cream maker is a budget-friendly choice for small batch experiments and can produce great results. To improve texture, be sure to chill your base thoroughly before churning and avoid overfilling the bowl. Adding a small amount of alcohol, corn syrup, or stabilizers like guar gum can also help create a smoother, creamier consistency with less iciness.
I’m curious about the differences between compressor ice cream makers and freezer bowl machines when it comes to the final texture and flavor of the ice cream. Is it really worth spending more for a compressor model if I make ice cream just a couple times a month?
Compressor ice cream makers generally produce smoother, creamier ice cream because they chill the mixture more consistently and quickly, reducing ice crystals. Freezer bowl machines often result in slightly icier texture since the bowl can warm up during churning. If you only make ice cream occasionally, a freezer bowl model may be perfectly fine, but if ultra-smooth texture is important to you, a compressor model could be worth the investment.
I’m just starting out and I’m looking at the compressor ice cream makers versus the freezer bowl machines you mentioned. Is the main benefit of the compressor models just being able to do more batches in a row, or does it really impact the texture and flavor noticeably?
Compressor ice cream makers do let you make multiple batches without waiting for a bowl to re-freeze, but they can also improve texture. Since they chill the mix as it churns, you often get smoother, creamier results with fewer ice crystals. The flavor stays the same, but the improved texture can make your homemade ice cream feel more professional.
I noticed you mentioned compressor ice cream makers as the ideal choice for ambitious home creators, but their price range is pretty high. For someone on a tighter budget, do you think a freezer bowl machine can reliably produce smooth, creamy artisan-style ice cream, or will I be missing out on quality?
A freezer bowl machine can still help you achieve smooth and creamy results if you follow a good recipe and chill your base thoroughly before churning. While compressor machines offer convenience and consistency, many home ice cream makers get great results with freezer bowl models by not overfilling the bowl and ensuring everything is cold. The main trade-off is making one batch at a time, but you can absolutely make delicious, artisan-style ice cream on a budget.
When it comes to budgeting for quality ingredients, do you have tips on where to find affordable but still high-end options for things like vanilla beans or fresh fruit? I want my homemade ice cream to taste great without blowing my weekly grocery budget.
To save on quality ingredients like vanilla beans or fresh fruit, try shopping at local farmers’ markets, which often have in-season fruit at better prices. For vanilla beans, look online for bulk deals or consider splitting a pack with friends. Ethnic grocery stores can also offer high-quality ingredients at lower prices. Buying frozen fruit is another way to get good flavor without paying premium prices for fresh, especially when fruit is out of season.
You mention that mastering artisan ice cream involves understanding the science of freezing and budgeting for quality ingredients. What are some cost-effective ways to source high-quality ingredients without overspending, especially for someone just experimenting at home?
You can find high-quality ingredients more affordably by buying in smaller quantities from local farmers’ markets or specialty stores, especially when fruits are in season. Bulk sections at grocery stores are great for nuts and chocolate. Consider using extracts or pastes for flavors like vanilla or coffee, which can be cost-effective and still provide great taste. Start with a few versatile ingredients that work in multiple recipes to minimize waste and spending.
I’m curious about the budgeting aspect you touched on. Beyond the upfront investment in equipment, approximately how much should I expect to spend on high-quality ingredients per batch, especially if I want to try some of those more unique artisan flavors?
For high-quality artisan ice cream, expect to spend around $8–$15 per batch on ingredients, depending on your recipe size and chosen flavors. Classic bases cost less, but unique flavors—like specialty chocolates, exotic fruits, or premium spices—can raise the price. Small batches using rare ingredients might push costs closer to $20. Planning ahead and sourcing in bulk can help manage your ongoing ingredient expenses.
If I’m planning to make ice cream only a few times a month, would it be more practical to stick with a freezer bowl machine despite its batch limitations, or is it worth saving up for a compressor unit in the long run?
If you’ll only be making ice cream a few times a month, a freezer bowl machine should work well for you. Its main limitation is that the bowl needs to be frozen in advance and can usually handle just one batch at a time. A compressor unit is more convenient for frequent or larger-batch use, but it’s a bigger investment—so for occasional making, the freezer bowl is a practical choice.
If I only have basic kitchen tools and no ice cream machine, can I still follow these artisan techniques and trends successfully, or should I wait until I can invest in more specialized equipment?
You can absolutely get started with artisan ice cream at home using just basic kitchen tools. The article highlights several no-churn and hand-mixing methods, so you don’t need an ice cream machine right away. Using a freezer-safe container, a sturdy whisk or hand mixer, and some patience, you can experiment with trendsetting flavors and techniques. Upgrading to specialized equipment later can enhance results, but it’s not necessary to begin exploring artisan ice cream.
When it comes to budgeting for high-quality ingredients, do you have any advice on where to save and where to splurge? For example, should I prioritize spending on things like fresh cream and eggs, or are there less expensive swaps that still produce that artisan flavor?
When making artisan ice cream, it’s usually best to splurge on fresh cream and high-quality eggs since they’re the base of your flavor and texture. You can save on mix-ins like fruits or chocolate by using seasonal produce or good-quality but less expensive chocolate. Vanilla beans are pricey, but a good vanilla extract can work well if you’re on a budget. Prioritize freshness and quality in your main ingredients, and get creative with the rest.
With the price range you mentioned for compressor ice cream makers, is there a particular brand or model you recommend for someone who makes ice cream just a few times a month but really values creamy texture?
For occasional home use with a focus on creamy texture, the Cuisinart ICE-100 is a solid choice among compressor ice cream makers. It’s reliable, user-friendly, and produces consistently smooth results. If you want to explore a more premium option, the Breville Smart Scoop BCI600XL offers extra features and excellent texture, though it’s at the higher end of the price range. Both are well-suited for home enthusiasts who want professional-quality ice cream.
Could you go into more detail about how the science of freezing impacts the texture of ice cream? I’m curious what steps I should be careful with to avoid ending up with something icy or too hard if I only have a basic freezer bowl machine.
The texture of ice cream depends a lot on how quickly it freezes. In a basic freezer bowl machine, freezing happens relatively slowly, which can lead to larger ice crystals and a grainier or icier texture. To improve creaminess, chill your ice cream base thoroughly before churning, don’t overfill the machine, and churn until it’s just set but still soft. Once churned, transfer it quickly to a shallow container and cover it tightly to minimize further ice crystal growth in the freezer.
When budgeting for quality ingredients as suggested, what are some affordable ways to source unique or trendsetting flavors without overspending? I’d love tips on keeping costs down while still making artisan ice cream at home.
One way to source unique flavors affordably is to use seasonal fruits from local markets, which are often fresher and less expensive. You can also experiment with pantry staples like spices, herbs, or extracts instead of buying specialty products. Bulk stores or ethnic markets can be great for finding interesting ingredients at lower prices. Don’t forget to watch for sales or consider splitting rare ingredients with friends.
After picking out an ice cream maker, what’s the best way to pick seasonal flavor combinations that actually work together? Do you have any suggestions for beginner-friendly pairings that are both creative and approachable?
Choosing seasonal flavor combinations is all about highlighting the freshest ingredients available. Start by focusing on one main fruit or flavor in season—like strawberries in spring or peaches in summer. Pair it with something creamy, like vanilla or honey, or add a subtle herb, such as basil or mint, for a twist. Beginner-friendly combos include strawberry-basil, peach-honey, blueberry-lemon, or apple-cinnamon. These are simple to make and generally crowd-pleasing while still letting you be creative.
I’m curious about the difference between compressor ice cream makers and freezer bowl machines when it comes to final texture. Does one produce creamier ice cream than the other, or is the main difference just about the convenience and number of batches you can do at a time?
Compressor ice cream makers generally produce creamier ice cream because they chill the mixture continuously and more evenly during churning, leading to smaller ice crystals. Freezer bowl machines rely on a pre-frozen bowl, which can warm up during the process and may yield slightly less smooth results, especially if you do multiple batches in a row. So, while convenience and batch size are important differences, texture is usually noticeably improved with a compressor model.
Could you expand a bit on the step-by-step process you use for capturing emerging culinary trends in homemade ice cream flavors? I’m curious how you experiment with new ingredients while still achieving a creamy texture and balanced taste.
To capture new trends in ice cream, I start by researching popular ingredients from food blogs, social media, and seasonal produce. I experiment in small batches, adjusting sugar and fat levels to balance novel flavors. When trying new mix-ins, I often infuse the base or make concentrated reductions to prevent icy textures. I test for creaminess by tweaking churn times and sometimes add stabilizers like a touch of cornstarch if a new ingredient affects texture. Taste tests help refine the balance before scaling up the recipe.
The article mentions experimenting with emerging culinary trends in ice cream making. As someone thinking about adding unique flavors to my menu, could you share specific examples of trendsetting ingredients or combinations that have proven popular with customers lately?
Absolutely! Some trendsetting ice cream flavors that have captured attention recently include miso caramel, black sesame, and matcha for savory-sweet profiles. Floral notes like hibiscus or elderflower are also gaining popularity. For a twist, pairing fruits with herbs—such as strawberry-basil or lemon-thyme—has been well received. Incorporating global influences, like Mexican hot chocolate or Thai iced tea, is another way to set your menu apart.
Could you give more specifics about how the performance of compressor ice cream makers compares with freezer bowl machines in terms of final texture and batch size? I am trying to decide if the higher upfront investment is worth it for someone who might make ice cream frequently at home.
Compressor ice cream makers generally produce smoother, creamier textures because they freeze the mixture evenly and quickly, minimizing ice crystals. They also let you make multiple batches in a row without re-freezing, and often handle slightly larger batch sizes. Freezer bowl machines are more affordable but may yield less consistent texture, especially if the bowl isn’t fully frozen or if you want to make several batches in a day. If you plan to make ice cream often, the compressor model is usually worth the investment for both convenience and quality.
You mentioned budgeting for quality ingredients in addition to equipment costs. Are there certain ingredients or brands that you’ve found offer a good balance between price and artisan-quality results, particularly for families trying to keep costs down?
For good balance between cost and quality, try using store-brand cream and milk, which often work just as well as premium brands for the base. For vanilla, look for pure extract rather than imitation, but buy in larger bottles for savings. Bulk nuts, chocolate, and seasonal fruit from warehouse or local markets can also keep costs down while still giving that artisan touch. Avoid pre-made mix-ins, and instead use simple, fresh ingredients whenever possible.
When budgeting for quality ingredients, are there particular suppliers or sourcing tips you recommend for finding unique flavors, especially for those of us trying to set our offerings apart in a local market?
For unique flavors, consider connecting with local farmers’ markets and specialty grocers; these often carry seasonal or rare produce you won’t find elsewhere. Exploring online marketplaces for small-batch extracts, spices, or international ingredients can also help you stand out. Building relationships with local producers may even lead to exclusive deals or access to limited-edition products, helping you create ice cream flavors that are truly distinctive in your area.
Your article mentions budgeting for quality ingredients. Do you have suggestions for sourcing specialty items like natural flavorings or mix-ins at a reasonable cost, especially for small business owners trying to keep margins under control?
Sourcing specialty items affordably can be a challenge for small business owners. Consider buying in bulk from restaurant supply stores or food co-ops, as they often have competitive pricing on natural extracts and mix-ins. Local farmers’ markets can be a great place for seasonal fruits and nuts. Online wholesalers and specialty ingredient suppliers sometimes offer discounts for small businesses, especially if you join as a member. Don’t forget to compare prices and request samples to ensure quality before committing to larger purchases.
You talked about mastering techniques for a creamy, balanced scoop. Are there any common mistakes home creators should avoid during the freezing process to prevent icy or grainy results?
Absolutely, a few common pitfalls can lead to icy or grainy ice cream. One is not chilling the base thoroughly before churning—make sure your mixture is very cold. Overfilling the machine or not churning long enough can also cause texture issues. Lastly, avoid too much water in your mix and use the right amount of sugar, as both help maintain creaminess.
You mention capturing emerging culinary trends in homemade ice cream. Could you share some practical ideas on how to infuse seasonal or unexpected flavors without access to commercial stabilizers or specialty equipment?
You can easily infuse seasonal or unexpected flavors at home by steeping fresh ingredients like herbs, spices, or citrus zest in your dairy base before churning. Roasted fruits, toasted nuts, or swirls of local honey add character. For smooth texture without stabilizers, cook a simple egg custard base or use a bit of cornstarch. Experimenting with teas, floral waters, or even savory elements like olive oil can also create unique artisan flavors.
You mentioned budgeting for quality ingredients—are there any particular components where splurging really makes a difference, versus spots where a home cook can cut costs without sacrificing flavor or texture?
Splurging on high-quality dairy and fresh eggs really pays off, as they form the base of most artisan ice creams and directly affect creaminess and flavor. Pure vanilla extract and real chocolate also make a big difference. On the other hand, you can save on mix-ins like nuts, cookies, or fruit by using store brands or what’s in season, as these typically blend in well without impacting overall quality.
After picking up the essential equipment, what would you recommend as the next key steps for a beginner looking to master the science of freezing and texture control when making artisan ice cream at home?
Once you have the essential equipment, start by experimenting with different base recipes to understand how ingredients like fat, sugar, and stabilizers affect texture and freeze rate. Try making small batches, adjusting one variable at a time, and keep notes on results. Pay close attention to churning times and temperatures, as both influence smoothness and ice crystal size. This methodical approach will help you master the science behind perfect artisan ice cream.
As someone considering adding artisan ice cream to my small food business, can you elaborate on the differences in output quality between compressor ice cream makers and freezer bowl machines? Is the higher initial investment in a compressor model justified by the results for small batch sales?
Compressor ice cream makers chill and churn simultaneously, producing smoother, creamier textures and letting you make multiple batches back to back. Freezer bowl machines require pre-freezing, can be less consistent, and limit batch frequency. For a small food business aiming for premium quality and flexibility, a compressor model’s higher cost is often justified by superior results and efficiency, especially if you plan to experiment with unique flavors or need to scale up production.
Could you elaborate more on how freezer bowl ice cream makers might affect the final texture compared to compressor models? I’m curious if the limitations you mentioned, like only being able to do one batch at a time, influence creaminess or consistency.
Freezer bowl ice cream makers generally freeze ice cream more slowly than compressor models, which can lead to larger ice crystals and a slightly icier texture. Compressor machines chill and churn more efficiently, producing smoother and creamier results. The single-batch limitation of freezer bowls means you can’t immediately make a second batch, but it doesn’t directly affect creaminess—it’s the freezing speed that impacts texture most.
When it comes to picking an ice cream maker, how big of a difference does a compressor model make compared to a freezer bowl machine for someone just starting out? Is it really worth the higher price if I’m mostly experimenting with flavors at home?
A compressor ice cream maker offers more convenience—it chills and freezes your mix automatically, allowing you to make back-to-back batches and experiment freely with textures. Freezer bowl machines are less expensive but require you to pre-freeze the bowl for many hours. For beginners just trying out flavors occasionally, a freezer bowl model is perfectly fine. The compressor is only really worth it if you plan to make ice cream often or want the flexibility to create several batches quickly.
The article talks about experimenting with flavors and mastering technique, but I’m not sure where to start as a beginner. Would you suggest following classic recipes first or jumping straight into trying new trendsetting flavors?
Starting with classic recipes is a great way to get comfortable with the basics of making ice cream. This approach helps you understand techniques like custard bases and churning before you experiment. Once you’re confident with the process and texture, it’ll be easier and more fun to try creating your own trendsetting flavors with mix-ins and unique ingredients.
The article mentions the importance of precise temperature control for great texture. For someone new to compressor ice cream makers, what specific settings or temperature ranges should I be paying attention to when experimenting with artisan flavors?
When using a compressor ice cream maker, aim to churn your ice cream base at temperatures between -18°C to -21°C (0°F to -6°F). This range helps achieve a smooth, scoopable texture. Most machines let you select a ‘hard’ or ‘soft’ setting—start with ‘soft’ for mix-ins or delicate flavors, and ‘hard’ for firmer, classic textures. Always pre-cool the machine if your model allows, and monitor the consistency as it churns.
I noticed the article mentions both compressor and freezer bowl ice cream makers, but I’m curious about how much of a texture difference I can expect between them if I use high-quality ingredients. Is the upgrade to a compressor model really that noticeable for someone just starting out?
Using high-quality ingredients will help you get delicious ice cream with either machine, but compressor models do offer a smoother, creamier texture because they maintain a consistent low temperature throughout churning. Freezer bowl models can sometimes produce slightly icier results, especially if the bowl isn’t fully frozen. If you’re just starting out, a freezer bowl machine can still give you excellent results, though you may notice a subtle difference in texture compared to a compressor model.
You mention that budgeting for quality ingredients is important—do you have any tips for sourcing unique or seasonal flavors without overspending at specialty stores?
To find unique or seasonal ice cream flavors affordably, check out local farmers markets for fresh, in-season produce, which is often less expensive than at specialty shops. You can also ask local grocers about overripe or surplus fruit, which can be great for ice cream and sold at a discount. For spices or extracts, try buying in small quantities from bulk bins or online stores to avoid paying premium prices for full jars.
You mention compressor ice cream makers and freezer bowl machines. For someone just getting started but wanting to experiment with trendier flavors, would you recommend saving up for a compressor model, or is a freezer bowl machine good enough to achieve a creamy texture?
A freezer bowl machine can definitely produce creamy ice cream, especially if you follow good techniques like chilling your base thoroughly. It’s a budget-friendly way to explore creative and trendy flavors as you get started. A compressor model offers more convenience and consistency, but you can achieve impressive results with a freezer bowl machine while you experiment and hone your recipes.