Introduction: Why Homemade Nut Milks Are Transforming Culinary Culture
The world of homemade nut milks is flourishing, driven by a blend of health consciousness, culinary curiosity, and the desire for fresh, customizable flavors. Store shelves are lined with almond, cashew, hazelnut, and macadamia milks, but these commercial options often contain added sugars, gums, and preservatives that can mask the natural taste and nutritional value of the original nuts. Whether you’re lactose-intolerant, vegan, or simply drawn to the idea of pure, fresh beverages, making nut milk at home offers a level of control and creativity that’s hard to match. The process is more approachable than you might think, requiring only a handful of tools, a bit of planning, and the willingness to experiment. In this detailed guide, we’ll walk you through the essential equipment, offer a deep dive into flavor customization, break down the costs, troubleshoot common mistakes, and provide expert tips for storage and shelf life. You’ll discover how to avoid gritty textures, keep your milks fresher for longer, and even repurpose leftover nut pulp for zero-waste kitchen magic. Let’s dive into the world of homemade nut milks and elevate your daily sips with both taste and craft.
Essential Tools & Equipment for Next-Level Nut Milk
Blenders: The Heart of the Operation
The quality of your blender directly impacts the creaminess and extraction of your nut milk. While high-speed blenders (such as Vitamix or Blendtec) yield the smoothest results, a sturdy mid-range blender can also do the job with a bit of extra blending time. Key features to look for:
- Power: At least 700 watts for a fine blend.
- Capacity: 1.5 liters or more is ideal for batch making.
- Easy to Clean: Removable blades or dishwasher-safe parts save time.
Straining Tools: Achieving Silky Smoothness
Nut milks require thorough straining to remove fibrous pulp. Consider these options:
- Nut Milk Bag: The gold standard. Fine mesh nylon or cotton bags designed for this purpose.
- Fine Mesh Sieve: Good for quick straining, though some grit may remain.
- Cheesecloth: Useful in a pinch; double or triple layer for best results.
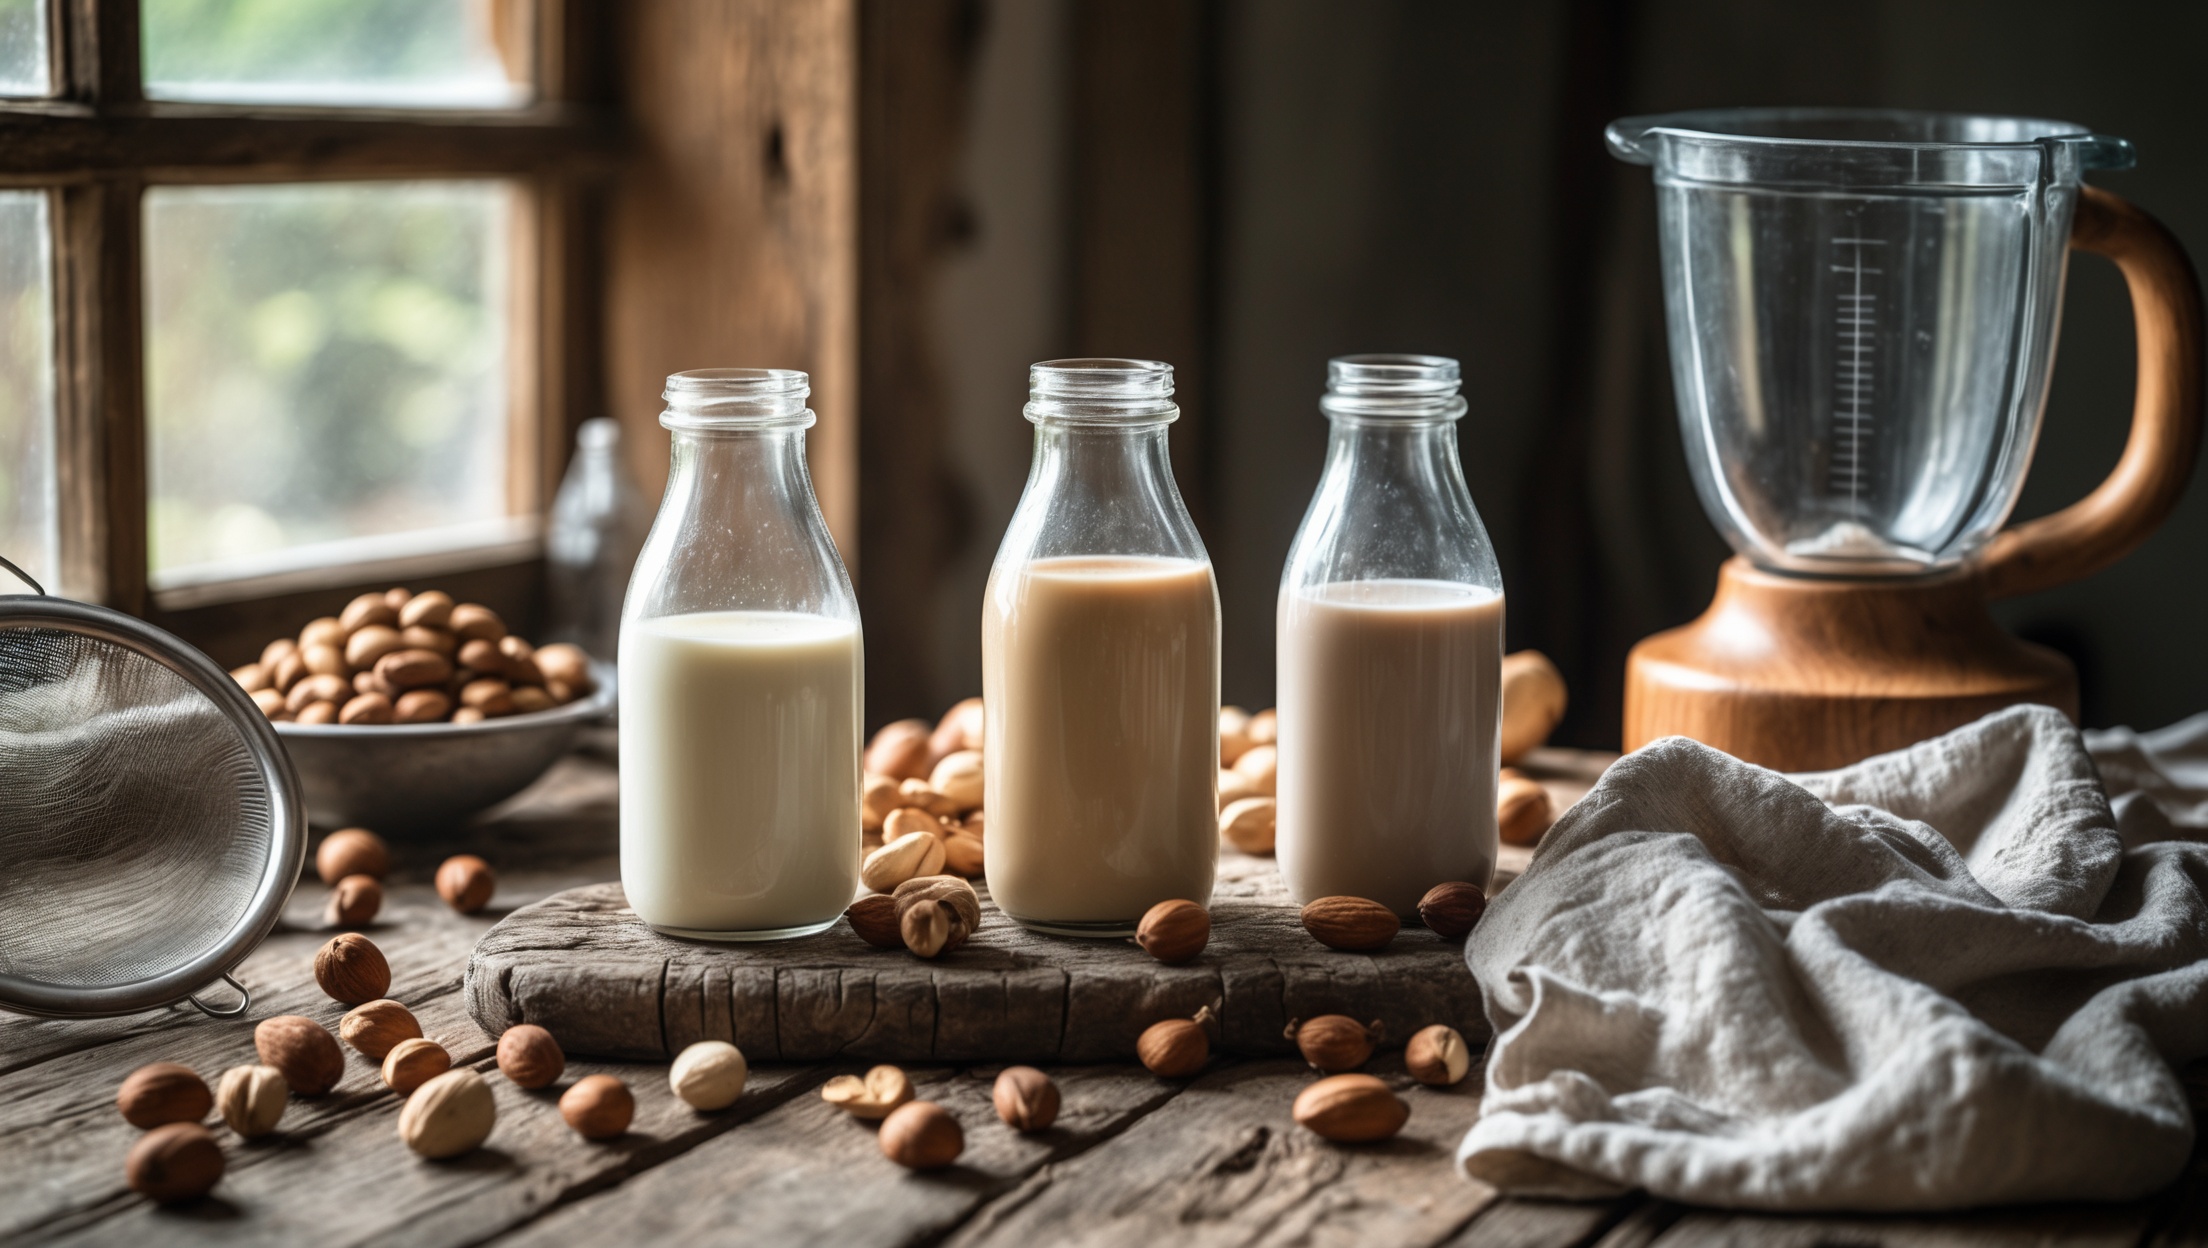
Bottles & Storage Containers
Glass bottles with tight-sealing lids are best for preserving freshness and preventing flavor absorption. Mason jars, swing-top bottles, or repurposed glass juice bottles work well. Avoid plastic containers, which can retain odors and leach chemicals.
Additional Essentials
- Soaking Bowls: Large enough to accommodate expansion as nuts absorb water.
- Measuring Cups: For accurate ratios of nuts to water.
- Funnels: Helpful for mess-free bottling.
- Spatula: To press out every last drop of milk from the pulp.
Step-by-Step: Crafting the Creamiest Nut Milk
1. Selecting and Soaking Your Nuts
Fresh, raw nuts yield the best flavor and creaminess. Common choices include almonds, cashews, hazelnuts, macadamias, and pecans. Soak nuts in filtered water for 6–12 hours. This softens them for blending and helps remove enzyme inhibitors, improving digestibility and taste. For an ultra-creamy milk, use a 1:3 nut-to-water ratio (1 cup nuts to 3 cups water).
2. Blending for Maximum Extraction
Drain and rinse soaked nuts. Add them to the blender with fresh filtered water. Blend on high for 1–2 minutes, or until the mixture appears milky and no large nut pieces remain. Taste and adjust water for thickness: less for creamier milk, more for a lighter consistency.
3. Straining for Smoothness
Pour the blended mixture through your nut milk bag (or cheesecloth/sieve) into a bowl. Squeeze and twist gently to extract all the liquid. Be patient: thorough straining ensures a silky-smooth result. Compost or save the remaining nut pulp for recipes (see below).
4. Flavoring and Enhancements
Return strained milk to the blender for flavoring. Popular options include:
- Sweeteners: Medjool dates, maple syrup, honey, or agave.
- Spices: Vanilla bean, cinnamon, cardamom, or nutmeg.
- Salt: A pinch enhances flavor and balances sweetness.
- Boosts: Cacao powder, matcha, turmeric, or even a shot of espresso for specialty milks.
Blend briefly to combine. Taste and adjust as needed.
Flavor Customization: Beyond Basic Almond Milk
Exploring Nut Varieties
- Cashew Milk: Naturally sweet, ultra-creamy, and requires no straining if blended thoroughly.
- Hazelnut Milk: Distinctive, nutty aroma—pairs well with chocolate or coffee flavors.
- Pecan Milk: Deep, buttery flavor perfect for autumn-inspired drinks.
- Macadamia Milk: Silky, subtle, and luxurious—great for lattes and desserts.
- Pistachio Milk: Vibrant green hue and naturally sweet profile.
Creative Flavor Infusions
- Berry Swirl: Blend in fresh or freeze-dried raspberries or strawberries.
- Golden Milk: Add turmeric, ginger, and black pepper for a spicy, anti-inflammatory boost.
- Mocha Hazelnut: Cacao and espresso powder for a coffeehouse treat.
- Orange Blossom Almond: A dash of orange blossom water for floral notes.
- Maple Pecan: Maple syrup and a touch of sea salt evoke pecan pie flavors.
Seasonal Inspirations
- Spring: Lavender almond milk, strawberry cashew milk.
- Summer: Coconut-almond, vanilla peach hazelnut.
- Autumn: Pumpkin spice cashew, cinnamon pecan.
- Winter: Chocolate peppermint almond, chai-spiced macadamia.
Cost Breakdown: Is Homemade Really Cheaper?
Ingredient Costs
- Raw nuts (per cup): Almonds ($1.20–$1.80), Cashews ($1.50–$2.50), Hazelnuts ($2.00–$3.00).
- Filtered water: Negligible if using home filtration.
- Optional flavorings: Dates ($0.50/serving), vanilla extract ($0.10/serving), spices ($0.05–$0.15/serving).
For a standard batch (1 cup nuts + 3 cups water = 1 quart milk), homemade nut milk typically costs $2–$3 per quart, depending on nut choice and flavorings. Store-bought cartons average $3–$5 per quart, often with additives and less nut content.
Equipment Investment
- Blender: $50–$400 (one-time cost).
- Nut milk bag: $6–$12 (lasts up to a year with care).
- Glass bottles: $3–$8 each (reusable).
Long-term, homemade nut milks are cost-effective, especially if you buy nuts in bulk and reuse equipment.
Storage & Shelf Life: Keeping It Fresh
Best Storage Practices
- Store nut milk in clean, airtight glass bottles or jars.
- Refrigerate immediately after bottling. Homemade nut milk lasts 3–5 days.
- Shake before each use; natural separation is normal.
Extending Shelf Life Naturally
- Add a pinch of sea salt—acts as a natural preservative.
- Use very clean equipment and hands to reduce contamination.
- Blanch nuts before soaking to reduce spoilage bacteria.
Freezing for Later Use
- Freeze in ice cube trays for smoothies or recipes.
- Thaw in the refrigerator and shake well before using.
- Some texture may change after freezing, but it’s still great for cooking or baking.
Beginner Mistakes to Avoid
- Undersoaking: Hard nuts don’t blend smoothly.
- Over-blending: Can heat the milk, leading to bitterness or separation.
- Poor straining: Leaves gritty texture—invest in a quality nut milk bag.
- Improper storage: Using plastic or not refrigerating promptly shortens shelf life.
- Ignoring shelf life: Homemade nut milk spoils quickly—date your bottles!
Zero-Waste Tips: Using Up Every Bit
Repurposing Nut Pulp
- Bake: Add to muffins, breads, or cookies for extra fiber.
- Granola: Mix with oats, seeds, and honey, then bake.
- Crackers: Combine with flaxseed, herbs, and bake into savory snacks.
- Energy Balls: Blend with dates, cocoa, and nut butter for quick bites.
- Compost: If you can’t use it, compost the pulp to enrich your soil.
Expert Tips & Tricks for Next-Level Results
- Blanch almonds: For a whiter, sweeter milk, blanch and peel almonds after soaking.
- Double strain: For ultra-smooth milk, strain twice through a fine mesh sieve after the nut milk bag.
- Warm infusions: Gently heat milk with spices (like cinnamon sticks or cardamom pods) for 5 minutes, then cool and strain for deeply infused flavor.
- Blend with coconut: Add unsweetened coconut flakes for a richer, tropical flavor.
Conclusion: Elevate Your Culinary Rituals with Homemade Nut Milks
Homemade nut milks are more than just a dairy alternative—they’re an exploration of taste, craft, and mindful culinary culture. With a modest investment in quality tools, a bit of practice, and a willingness to experiment, you can create nut milks tailored exactly to your preferences: creamier, fresher, purer, and free from unwanted additives. The process encourages a deeper connection to your ingredients, invites seasonal creativity, and fosters a zero-waste ethos when you repurpose nut pulp. Perhaps most importantly, each batch is an invitation to slow down and savor the ritual—soaking, blending, straining, and sipping. As you grow more confident, you’ll discover your favorite nut varieties, signature flavor infusions, and clever uses for every part of the process. Whether enjoyed by the glass, poured over granola, frothed in coffee, or used in baking, homemade nut milks will elevate your kitchen and nourish your lifestyle. Take the plunge and transform this simple craft into a delicious, sustainable staple of your culinary repertoire.