Introduction: The Art and Science of Infusing Oils
Flavored oils are the unsung heroes of the culinary world, quietly elevating salads, pastas, roasted vegetables, and even desserts with subtle, aromatic complexity. Whether drizzled over burrata, brushed on grilled bread, or used as a marinade base, a well-crafted infused oil can turn simple ingredients into memorable dishes. Yet, making flavored oils at home is not just about tossing herbs into a bottle; it’s a beautiful intersection of flavor chemistry, kitchen craft, and food safety. Many home cooks shy away from DIY infusions, worried about the risk of spoilage or unsure which tools and methods yield the best (and safest) results. This comprehensive guide demystifies the process, equipping you with the practical know-how to confidently create your own gourmet infusions. We’ll cover the essential equipment for precise infusing, walk you through step-by-step techniques for both cold and heated methods, address crucial safety practices to avoid botulism, and inspire you with creative, seasonally driven flavor combinations. Whether you’re a culinary enthusiast looking to elevate your pantry or a seasoned chef seeking to refine your technique, this deep dive into oil infusions will unlock a world of flavor possibilities—safely and deliciously.
Understanding Oil Infusions: Flavor, Function, and Food Safety
What Is an Oil Infusion?
Oil infusions result when aromatic compounds from herbs, spices, citrus, or other flavorful ingredients are transferred into a carrier oil—most often extra-virgin olive oil, but also grapeseed, sunflower, or neutral oils. The process extracts fat-soluble flavors, creating oils that are both versatile and intensely aromatic. Infused oils can be used for finishing, dipping, marinating, or even as a base for vinaigrettes.
Why Infuse Your Own Oils?
- Customization: Tailor flavors to your palate or menu.
- Freshness: Control the quality and seasonality of ingredients.
- Cost: Homemade infusions are more economical than gourmet store-bought options.
- Gifting: Beautifully bottled oils make artisan gifts.
Safety First: The Critical Risks of Homemade Oil Infusions
Homemade oil infusions pose a unique food safety risk: botulism. The spores of Clostridium botulinum can thrive in the airless, fatty environment of flavored oils, particularly when fresh herbs, garlic, or other water-rich ingredients are used. Symptoms of botulism are rare but serious. Commercial oils are acidified or pasteurized for safety—home infusions require careful handling and strict adherence to best practices.
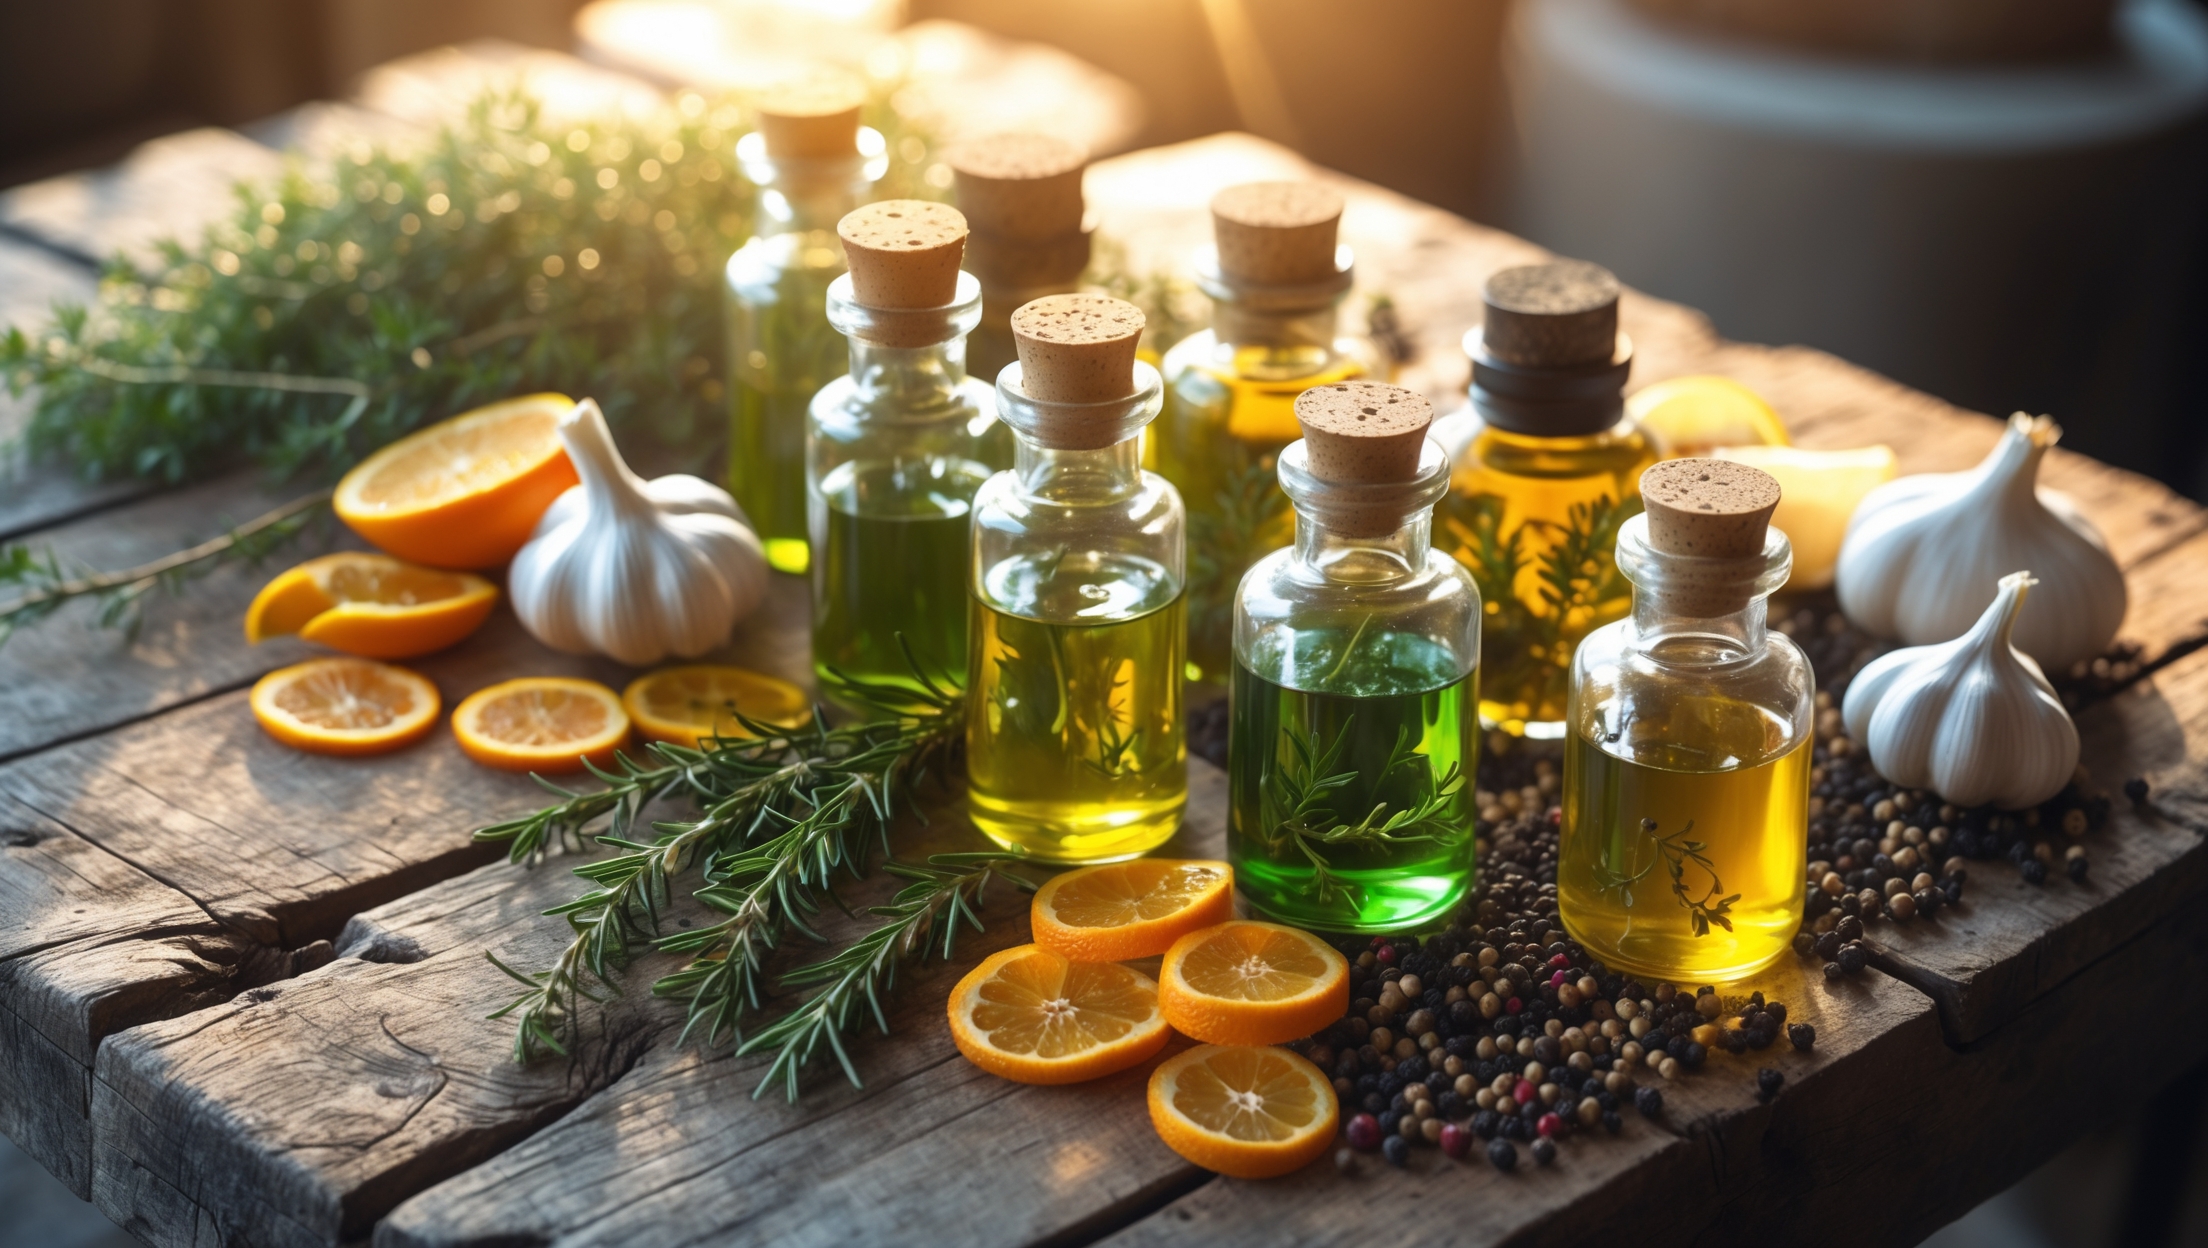
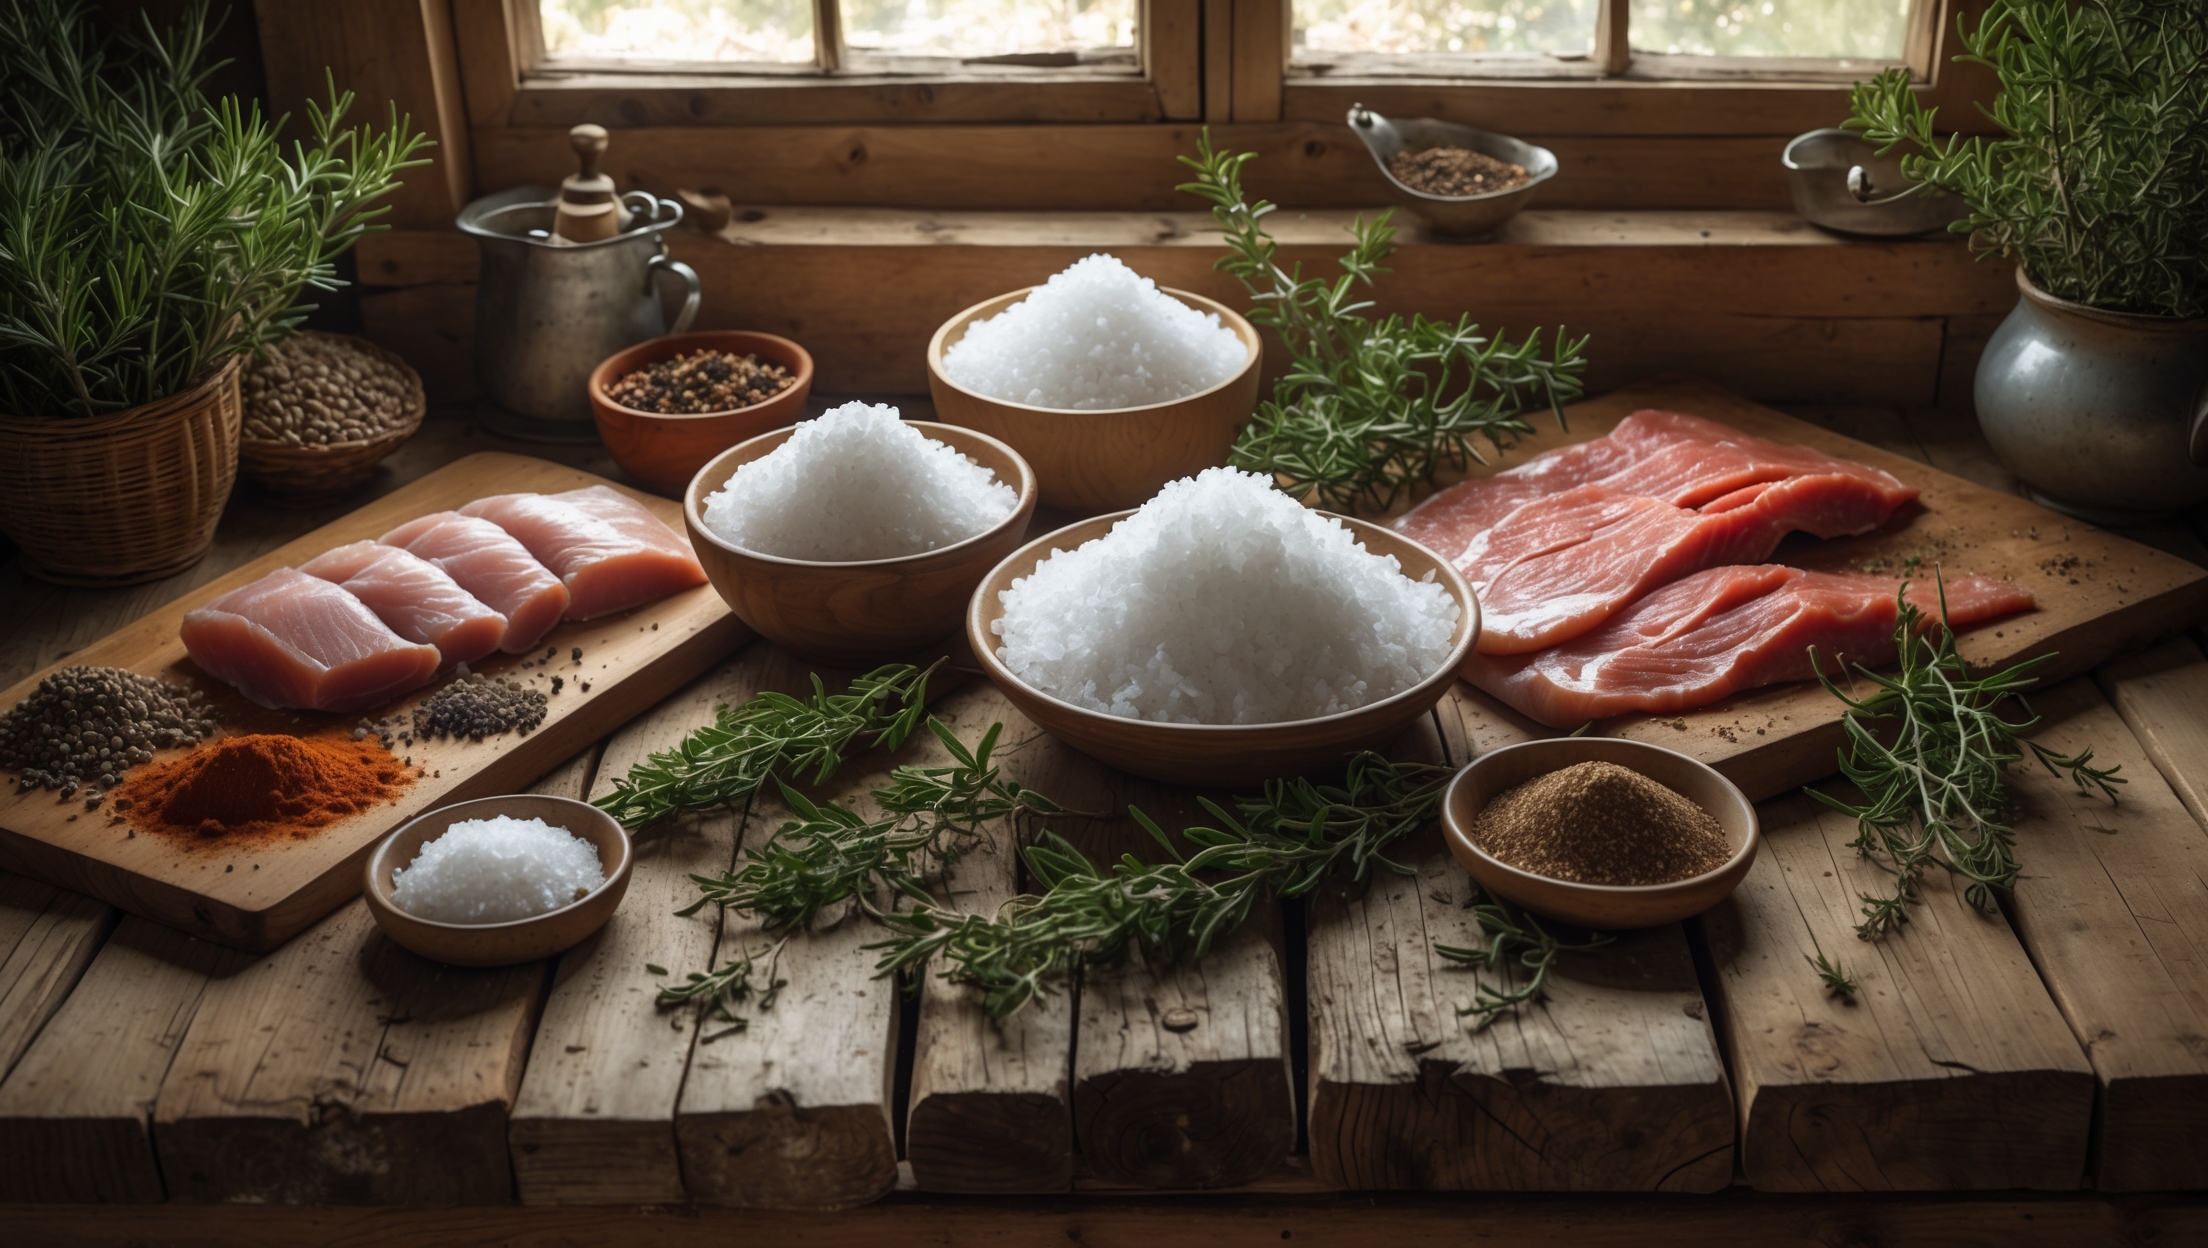
Essential Tools & Equipment for Safe, Flavorful Oil Infusions
1. The Right Bottles & Storage Containers
- Sterilized Glass Bottles: Always use sterilized bottles with airtight seals. Swing-top or screw-cap bottles are ideal. Avoid plastic, which can leach flavors or chemicals.
- Dark Glass: Dark or amber bottles protect oil from light, preserving flavor and slowing spoilage.
- Labels: Properly label each batch with the infusion date and ingredients.
2. High-Quality Carrier Oils
- Extra-Virgin Olive Oil (EVOO): Robust, peppery, and ideal for fresh herbs or garlic.
- Neutral Oils (Grapeseed, Sunflower, Canola): Allow delicate flavors to shine through.
- Sesame or Nut Oils: For specialty infusions, though these spoil faster.
3. Infusing Vessels & Equipment
- Small Saucepan or Double Boiler: For heated infusions.
- Thermometer: Essential for maintaining safe temperatures and preventing overheating.
- Fine Mesh Strainer or Cheesecloth: To filter out solids and achieve a clear oil.
- Funnel: For mess-free bottling.
- Mortar and Pestle or Spice Grinder: To bruise or crush aromatics and release maximum flavor.
4. Safety Supplies
- Acidifying Agent (Optional): For certain infusions, acidification (using citric acid or vinegar) can improve safety, though it may alter flavor.
- Disposable Gloves: For handling spicy ingredients.
Choosing Ingredients: Fresh, Dried, and Beyond
Fresh vs. Dried: What’s Best?
- Dried Herbs & Spices: Lower water content means lower risk of spoilage. Ideal for beginners (rosemary, thyme, chili flakes, peppercorns).
- Fresh Ingredients: Offer brighter, more complex flavors but require strict safety protocols. Blanching and thorough drying are essential.
Flavor Pairing Inspiration
- Herbs: Basil, rosemary, thyme, tarragon, sage, oregano, dill.
- Spices: Crushed red pepper, black or pink peppercorns, coriander, fennel seeds.
- Citrus: Lemon, lime, or orange zest—always zest only, avoiding bitter pith.
- Alliums: Garlic, shallot (blanch and thoroughly dry before use).
- Specialty: Dried mushrooms, sun-dried tomatoes, ginger, lemongrass.
Step-by-Step: Cold vs. Heated Oil Infusion Methods
Cold Infusion Method
- Best For: Dried herbs, spices, citrus zest.
- Flavor Profile: Subtle, nuanced, ideal for delicate ingredients.
How-To:
- Prepare Aromatics: Bruise or crush dried herbs/spices to release oils.
- Bottle: Add aromatics to a sterilized glass bottle (1–2 tablespoons per cup of oil).
- Add Oil: Pour in oil, leaving a little headspace. Cap tightly.
- Infuse: Store in a cool, dark place. Shake daily. Taste after 3–7 days.
- Strain: Once flavor is at desired strength, strain out solids using a fine mesh or cheesecloth. Rebottle in a clean, dry, sterilized bottle.
- Label and Refrigerate: Label with date and ingredients. Refrigerate for safety, especially with any risk of moisture.
Heated (Quick) Infusion Method
- Best For: Fresh herbs, garlic, robust spices.
- Flavor Profile: Intense, immediate, deeper extraction.
How-To:
- Prepare Aromatics: Wash, thoroughly dry, and (if using garlic/herbs) blanch for 30 seconds in boiling water, then shock in ice water and dry again.
- Combine with Oil: Place aromatics and oil in a small saucepan. Use a ratio of 1/2 cup aromatics to 1 cup oil for a pronounced flavor.
- Heat Gently: Over a low flame, bring oil to 180°F (82°C)—never allow to smoke. Hold temperature for 10–30 minutes, swirling occasionally.
- Cool and Strain: Remove from heat. Let cool, then strain through cheesecloth into a sterilized bottle.
- Label and Refrigerate: Clearly label. Refrigerate and use within 7–10 days.
Flavor Inspiration: Seasonal Infusion Ideas
- Spring: Lemon-thyme oil, chive blossom oil, tarragon-citrus oil.
- Summer: Basil-garlic oil, chili-lime oil, rosemary-peppercorn oil.
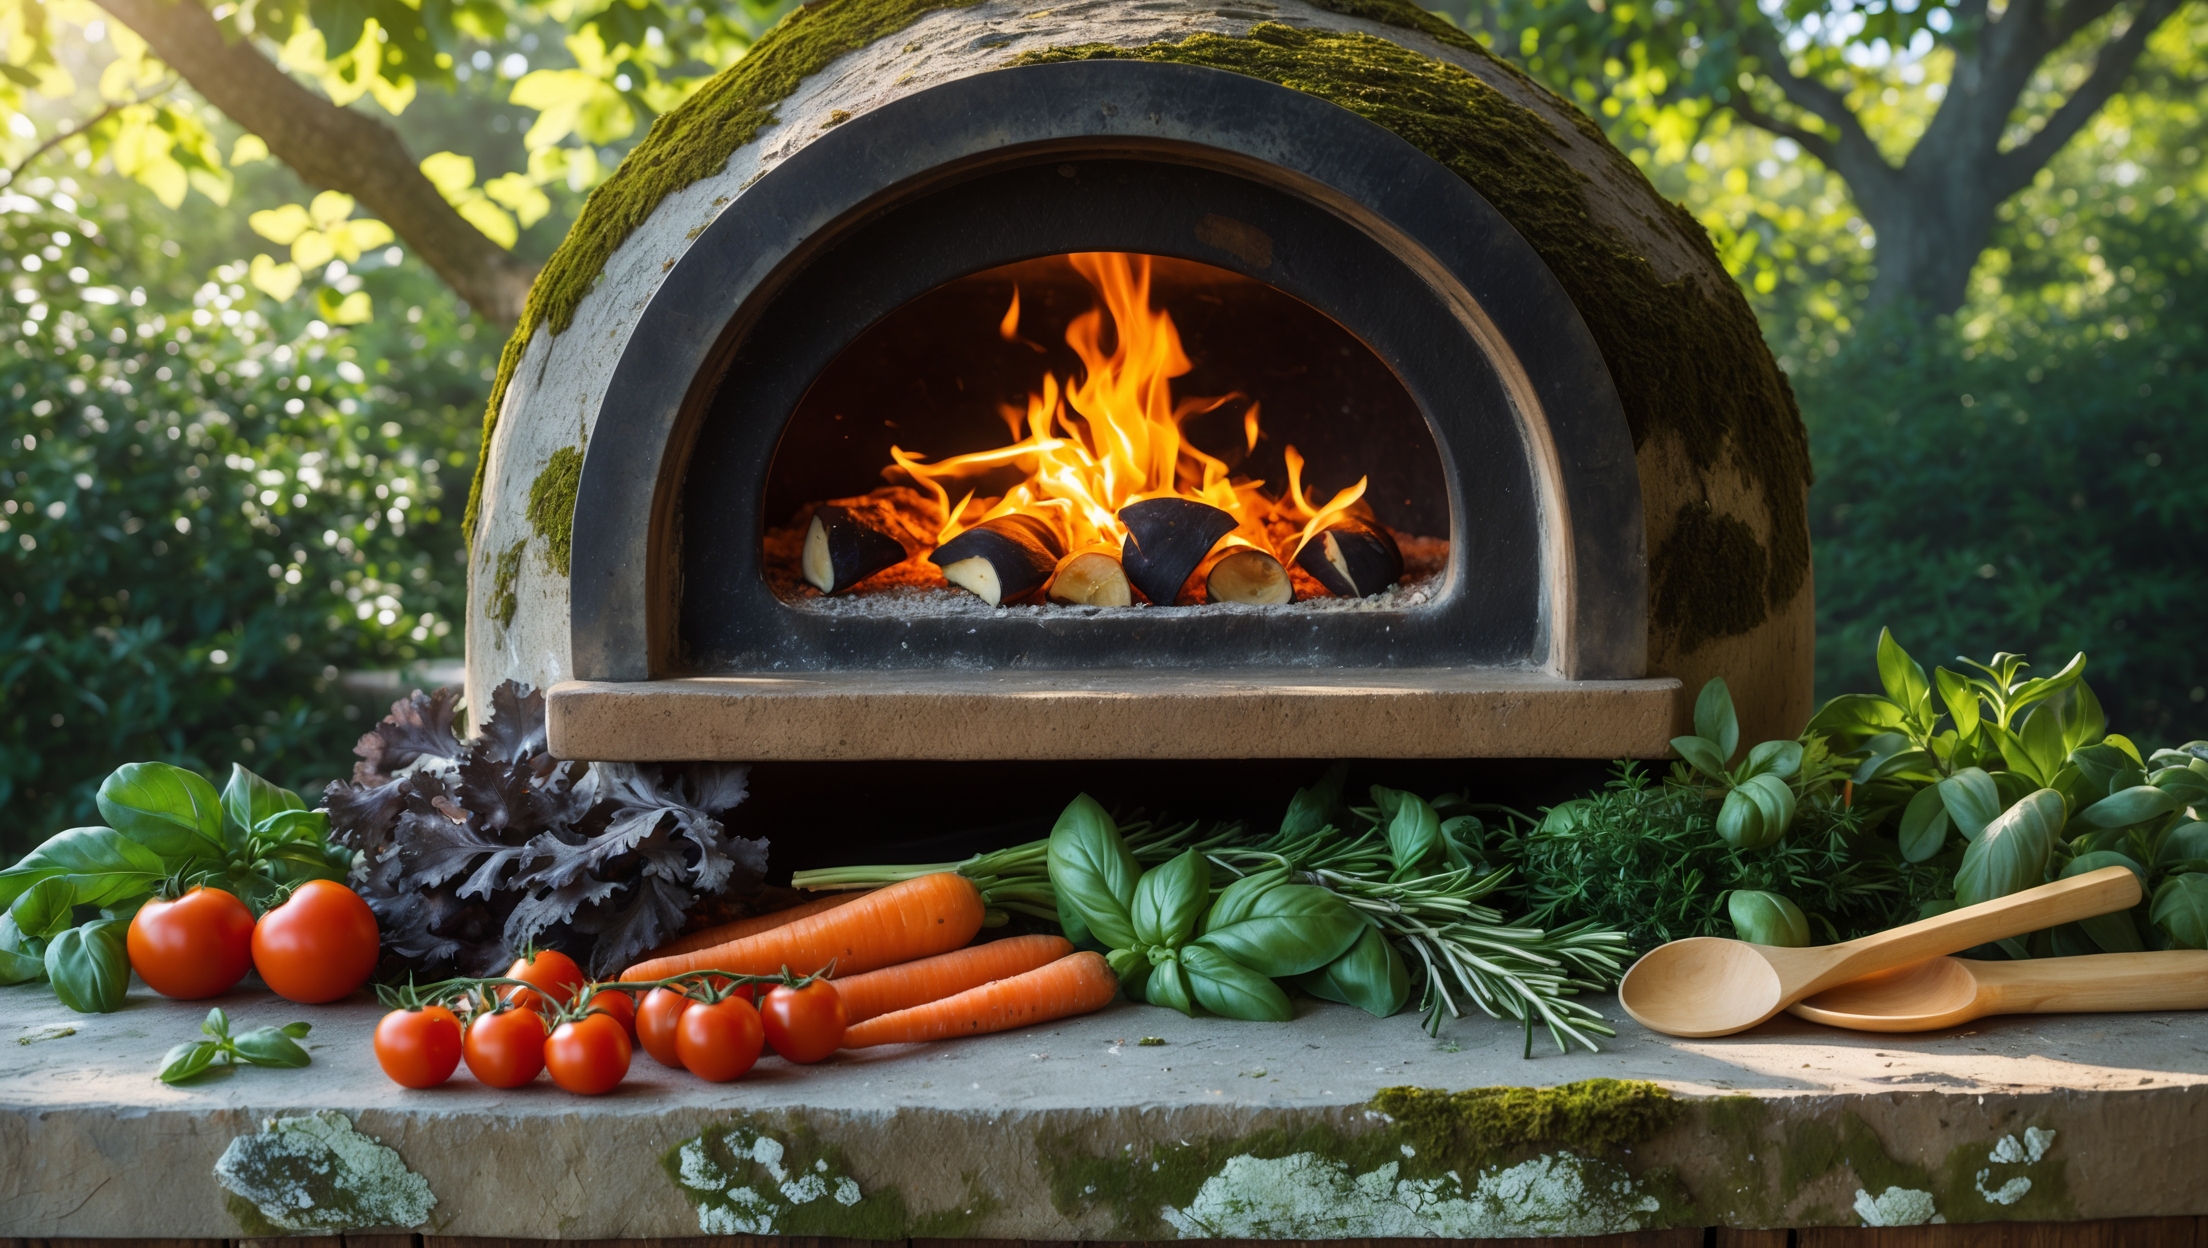
- Autumn: Sage-brown butter oil (for finishing), roasted garlic oil, smoked paprika oil.
- Winter: Fennel-orange oil, black pepper and bay leaf oil, ginger-sesame oil (for Asian dishes).
Safety Checklist: Best Practices for Safe Homemade Infused Oils
- Always use thoroughly dried or blanched ingredients to minimize water activity.
- Sterilize all bottles and utensils before use.
- Strain out all solids after infusion—do not leave herbs, garlic, or spices in the oil for storage.
- Label each bottle with date and ingredients.
- Refrigerate all homemade infused oils, regardless of method.
- Use within 7–10 days, or up to one month for dried-only infusions stored in the fridge.
- If oil becomes cloudy, fizzy, or develops off odors, discard immediately.
Cost Breakdown: DIY Infused Oils vs. Store-Bought
Ingredient Costs (per 250ml/8oz bottle):
- Quality Olive Oil: $3–$5
- Herbs/Spices: $0.50–$1.00
- Bottle & Label: $1–$2 (reusable for future batches)
- Total DIY Cost: $5–$8 per bottle
Average Store-Bought Infused Oil:
- Specialty Brand (8oz): $12–$18
- Gourmet Packaging: Often includes additional cost for branding/packaging, not ingredient quality.
DIY wins on customization, freshness, and value—especially if you reuse bottles and grow your own herbs.
Maintenance Best Practices: Storing and Using Infused Oils
- Store infused oils in the refrigerator, not at room temperature.
- Bring to room temperature before drizzling for optimal flavor and pourability.
- Wipe bottle rims clean after each use to prevent contamination.
- Rotate infusions—make small batches more frequently rather than large quantities.
- Never top up old oil with fresh oil; make a new batch instead.
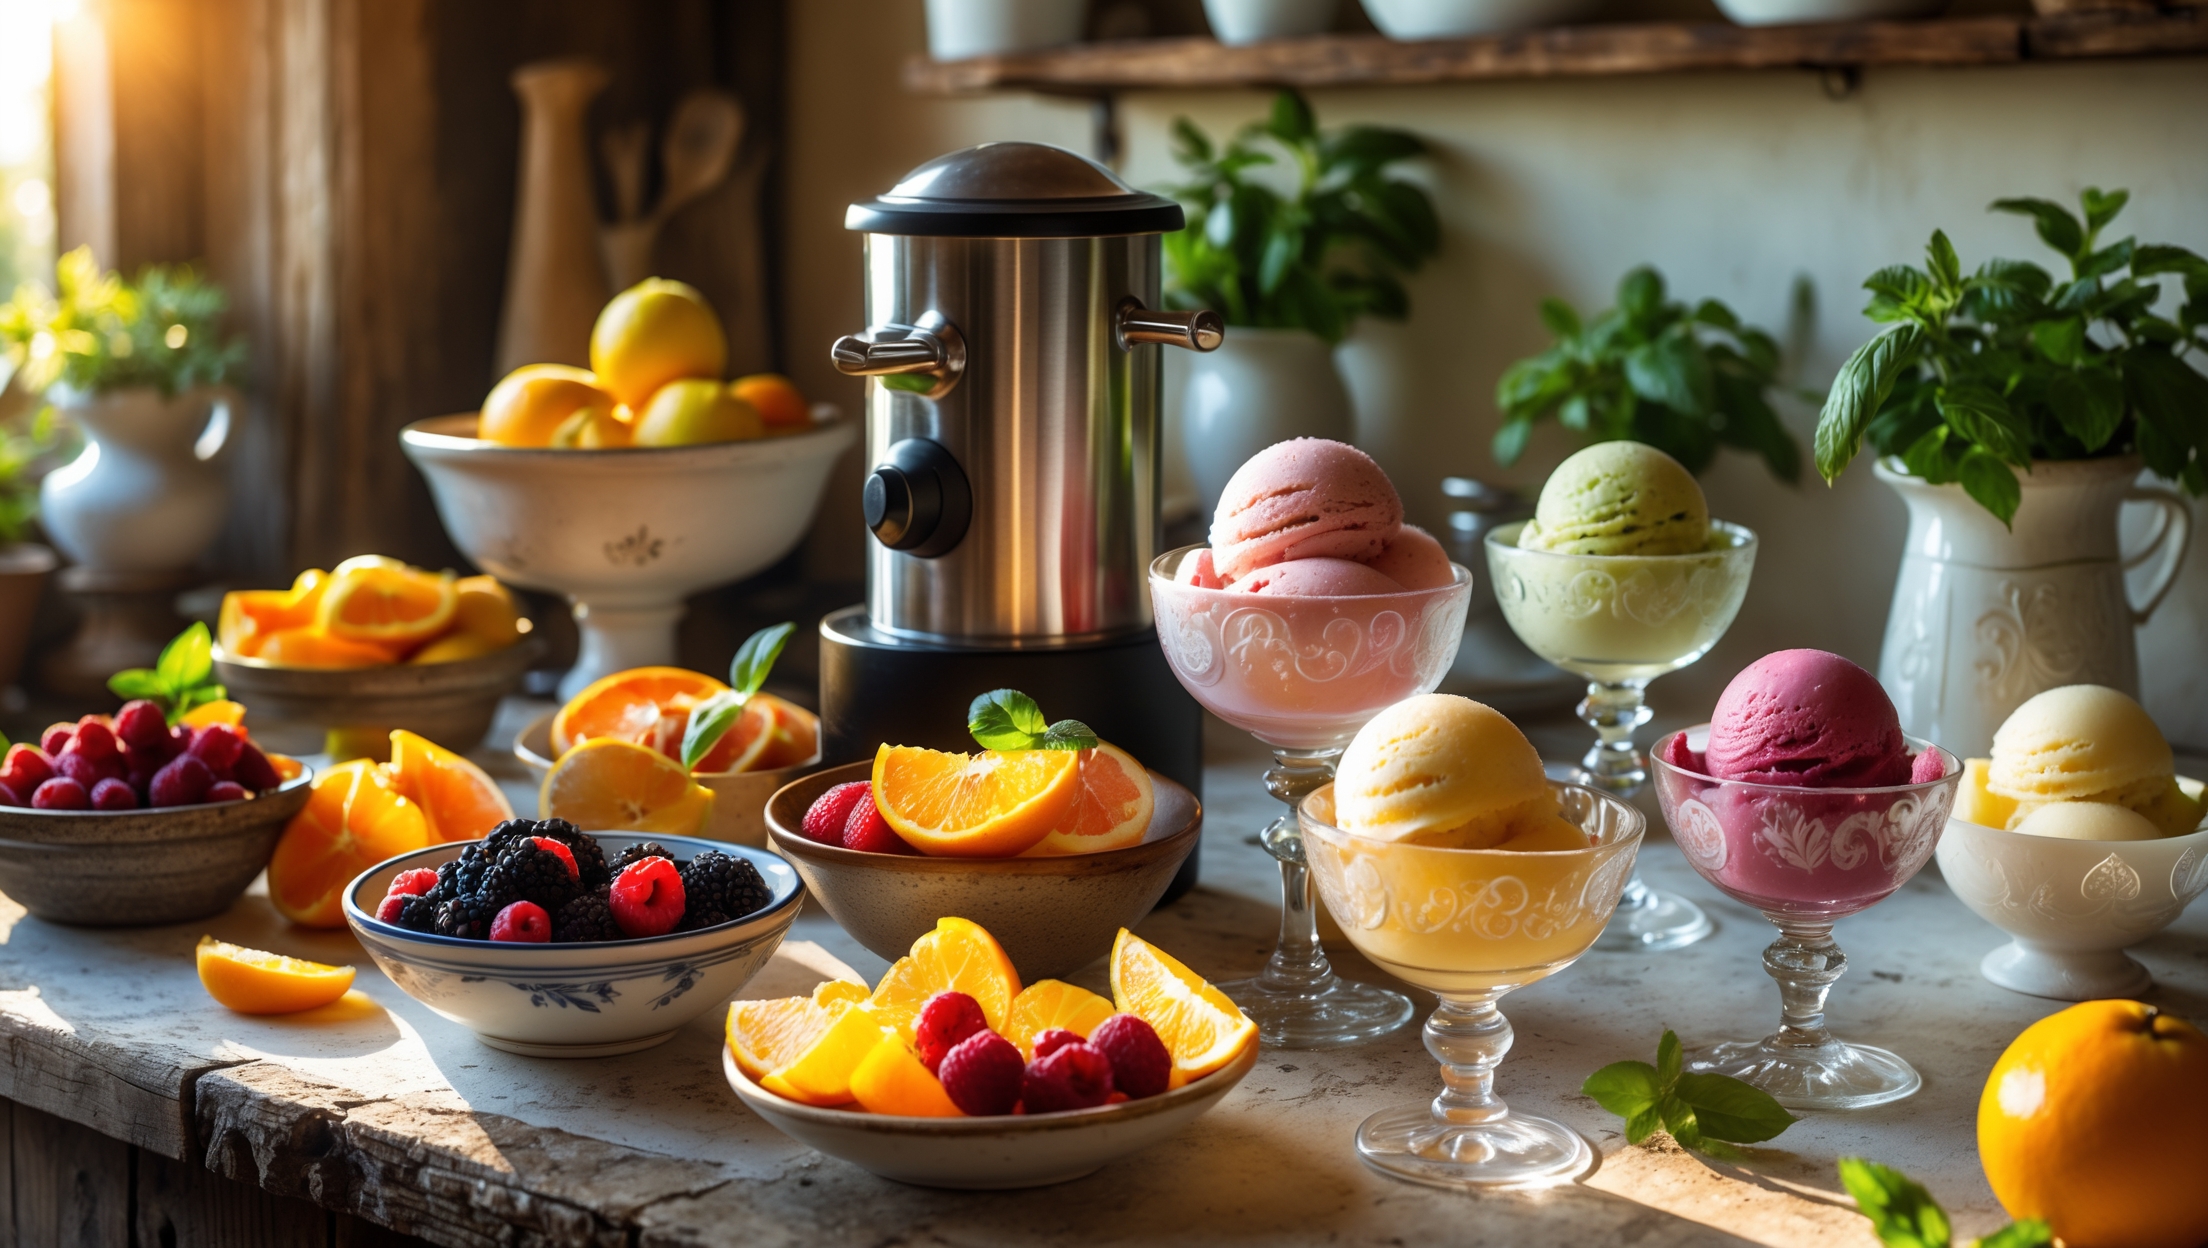
Culinary Applications: Creative Uses for Your Infused Oils
- Finishing: Drizzle rosemary oil over roasted potatoes, chili oil on pizza, or basil oil on burrata.
- Marinades: Use garlic or ginger oil as a base for marinating meats, tofu, or vegetables.
- Salad Dressings: Combine citrus- or herb-infused oil with vinegar and mustard for elevated vinaigrettes.
- Baking: Brush sage or tarragon oil atop focaccia or savory breads.
- Gifting: Present in a decorative bottle with a handwritten flavor note and use-by date.
Common Myths About Oil Infusions—Debunked
- “Oil Preserves Anything Forever”: False. Oil protects from air but does not inhibit botulism. Safety protocols are essential.
- “Store on the Counter Like in Fancy Restaurants”: Commercial oils are acidified or pasteurized. Homemade versions must be refrigerated.
- “Leaving Garlic in Oil Adds More Flavor Over Time”: It also increases the risk of botulinum toxin. Always strain out solids.
Conclusion: Elevate Your Kitchen with Safe, Flavorful Infused Oils
Infusing oils at home is more than a trend—it’s a creative, rewarding way to personalize your pantry and express culinary artistry. With the right tools, a solid grasp of safety fundamentals, and a willingness to experiment with flavors, you can craft oils that transform everyday cooking into memorable experiences. The process demystifies the science behind flavor extraction and teaches respect for food safety, blending the best of tradition and innovation. Homemade infused oils are fresher, more vibrant, and more cost-effective than anything from a store shelf, allowing you to tailor every bottle to your taste and the season’s bounty.
Remember, the key to success is precision: always use clean, dry equipment; follow recommended infusion times and temperatures; and label and refrigerate every batch. Embrace small-batch experimentation—try a lemon-zest oil in spring, a chili-lime oil for summer grilling, or a sage-garlic oil for autumn roasts. Each bottle is a snapshot of your culinary creativity and care. Whether gifting to friends, adding a gourmet touch to weeknight dinners, or exploring new flavor territories, your homemade infused oils will become a signature element of your kitchen repertoire. Approach each batch with curiosity, and let safety and quality guide you. Happy infusing!
I saw you mention both cold and heated infusion methods. In your experience, does one method extract flavor better than the other, especially when using heartier ingredients like rosemary or chili? Are there certain herbs or spices you would always recommend infusing with heat for maximum effect?
When working with tougher ingredients like rosemary or chili, heated infusion generally draws out their flavors more effectively and quickly than cold infusion. Heat helps break down the plant material and release essential oils. For woody herbs (rosemary, thyme) and whole spices (peppercorns, cloves), I’d definitely recommend the heated method. More delicate herbs, like basil or mint, tend to do better with cold infusion to preserve their fresh, bright notes.
If I want to experiment with seasonal ingredients for oil infusions, is there a recommended way to balance flavors so that one doesn’t overpower the rest? Also, what’s a realistic timeline for how long homemade infused oils stay fresh?
When experimenting with seasonal ingredients for oil infusions, start by using small amounts of stronger flavors and gradually increase to taste, allowing milder ingredients a chance to shine. Taste frequently as the infusion develops. For freshness, homemade infused oils typically last 1 to 2 weeks in the refrigerator. Always watch for cloudiness or unusual smells, and discard if you notice any signs of spoilage.
I noticed you talked about using both cold and heated methods for infusing oils. Is there a noticeable difference in flavor between the two, and are certain ingredients better with one method over the other?
Yes, there’s a noticeable difference between cold and heated oil infusion methods. Cold infusion tends to yield subtler, fresher flavors and is great for delicate herbs like basil or mint, which can lose their aroma with heat. Heated infusion extracts flavors more quickly and works well for sturdy ingredients like garlic, rosemary, or dried spices. Choosing the right method depends on both the ingredient and the intensity of flavor you want.
I want to try making infused oils but I’m on a college budget. Are there certain carrier oils or herbs and spices that work best for affordable, high-impact infusions? Any tips for maximizing flavor without spending a ton on fancy ingredients?
You can absolutely make delicious infused oils on a budget. Use affordable carrier oils like canola, sunflower, or light olive oil—they work well and have neutral flavors. For high-impact infusions, try garlic, dried chili flakes, rosemary, or thyme, as these are inexpensive and pack a punch. To boost flavor, lightly crush herbs or spices before infusing and let the mixture steep longer. Always strain well and store your infused oil in a clean, airtight container.
You mentioned food safety concerns like botulism with homemade oil infusions. What are the most important safety steps I should follow if my kids want to help out, and how long can a homemade oil safely last in the fridge?
When making infused oils with kids, always start by washing hands thoroughly and using clean, dry utensils and jars. Heat the oil to at least 180°F before pouring it over the ingredients to help kill bacteria. Strain out herbs or garlic after infusing, then refrigerate the oil right away. Homemade infused oils should be used within one week when stored in the fridge to minimize any risk.
You mention using different carrier oils like extra-virgin olive oil, grapeseed, or sunflower. Are there big differences in cost or shelf life between these options, and how should a small business decide which oil to use for their signature infusions?
Extra-virgin olive oil is usually more expensive and has a stronger flavor, which can complement some infusions but might overshadow delicate ones. Grapeseed and sunflower oils are milder, typically less costly, and offer a neutral base. In terms of shelf life, grapeseed and sunflower tend to last longer than olive oil. For a small business, consider the flavor profile you want, your budget, and how quickly you’ll use the oil. Testing small batches with each type can help you find the best fit for your signature infusions.
Could you elaborate on which specific kitchen equipment you consider essential for ensuring both precise infusion and food safety, especially when it comes to preventing botulism? I want to make sure I’m not missing any critical tools before I get started.
To ensure both precise infusion and food safety, especially to prevent botulism, you’ll need a reliable food thermometer to monitor oil temperatures (keeping infusions above 180°F helps minimize risks). Use clean, sterilized glass jars or bottles for storage, and always strain infusions with a fine-mesh sieve or cheesecloth. A vacuum sealer or sous vide setup is also very helpful for precise temperature control. Always refrigerate infused oils and use them within a week to reduce any risk.
For someone just starting out, what would you consider the most essential tools from your list that are actually worth investing in, especially if I’m on a tight kitchen budget? I’m curious if any tools can be skipped or substituted.
If you’re just getting started and want to keep costs low, focus on a small saucepan, a fine mesh strainer or cheesecloth, and some clean glass jars or bottles for storing your infused oil. While a thermometer is useful, you can often manage without it if you keep the heat low and watch closely. Skip specialty infusers or fancy dispensers until you get more comfortable.
You mentioned the risk of botulism when making infused oils. If I’m using fresh herbs from my garden, are there any extra steps I should take to reduce this risk, or is drying the herbs first enough?
Drying your herbs before infusing is a key step to reduce the risk of botulism because it removes much of the moisture where bacteria can thrive. For extra safety, make sure your herbs are completely dry—not just wilted. Store your finished oils in the refrigerator and use them within a week or two. If you want a longer shelf life, consider acidifying the herbs with vinegar first, or stick to dried ingredients only.
For someone just starting out with limited kitchen equipment, could you recommend the essential tools that actually make the biggest difference for safety and quality in homemade oil infusions, versus items that are more about convenience or precision?
For beginners, the most important tools for safe and high-quality oil infusions are a heavy-bottomed saucepan or small pot for even heating, a food thermometer to monitor oil temperature and prevent overheating, and a fine mesh strainer or cheesecloth for filtering. Glass jars with tight lids are also essential for storing infused oils. Items like immersion blenders, vacuum sealers, or fancy funnels add convenience or precision but aren’t necessary to get started safely.
After reading about the importance of safety practices to avoid spoilage, I wondered how long homemade infused oils typically stay fresh, and what signs indicate they should be discarded. Is refrigeration always necessary, or are there infusions that can be safely kept at room temperature?
Homemade infused oils generally stay fresh for up to two weeks when refrigerated. Refrigeration is highly recommended to slow bacterial growth, especially when infusing with fresh ingredients like herbs, garlic, or chili. Signs that oil should be discarded include off smells, cloudiness, or mold. Only oils infused with thoroughly dried ingredients and no moisture may be kept at room temperature, but even then, refrigeration is safest for home infusions.
I noticed you mention both cold and heated methods for making infused oils. Is there a big difference in flavor or shelf life between the two? I am a beginner and want to pick the safer and easier option for my first try.
Cold infusion tends to create milder flavors and generally takes longer, but it’s easier and a bit safer for beginners since there’s less risk of overheating or burning ingredients. Heated infusion gives a stronger, faster result but requires close attention. For shelf life, both should be stored in the fridge and used within a week or two to avoid spoilage. For your first try, cold infusion is a simple and safe way to start.
You mentioned food safety and specifically botulism, which has always made me nervous about making herb-infused oils. What are the key signs that an infused oil might have spoiled, and do you have any foolproof storage tips to maximize safety?
Infused oils can spoil if not handled properly. Key signs of spoilage include off smells, cloudiness, bubbling, or any unusual discoloration. To maximize safety, always refrigerate your infused oils, use only thoroughly dried herbs, and consume them within a week or two. Never store homemade infused oils at room temperature, and discard any oil that looks or smells odd.
I like the idea of customizing flavors, but does the type of oil you use (like olive versus grapeseed) make a big difference in the shelf life or safety of the infusion? If I’m on a budget, is there a best value oil you’d recommend for beginners trying this at home?
Yes, the type of oil you use does affect both shelf life and safety. Olive oil has a stronger flavor and can go rancid a bit quicker than neutral oils like grapeseed or canola. For budget-friendly options, consider canola or sunflower oil—they’re mild in taste, affordable, and have a longer shelf life. Always refrigerate your infusions and use them within two weeks for safety.
I’m interested in making infused oils to use at my cafe, but I’m a bit worried about the food safety aspect you mentioned, especially botulism risks. Could you elaborate on how long homemade infused oils stay safe to use and what steps I should take to prevent spoilage?
Homemade infused oils are safest when kept in the refrigerator and used within one week. To prevent botulism and spoilage, always use clean, dry equipment and thoroughly dry any herbs or ingredients before infusing. Avoid adding fresh garlic or raw, moist ingredients, as moisture increases risk. If you want longer shelf life, consider acidifying ingredients with vinegar or only using dried aromatics. Always discard oils that look cloudy, smell off, or show signs of mold.
You mention extra-virgin olive oil, grapeseed, and sunflower oil as options for infusions. In terms of flavor and shelf life, have you found that one oil performs better than the others for beginners who just want to make small, affordable batches at home?
For beginners making small, affordable batches, grapeseed oil is a great choice. It has a neutral flavor, letting your infusions shine, and a relatively long shelf life compared to extra-virgin olive oil. Olive oil adds its own bold flavor but can go rancid faster. Sunflower oil is mild and also good for infusing, but grapeseed tends to be slightly more stable and budget-friendly.
You mentioned both cold and heated methods for making infused oils. Is one method generally safer or better for beginners, or does it depend on the type of ingredients I’m using for the infusion?
Heated methods are usually quicker but require careful temperature control to avoid overheating or burning both the oil and the ingredients. Cold infusion is safer for beginners, as it’s a gentler process and reduces the risk of spoilage from overheating, especially when using delicate herbs or spices. However, for ingredients with a higher risk of bacterial growth, like fresh garlic, it’s best to use the heated method and refrigerate the finished oil.
I noticed you mentioned both cold and heated methods for infusing oils at home. Could you explain which method is better for preserving the flavor of delicate herbs, and are there any different safety concerns with each approach?
For delicate herbs like basil or cilantro, the cold infusion method is usually best for preserving their fresh, subtle flavors, since heat can cause these herbs to lose their brightness or even turn bitter. However, cold infusions take longer—often a week or more. The heated method works faster but is better suited to sturdier herbs. Also, with heated infusions, always keep temperatures below 180°F to reduce the risk of bacteria growth and prevent the oil from overheating.
The article mentions both cold and heated methods for infusing oils. Could you elaborate on how the flavor or safety outcomes differ between those two techniques? I’m trying to decide which method might be best for a beginner.
Cold infusion gently steeps ingredients in oil over days or weeks, preserving delicate flavors but taking longer, and sometimes carrying a higher risk of bacteria, especially with fresh herbs or garlic. Heated infusion speeds up the process and can create deeper, more robust flavors, while also reducing the risk of harmful bacteria. For beginners, heated infusion is often safer and more reliable, especially if you plan to store the oil for more than a few days.
If I only have basic kitchen tools like a saucepan and a strainer, can I still follow these techniques for making infused oils, or would I need to invest in more specialized equipment to do it safely?
You can definitely make infused oils at home with just a saucepan and a strainer. These basic tools are all you need to gently heat your oil and strain out the solids afterward. Just be sure to monitor the temperature and follow food safety guidelines, especially for fresh ingredients, to avoid any risk of spoilage.
In the section about using different carrier oils like olive, grapeseed, or sunflower, do certain oils work better with heated versus cold infusion methods? I want to find the best process for both flavor and shelf life.
Heated infusion works especially well with olive and grapeseed oils, as their flavors hold up to gentle heat and they safely extract flavors from herbs and spices. Sunflower oil is also stable with heat, but its neutral taste suits cold infusion if you want delicate flavors. Generally, heated infusions yield faster, stronger flavors but may reduce shelf life, while cold infusions take longer and preserve freshness a bit more. For best results, always strain well and store your infused oils in the fridge.
You talk about both cold and heated infusion methods in the article. Is there a big difference in the final flavor or shelf life depending on which method I use, and is one safer than the other for beginners?
There are some key differences between cold and heated infusion methods. Heated infusion generally produces a stronger, more immediate flavor and can be a bit safer since the heat helps kill bacteria, making the oil less likely to spoil quickly. Cold infusion gives subtler flavors and takes longer, but it may have a shorter shelf life if moisture or fresh ingredients are used, increasing spoilage risk. For beginners, heated infusion is often safer and more reliable.
I noticed you emphasized food safety and botulism as a concern with homemade oil infusions. Is there a specific type of equipment or process that minimizes this risk if you’re infusing at home on a tight budget?
To reduce the risk of botulism when making oil infusions at home, use thoroughly dried herbs or ingredients since moisture increases the risk. After infusing, refrigerate the oil and use it within a week. Sterilize any jars or bottles beforehand by boiling them. You don’t need fancy equipment—just clean, dry tools and careful handling go a long way in keeping your infusions safe.
Do certain carrier oils, like extra-virgin olive oil versus grapeseed oil, affect how well flavors get extracted during infusion or how long the finished oil will last? I’m curious if some oils are better for beginners in terms of safety and results.
Yes, the type of carrier oil makes a difference. Extra-virgin olive oil has a strong flavor that can sometimes overpower delicate infusions, but it’s popular for its richness. Grapeseed oil is more neutral and lighter, often allowing infused flavors to shine through more clearly. Regarding shelf life, oils high in polyunsaturated fats (like grapeseed) spoil faster than those higher in monounsaturated fats (like olive oil). For beginners, olive oil is a safe, stable choice, but always store infused oils in the fridge and use them within a week or two for best safety and freshness.
You mentioned both cold and heated methods for infusing oils at home. Could you explain how the flavor or shelf life might differ between these two techniques? I’m trying to decide which approach works best for different types of ingredients.
Cold infusion preserves delicate, fresh flavors and is ideal for herbs like basil or mint, but it usually takes longer and the oil might have a shorter shelf life due to potential moisture. Heated infusion extracts flavor faster and works well for robust ingredients like garlic or dried chilies, but the heat can sometimes mute subtle notes. For longer shelf life, use dried ingredients and ensure everything is fully strained.
Can you elaborate a bit more on the food safety side, especially concerning botulism? How long can homemade infused oils be safely stored before they become risky, and does using the cold versus heated method make a difference in shelf life?
Botulism is a real concern with homemade infused oils, especially when using fresh herbs, garlic, or chilies. These can introduce spores that thrive in oil. Heated infusion reduces risk by killing some bacteria, but it’s not foolproof. For safety, always refrigerate homemade infused oils and use them within one week. The cold infusion method carries a higher risk, so extra caution is needed. Never store homemade infused oils at room temperature. If you want longer shelf life, consider using dried ingredients and still keep the oil refrigerated.
Does the type of oil you choose, like grapeseed versus extra-virgin olive oil, affect how strongly the infused flavors come through or how stable the final product is? I’m wondering if certain oils are better suited to specific ingredients or techniques.
Yes, the oil you choose can make a difference. Neutral oils like grapeseed allow infused flavors to shine through more clearly, while extra-virgin olive oil has its own strong flavor that can sometimes mask delicate infusions. For subtle herbs or spices, a neutral oil is often best. Olive oil can work well with robust ingredients like garlic or rosemary and offers good stability, but it can become cloudy or go rancid faster than some others. Always consider both the flavor and shelf life when choosing your oil.
I noticed you emphasized safety, especially with concerns like botulism. When it comes to storing homemade infused oils, are there specific containers or refrigeration guidelines that help maximize shelf life and prevent spoilage?
For homemade infused oils, always use clean, sterilized glass containers with tight-fitting lids to reduce contamination risks. Store the oils in the refrigerator, not at room temperature, as cool temperatures slow bacterial growth and extend shelf life. Discard any oil if you notice cloudiness, off smells, or changes in texture. Generally, use refrigerated infused oils within one to two weeks for safety.
I see you mention both cold and heated infusion methods. Is there a noticeable difference in flavor intensity or shelf life between the two approaches, and would you recommend one method over the other for beginners?
Cold and heated infusion methods do differ in both flavor intensity and shelf life. Heated infusions usually produce stronger, more immediate flavors, but they can shorten shelf life if not done carefully. Cold infusions are gentler, often resulting in subtler flavors and a longer shelf life because there’s less chance of spoilage. For beginners, cold infusion is typically easier and safer, though it takes more time to develop flavor.
Infused oils sound great for seasonal menu items, but I’m on a tight budget. Are there any essential tools you suggest that are both affordable and effective for someone looking to experiment at home without investing in professional equipment?
You can definitely create delicious infused oils at home without spending much. All you really need are clean glass jars, a small saucepan or pot, a fine mesh strainer or cheesecloth, and a funnel for easy pouring. These items are inexpensive and easy to find. You can use your regular stovetop for gentle heating. No need for fancy gear—the basics will work well for most home infusions.
When choosing a carrier oil, does the flavor of extra-virgin olive oil overpower delicate ingredients like citrus or fresh herbs, compared to using a neutral oil like grapeseed? I’d love some tips on picking the best oil for different infusion goals.
Extra-virgin olive oil does have a pronounced, sometimes peppery flavor that can dominate subtle ingredients like citrus zest or soft herbs. If you want the bright or delicate notes of your additions to shine, a neutral oil such as grapeseed, sunflower, or canola is a better pick. For heartier flavors—like garlic, rosemary, or dried chilies—olive oil can add depth. Choose your oil based on whether you want the oil’s taste to play a starring role or stay in the background.
You mention safety practices to avoid botulism when making infused oils at home. Can you clarify how long homemade infused oils are safe to keep before they should be discarded?
Homemade infused oils, especially those with fresh herbs, garlic, or other low-acid ingredients, should be refrigerated and used within one week to minimize the risk of botulism. If you want to keep them longer, freeze them in small portions. Always discard any oil that becomes cloudy, develops off-odors, or shows signs of spoilage.
If I want to try both the cold and heated oil infusion techniques you mentioned, how much time should I set aside for each? I have a pretty packed schedule and was hoping one method might be quicker or better for beginners.
For a busy schedule, the heated oil infusion is usually quicker—it can take about 30 minutes to an hour, depending on the recipe. The cold infusion method is slower, often requiring several days to a week for the flavors to develop fully. If you’re new to infusions and want fast results, the heated method may be more convenient and beginner-friendly.
With kids in the house, I’m always looking for budget-friendly kitchen ideas. Are there affordable tools you’d suggest for someone just starting out with homemade oil infusions, or can I get by with basic equipment?
You can definitely start making infused oils with basic kitchen equipment you likely already own. A clean glass jar with a tight lid, a small saucepan, and a fine mesh strainer or coffee filter will do the trick for most simple infusions. If you want to invest a bit, an inexpensive funnel and a set of cheesecloth can make straining easier, but they’re not essential. No need for fancy gadgets when starting out!
The article talks about essential equipment for precise infusing, but are there any budget-friendly alternatives for someone who doesn’t already own things like a thermometer or a fine-mesh strainer? I’d love some tips on making infusions with basic kitchen tools.
You can definitely make flavorful infusions with basic tools. If you don’t have a thermometer, just heat your oil gently on the lowest stove setting and watch for tiny bubbles or a slight shimmer—avoid letting it smoke. For straining, a clean coffee filter, a piece of clean cotton cloth, or even a paper towel set in a regular sieve can substitute for a fine-mesh strainer. These household items work well for most simple infusions.
I’m really interested in the safety process you mentioned for homemade infused oils, especially avoiding botulism. Could you clarify what specific steps or equipment are most important for making sure the oils stay safe to use over time?
To keep homemade infused oils safe, the most important steps are to use very clean, dry equipment and to only infuse oils with completely dried herbs, spices, or ingredients to avoid introducing moisture. Always store the finished oil in the refrigerator and use it within a week or two. If you want longer storage, consider acidifying your ingredients first or infusing through heat, which can help reduce the risk of botulism.
I’m curious about the essential equipment you recommend for precise infusing. As a small business, I’m working with a limited budget, so are there any affordable tools or substitutes that still ensure good results and minimize safety risks?
For precise infusing on a budget, you can use a digital kitchen thermometer, a fine mesh strainer or cheesecloth, glass jars with tight lids, and a small saucepan. These inexpensive tools help you control temperature, filter out solids, and store oil safely. If you want to upgrade, a sous vide stick offers precise temperature control, but it’s optional. Always keep oils away from direct heat to prevent safety hazards.
Can you explain a bit more about what makes certain carrier oils (like olive oil versus grapeseed or sunflower) better for specific types of infusions? Does the choice of oil affect the safety or shelf life of the finished product?
The choice of carrier oil definitely matters for both flavor and shelf life when making infusions. Olive oil has a strong flavor and is great for savory herbs, while neutral oils like grapeseed or sunflower let delicate flavors shine. For safety and longevity, oils with higher polyunsaturated fats (like grapeseed) spoil faster than those with more monounsaturated fats (like olive oil). Always store infused oils in the fridge and use them within a couple of weeks to reduce spoilage risk.
I’m on a college budget, so I’m wondering if I really need all the ‘essential equipment’ listed for precise infusing, or if there are any simple, affordable alternatives you recommend for beginners just starting out with oil infusions?
You definitely don’t need all the specialized equipment to start infusing oils. For beginners on a budget, a basic saucepan, a clean glass jar, and a fine mesh strainer or coffee filter can work very well. Focus on safety and cleanliness, and use what you already have in your kitchen. Precision tools are helpful but not required for great results.
The article talks about using different base oils like extra-virgin olive, grapeseed, or sunflower for infusions. Is there a best option for beginners when it comes to flavor and shelf life, or does it depend on the ingredients I’m using?
For beginners, light olive oil or grapeseed oil are great choices. They have neutral flavors that let your added ingredients shine, and both offer decent shelf life. If you plan to infuse stronger flavors like garlic or chili, a neutral oil is usually best. The choice can also depend on your ingredients—delicate herbs pair well with lighter oils, while robust flavors can stand up to extra-virgin olive oil.
Can you recommend any essential tools that are affordable for someone just starting out? I’m wondering if I need special equipment, or if I can get by with basic kitchen stuff I already have for infusing oils safely at home.
You don’t need much-specialized equipment to start infusing oils safely at home. Basic kitchen tools like a small saucepan, a fine mesh strainer or cheesecloth, a clean glass jar with a tight lid, and a funnel will work well. If you want to be extra precise, a thermometer is helpful but not strictly necessary. These are affordable and you may already have most of them in your kitchen.
I love the idea of customizing my own oils, but do I really need special equipment to get good results? Are there any budget-friendly alternatives for the essential tools you recommend in the article?
You don’t need fancy equipment to make delicious infused oils at home. While tools like fine mesh strainers or infusion kits can make things easier, you can substitute with items you likely already have. A clean glass jar, a saucepan for gentle heating, and a regular kitchen strainer lined with cheesecloth or a coffee filter work well for most recipes. Just be sure everything is clean and dry for the best results.
Are there any basic essential tools that I can use from a standard home kitchen, or do I really need to buy specific equipment to try these infusion techniques? I’m trying to keep things budget-friendly for my first attempt.
You can definitely start infusing oils using basic tools from your kitchen. A small saucepan, a fine mesh strainer or cheesecloth, and clean glass jars are usually enough for simple infusions. While specialized equipment can make the process easier or more precise, it’s not essential for beginners. This approach keeps things affordable while you experiment.
The article mentions oil infusions can elevate everything from salads to desserts, but I’m worried about the risk of spoilage and botulism. What steps can I take to make sure my homemade herb oils stay safe for my kids’ lunches or family dinners?
It’s smart to be cautious about spoilage and botulism with homemade herb oils. To stay safe, always use fresh, thoroughly washed and dried herbs. Heat the oil and herbs together to at least 180°F for several minutes, then strain out solids. Store the finished oil in the fridge and use it within a week. Never store herb oils at room temperature and discard any that look cloudy or smell off.
You mention the risk of botulism when making infused oils at home. I run a small café and would like to offer house-made oil infusions. Could you clarify what specific steps I need to take to keep everything food safe, especially if storing the oils for a few weeks?
To prevent botulism when making infused oils, always start by thoroughly washing and drying any herbs, garlic, or other flavorings. After infusing, store the oils in the refrigerator, not at room temperature. Use sterilized containers, and label with preparation dates. For café use, it’s safest to only keep infused oils refrigerated for up to a week, and discard any leftovers after that. Never store homemade infused oils at room temperature or for extended periods.
What is the main difference in flavor or shelf life between using the cold infusion method versus the heated method you mentioned? I’m not sure which technique would be best for starting out with something like rosemary oil.
The cold infusion method tends to produce a subtler, fresher flavor but takes longer (days to weeks) and usually yields a shorter shelf life, especially with fresh herbs like rosemary, due to moisture that can promote spoilage. The heated method creates a more intense, immediate flavor and helps drive off moisture, resulting in a longer-lasting oil. For rosemary oil, especially as a beginner, the heated method might be easier and safer, giving you a stronger flavor and better shelf stability.
The article mentions the risk of botulism when making infused oils at home. Could you clarify how long homemade infused oils remain safe to use if stored in the refrigerator, and are there specific signs of spoilage to watch for?
Homemade infused oils should be kept in the refrigerator and used within 1 to 2 weeks to minimize the risk of botulism. Always discard any oil if you notice cloudiness, off smells, bubbles, or mold growth. Even if there are no visible changes, it’s important not to keep homemade infused oils for longer than recommended.
Could you clarify what you mean by ‘essential equipment for precise infusing’? I’m interested in trying both the cold and heated methods but don’t want to invest in a bunch of tools right away. What would be the absolute basics I’d need to get started safely at home?
For both cold and heated oil infusions, you only need a few basics to start safely. Use a clean glass jar with a tight lid for steeping, a fine-mesh strainer or cheesecloth for filtering, and a small saucepan if you want to heat the oil gently. A thermometer can help with heated methods, but for most home use, it’s optional as long as you keep the heat low. These simple tools will cover both methods without requiring major investment.
Could you explain more about the step-by-step techniques for heated versus cold infusions described in the article? I’m short on time most evenings, so I’d love to know which method is faster without sacrificing food safety.
Heated infusion is the faster method—in the article, it involves gently warming your oil with the chosen herbs or spices for about 30 to 60 minutes, which extracts flavors quickly. Cold infusion, in contrast, requires you to steep the ingredients in oil at room temperature for several days or weeks. For safety, especially with fresh herbs, always strain out solids and refrigerate the oil after infusing, whichever method you choose.
I’m interested in trying some seasonal flavor combinations but don’t want to invest in a lot of new equipment. Based on your essential tools list, which items are absolutely necessary to get started with safe oil infusions on a small budget?
To start infusing oils safely on a small budget, you only need a few basics: a small saucepan or heatproof jar for warming the oil, a fine mesh strainer or cheesecloth for filtering out solids, and clean glass bottles or jars for storing the finished oil. Optional tools like funnels and thermometers are helpful but not essential for simple, small-batch infusions.
I’m new to making my own flavored oils, and I’m a bit nervous about the food safety side, especially botulism risks. You mention both cold and heated infusion methods—could you explain which method is considered safer for beginners and why?
When it comes to food safety, especially for beginners, heated infusion is generally the safer method. Heating the oil and flavoring ingredients to at least 180°F helps kill bacteria and spores, reducing the risk of botulism. Cold infusion doesn’t offer this safety step, so it’s best reserved for ingredients that will be used up quickly and kept refrigerated. Always refrigerate your homemade oils and use them within a week to stay safe.
When making infused oils on a budget, are there more affordable carrier oils you recommend that still yield good flavor, or is it worth investing in quality extra-virgin olive oil every time? Would the techniques differ with less expensive oils?
You don’t have to use premium extra-virgin olive oil to get tasty infused oils. Neutral oils like sunflower, canola, or grapeseed are budget-friendly and let the infused flavors shine. Olive oil gives a richer base, but for most infusions, affordable oils work well and the techniques stay the same—just make sure the oil is fresh and mild-tasting for best results.
If I only have basic kitchen tools and a tight budget, which essential equipment would you say is truly necessary for safe and flavorful oil infusions, and are there any affordable substitutes you recommend?
For safe and flavorful oil infusions, you’ll mainly need a small saucepan, a fine mesh strainer or cheesecloth, and clean glass jars or bottles for storage. If you don’t have a strainer, a clean coffee filter or even a clean cotton cloth can work as a substitute. Use a kitchen thermometer if possible to control temperature, but if not, just be sure to keep the oil below simmering to prevent burning.
I’m curious about the equipment side of things. For someone just starting out, are there any budget-friendly essentials that work well for safe and precise oil infusions, or do I really need to invest in specialized thermometers and bottles?
You don’t have to spend much to get started with oil infusions. A basic saucepan, a fine mesh strainer or cheesecloth, and clean glass jars or bottles work well for most beginners. While a kitchen thermometer helps with precise temperature control, it’s optional for many simple infusions—just keep the heat low and avoid boiling. Specialized equipment is helpful but not necessary when starting out.
Could you elaborate more on the specific safety practices mentioned to avoid botulism when infusing oils at home? I’m particularly cautious about food safety issues, so any detailed steps or warning signs would be greatly appreciated before I try making my own infusions.
Absolutely, safety is key when infusing oils. To avoid botulism, always use fresh, clean herbs or ingredients and dry them thoroughly, as moisture promotes bacterial growth. Store infusions in the refrigerator and use them within a week. Never store homemade infusions at room temperature. If you notice cloudiness, bubbling, or an off smell, discard the oil immediately. Sterilizing your jars and using acid (like vinegar or lemon juice with certain infusions) can add extra protection.
Could you provide more details about the specific equipment recommended for cold versus heated infusion methods? I’m curious if there are any key differences in tools required or if the safety practices differ significantly between these two approaches.
For cold infusion, you’ll need a clean glass jar with a tight lid and a fine mesh strainer or cheesecloth for filtering. Heated infusion usually requires a saucepan or double boiler, a thermometer to monitor temperature, and similar straining tools. Safety-wise, heated infusion involves more caution—monitoring temperature to avoid overheating oil and preventing burns. Cold infusion is generally safer, but still requires clean equipment to avoid contamination.
You talk about both cold and heated methods for infusing oils—does one method tend to produce a stronger flavor, or is one safer than the other if I’m using fresh herbs from my garden?
Heated infusion tends to produce a stronger, more immediate flavor since warmth helps release more of the herbs’ essential oils. However, when using fresh herbs, cold infusion is generally safer because it reduces the risk of bacterial growth, particularly botulism, which can occur if moisture is trapped in oil. If you prefer heated methods, be sure to strain and refrigerate the infused oil right away, and use it within a week.
I noticed the article emphasizes food safety concerns like botulism when infusing oils at home. Can you explain more about which specific ingredients or techniques present the highest risk, and are there any easy signs to watch out for if something has gone wrong with a homemade infusion?
Fresh ingredients with high moisture, like garlic, fresh herbs, and chilies, pose the highest risk for botulism in infused oils, especially if they’re not properly dried or refrigerated. Botulism can occur because harmful bacteria thrive in oxygen-free environments like oil. Unfortunately, botulism toxins don’t have obvious warning signs—spoiled smell or cloudy oil aren’t always present—so it’s safest to refrigerate infusions and use them within a week. When in doubt, discard any batch you’re unsure about.
You mention botulism risks when making flavored oils at home, which is something I’ve always worried about. Could you explain more about which specific ingredients or infusion methods are most likely to cause food safety issues, and how to store homemade oils to prevent spoilage?
Botulism risk in homemade infused oils comes mainly from using fresh ingredients like garlic, herbs, or chili peppers, as these can introduce Clostridium botulinum bacteria when submerged in oil. The safest method is to use dried ingredients or to acidify fresh ones before infusing. Always store homemade oils in the refrigerator and use them within one to two weeks. Never leave fresh-infused oils at room temperature, as this increases the risk of spoilage and foodborne illness.
You mentioned safety practices to avoid botulism when infusing oils at home. As a parent who often cooks in bulk, how long do homemade infused oils typically last, and what’s the safest way to store them to keep them fresh for family meals?
Homemade infused oils should be refrigerated and used within one week to minimize the risk of botulism, especially if you’re including fresh herbs, garlic, or other fresh ingredients. Always store infused oils in clean, airtight containers in the fridge, and discard any oil that shows signs of cloudiness, off smells, or mold. For longer storage, consider freezing the oil in small portions.
When using fresh herbs versus dried herbs for oil infusions, are there different safety considerations to keep in mind to prevent spoilage or botulism, especially with the cold infusion method?
Yes, there are important safety differences. Fresh herbs contain water, which increases the risk of spoilage and botulism, especially with cold infusions. To reduce risks, always thoroughly dry fresh herbs first or use dried herbs instead, as they are safer for oil infusions. Store any homemade oil in the refrigerator and use it within a week. Discard immediately if you notice any off smells, cloudiness, or bubbling.
You mention that extra-virgin olive oil is commonly used, but also suggest grapeseed and sunflower oil. For someone on a student budget, which oil is most affordable while still giving good results for different types of infusions?
Grapeseed and sunflower oils are usually more affordable than extra-virgin olive oil, and they have a neutral flavor that works well for most infusions. Sunflower oil, in particular, is often the cheapest option and still delivers good results whether you’re infusing herbs, spices, or citrus. Both are versatile and budget-friendly for students.
For someone trying to keep costs low, which carrier oil would you recommend as the most versatile yet budget-friendly option for infusing at home? Does the choice of oil significantly impact the shelf life or intensity of the infused flavors?
For budget-friendly infusions, canola and sunflower oil are both excellent choices—they’re affordable, neutral in flavor, and work well with a wide range of herbs and spices. While olive oil is common, it can be pricier and has its own strong taste. The type of oil does affect shelf life; oils with fewer polyunsaturated fats (like olive oil) last longer, while neutral oils like canola should be used more quickly. The oil’s flavor neutrality also lets your infused ingredients shine.
I noticed you listed extra-virgin olive oil and neutral oils as options for infusing. Is there a big cost difference between using fancy olive oils versus more affordable oils, and does it really impact the final taste of the infusion?
There can be a noticeable cost difference between extra-virgin olive oil and more affordable neutral oils like canola or sunflower. High-quality extra-virgin olive oil tends to be more expensive, but it also brings its own distinct, robust flavor to the infusion. If you want the infused flavors to shine through clearly, a neutral oil is often best. If you enjoy the taste of olive oil itself, using a fancier oil will definitely impact and enhance the flavor of your final infusion.
You mentioned that food safety is a big concern when infusing oils at home, especially regarding botulism. What are the main signs to look out for if something has gone wrong, and are there particular ingredients that are riskier than others?
If infused oil looks cloudy, has bubbles, off smells, or shows signs of mold, discard it immediately. Garlic, fresh herbs, and some vegetables are higher risk because they can introduce moisture and botulism spores. Always keep infused oils refrigerated and use them within a week to minimize risks. Using dried ingredients instead of fresh can also help improve safety.
The article talks about both cold and heated infusing methods. Is one method faster or safer than the other for someone new to this? I usually only have short pockets of time to prep during the week.
Heated infusing methods are generally much faster than cold infusions. With gentle heat, you can infuse oils in under an hour, while cold infusions may take several days. For safety, just make sure not to overheat the oil to avoid burning or unwanted flavors. If you’re short on time, the heated method is convenient and safe as long as you monitor the temperature.
You mentioned food safety concerns like botulism with homemade oil infusions. How do you know if an infused oil has gone bad or is unsafe to eat, and are there any ingredients that are especially risky to use?
Infused oils that have gone bad may smell rancid, develop off flavors, or show cloudiness or mold, but botulism toxin doesn’t always change appearance or smell, so you can’t rely on looks alone. Ingredients with high moisture, like fresh garlic, herbs, or chilies, are especially risky because they can support botulism growth. To reduce risk, use only dried ingredients, keep oils refrigerated, and use them within a week.
The guide talks about both cold and heated infusion methods. For someone on a tight budget and limited kitchen tools, which method would you recommend as the most cost-effective and practical for trying this out at home without compromising safety?
For someone with limited tools and budget, the cold infusion method is usually the most practical and cost-effective. All you need is a clean jar and some patience, since the flavors develop over several days at room temperature. Just make sure to use dried ingredients to avoid any risk of spoilage, and always store your finished oil in the fridge for safety.
The article talks about infusing oils with different ingredients like herbs and citrus. How long should infused oils typically be stored, and what are the visible signs that an oil might have spoiled or become unsafe to use?
Infused oils made at home should usually be kept in the refrigerator and used within 1 to 2 weeks for safety. If you notice cloudiness, off smells, bubbling, or any mold development, discard the oil immediately. Fresh ingredients like herbs and citrus can introduce moisture, which increases the risk of spoilage, so always store them properly and look for any changes before use.
I understand there’s a risk of botulism with homemade oil infusions. If I want to sell these oils at local markets, what specific food safety steps or certifications should I look into to ensure my products are safe and compliant?
If you plan to sell infused oils, you’ll need to follow your area’s food safety regulations, which often require a food handler’s permit, a certified kitchen, and possibly product testing for shelf stability. Many regions also mandate acidification of ingredients or refrigeration to reduce botulism risk. It’s important to contact your local health department for exact requirements and consider food safety training or certification courses to ensure compliance.
The article talks about avoiding botulism and ensuring food safety. If I want to sell infused oils at a farmer’s market, are there specific steps or best practices I should follow to make sure my products are compliant with local regulations and stay safe for customers?
When selling infused oils at a farmer’s market, you’ll need to follow strict food safety guidelines to avoid contamination and legal issues. Start by checking your state and local health department rules on selling infused oils, as regulations can vary. Use only dried ingredients to prevent botulism, ensure all equipment is sanitized, and consider acidification or refrigeration for added safety. You may also need to label ingredients and include safety instructions. Getting certified in food handling and keeping records of your processes is often required, so contact your local authorities for detailed requirements.
You mentioned using both cold and heated methods for infusing oils. For someone short on time, which method tends to be quicker and does either technique make a noticeable difference in flavor intensity?
Heated methods are definitely quicker—they usually take between 30 minutes to a couple of hours, depending on the ingredients and the temperature you use. In contrast, cold infusions can take several days to weeks. Heated infusions often yield a more intense and immediate flavor, while cold methods can create subtler, sometimes fresher notes. For speed and stronger flavors, go with the heated technique.
I’m curious about the seasonal flavor combinations you referenced. Are there any specific herbs or ingredients that shouldn’t be used in oil infusions because of safety risks or issues with spoilage?
Some herbs and ingredients, especially fresh garlic and fresh herbs with high water content like basil, can increase the risk of spoilage or botulism when infused in oil because they create an environment where bacteria can thrive. If you want to infuse oils safely, it’s best to use thoroughly dried herbs, citrus peels, or dried spices. Always refrigerate homemade infusions and use them within a week to minimize risks.
You mentioned botulism safety is crucial when making infused oils at home. Could you elaborate on how to properly store homemade oils and how long they actually stay safe to use, especially with fresh herbs or garlic involved?
When infusing oils with fresh herbs or garlic, it’s safest to keep them refrigerated at all times and use them within one week. Fresh ingredients can introduce moisture, which increases the risk of botulism. Never store homemade infused oils at room temperature, and avoid making large batches. For longer storage, you can strain out the solids and freeze the oil in small amounts. Always discard any oil that looks cloudy, smells off, or develops mold.
I’m interested in trying some infused oils, but I’m especially concerned about preventing botulism. Could you elaborate on what specific safety practices need to be followed, particularly for storing infused oils made with fresh ingredients?
Botulism is a real concern when infusing oils with fresh ingredients like garlic or herbs. To stay safe, infuse oils and refrigerate them immediately—never store at room temperature. Use very clean utensils and containers, and label the oil with the date. For maximum safety, use the oil within one week or freeze it for longer storage. Avoid using any oil that looks cloudy, fizzy, or smells off.
In the section about cold versus heated infusion methods, can you elaborate on how the choice of base oil (like extra-virgin olive oil versus grapeseed or sunflower) might impact both the final flavor and shelf life of the infused oil?
The base oil you choose plays a big role in both taste and shelf life. Extra-virgin olive oil adds its own strong, grassy flavor, which can either enhance or compete with your infusion ingredients. Grapeseed and sunflower oils are much more neutral, letting the flavors you add really shine through. For shelf life, oils like grapeseed and sunflower tend to be less stable and can go rancid faster, while olive oil is more stable, especially if stored properly.
If someone wants to start infusing oils at home without investing in a lot of specialized equipment, what are the absolute essentials needed to do it safely and effectively? Are there any common kitchen tools that can double as makeshift gear for beginners?
To infuse oils safely at home with minimal equipment, you’ll just need a clean glass jar with a tight lid, a fine mesh strainer or cheesecloth, and a saucepan for gentle heating if needed. Most people already have these in their kitchen. Always make sure your tools and ingredients are clean and dry to prevent contamination or spoilage.