
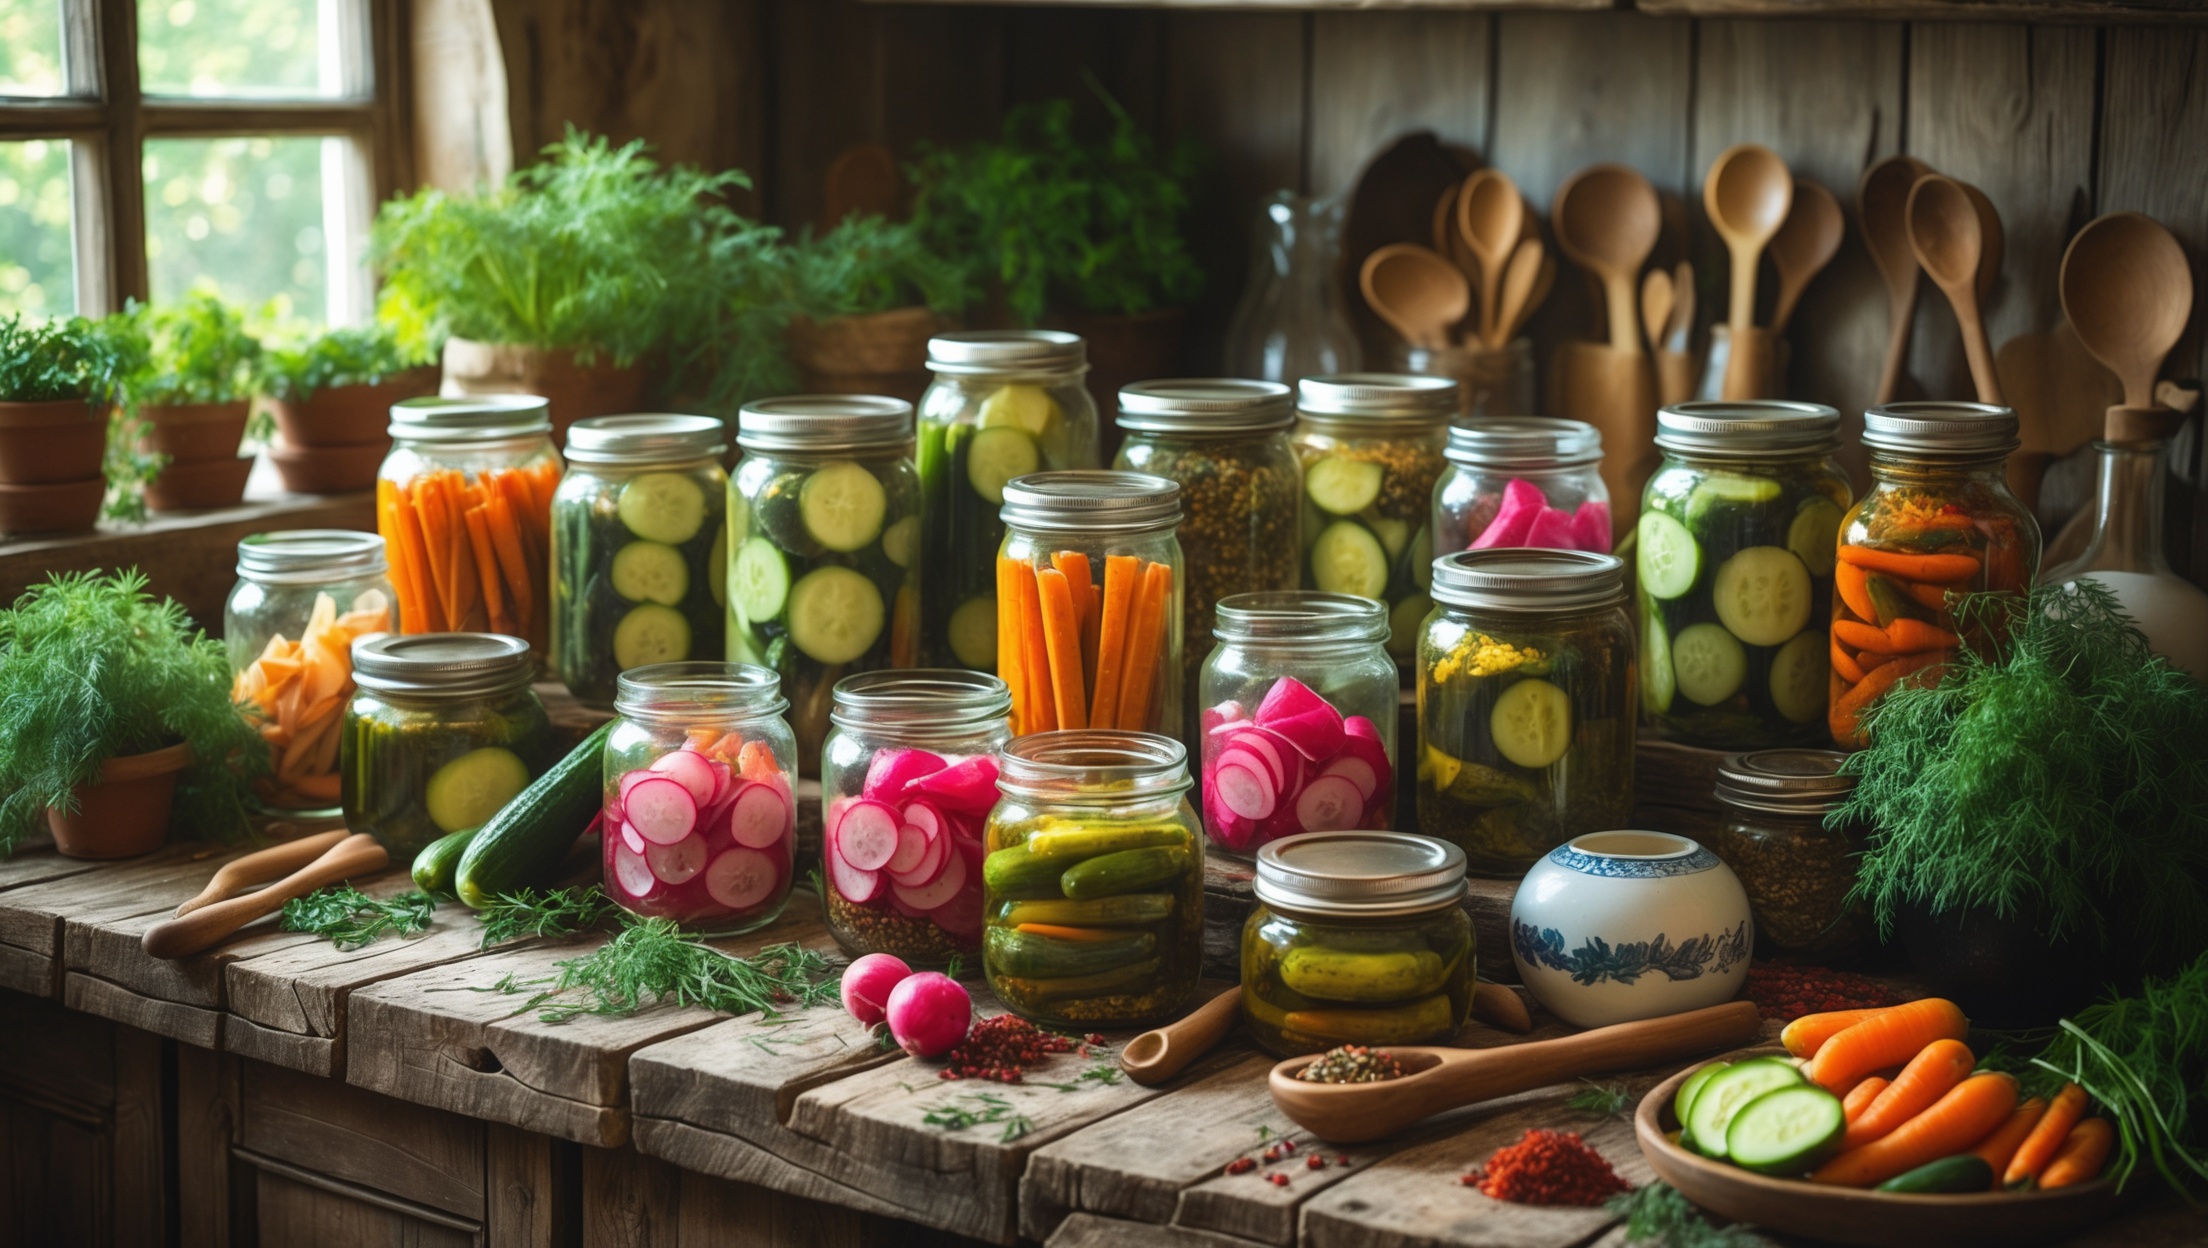
Introduction: The Renaissance of Slow-Cooked Stocks
In the landscape of modern home cooking, few skills distinguish the seasoned culinary enthusiast from the casual cook quite like the ability to craft a nuanced, slow-cooked stock. While ready-made broths and bouillon cubes abound on grocery shelves, their convenience rarely matches the depth, silkiness, and layered flavors of a homemade stock simmered to perfection. Within the bubbling pot of a well-tended stock lies the foundation for velvety soups, robust sauces, and unforgettable risottos—a true cornerstone of refined culinary culture.
But why revisit such a timeless technique in today’s fast-paced world? The answer is twofold: flavor and craft. Slow-cooked stocks are not merely a vehicle for leftover bones and vegetable trimmings; they are a canvas for creativity, sustainability, and cost-effective luxury. Mastering stock-making empowers you to transform simple, affordable ingredients into liquid gold, elevating both everyday meals and special occasions. In this guide, we will unveil the essential tools, budgeting strategies, and expert techniques that demystify the process and make exceptional stock accessible for every home cook. Whether you’re a beginner seeking to avoid common pitfalls or a seasoned enthusiast looking to refine your craft, these insights will unlock richer, deeper flavors in your kitchen—one simmering pot at a time.
Essential Tools for Crafting Exceptional Stocks
The Stockpot: Choosing the Right Vessel
Your stockpot is the backbone of the process. Opt for a heavy-bottomed, stainless steel pot with a capacity of at least 8 quarts (7.5 liters) for most home kitchens. Stainless steel resists corrosion from acidic ingredients, distributes heat evenly, and is easy to clean. Avoid thin aluminum pots, which can create hot spots and metallic flavors.
- Lid: A tight-fitting lid helps control evaporation during long simmers.
- Handles: Sturdy, heat-resistant handles are essential for safe maneuvering.
Strainers and Skimmers
Clarity is prized in high-quality stocks. Use a fine-mesh strainer for the final filtration, and a wide, flat skimmer or ladle to remove impurities and foam as the stock simmers.
- Fine-mesh chinois or conical strainer: For ultra-clear, restaurant-quality stocks.
- Slotted spoon or mesh skimmer: For easy removal of solids and scum during cooking.
Thermometer
Maintaining a gentle simmer (not a rolling boil) is crucial. An instant-read thermometer ensures you keep your stock just below boiling—ideally between 185°F and 205°F (85°C–96°C).
Storage Solutions
A well-made stock is best enjoyed over time. Prepare for storage with:
- Heatproof containers: Glass jars, BPA-free plastic containers, or silicone freezer cubes.
- Labels and date markers: Essential for tracking batches and freshness.
Budgeting for Stock Success: Stretching Flavor, Not Finances
Cost Breakdown: Ingredient Sourcing
One of the greatest appeals of stock-making is its economy. Here’s how to maximize flavor while minimizing expense:
- Bones: Save chicken carcasses, beef bones, or fish frames from other meals. Many butchers sell soup bones at low cost.
- Vegetable Trimmings: Freeze onion ends, carrot peels, celery leaves, and herb stems for future use. Avoid bitter greens and cruciferous vegetables, which can overpower the stock.
- Aromatics: A few cloves of garlic, peppercorns, and bay leaves go a long way.
For a typical 8-quart batch:
- Bones: $2–$5 (or free, if saved from other meals)
- Vegetables/Aromatics: $1–$3
- Utilities: Approximately $0.25–$0.50 (for 6–8 hours simmer time)
Total estimated cost: $3–$8 for 3–4 quarts of high-quality stock (significantly less than store-bought alternatives).
Time Investment and Batch Planning
While slow-cooked stocks require hours of simmering, most of that time is hands-off. Make large batches and freeze portions to maximize your investment. Plan stock-making for weekends or days when you are at home for extended periods.
Craft Techniques: From Foundation to Finish
Building the Flavor Base
The secret to a complex stock lies in layering flavors from the start:
- Roasting Bones and Vegetables: For brown stocks (beef, veal, poultry), roast bones and aromatics at 400°F (200°C) for 30–45 minutes before simmering. This step imparts a deep, caramelized flavor and rich color.
- Blanching: For clearer stocks (especially chicken or fish), blanch bones briefly in boiling water and then rinse to remove impurities.
Proportion and Simmering
- Water-to-Bones Ratio: Use just enough cold water to cover the bones and vegetables by 2–3 inches. Too much water dilutes the flavor; too little risks scorching.
- Gentle Simmer: Avoid boiling. A slow, steady simmer extracts collagen and flavor without emulsifying fat or clouding the stock.
Skimming and Degreasing
Regularly skim foam and fat from the surface, especially during the first hour. For fat removal after cooking, chill the stock so the fat solidifies for easy removal.
Infusing Aromatics
Add aromatics (herbs, peppercorns, bay leaf) during the last hour of simmering to prevent bitterness. For Asian-inspired stocks, try ginger, star anise, or lemongrass. For Mediterranean notes, use thyme, parsley stems, or fennel fronds.
Straining for Clarity
Once simmering is complete (6–8 hours for beef/veal, 4–6 for chicken, 1–2 for fish), strain the stock through a fine-mesh sieve or cheesecloth. For crystal-clear consommé, use an egg-white raft clarification method.
Seasonal Stock-Making: Ingredient Swaps and Inspiration
Spring and Summer
Leverage fresh, tender vegetables—spring onions, young carrots, peas—and lighter herbs like dill or tarragon. Use fish or poultry bones for a more delicate stock.
Autumn and Winter
Root vegetables (parsnips, turnips), leeks, and robust herbs (rosemary, sage) shine. Beef or veal bones create hearty bases for winter soups and braises.
Foraging and Farmers’ Markets
Visit local markets for unusual bones (duck, lamb) or wild aromatics (ramps, lovage) to personalize your stock. Foragers might add wild mushrooms or herbs for unique, hyper-seasonal flavors.
Common Mistakes and How to Avoid Them
- Boiling the Stock: This emulsifies fat and results in a cloudy, greasy broth. Always maintain a gentle simmer.
- Using Bitter Vegetables: Cabbage, broccoli, and kale can dominate and sour the flavor. Stick to sweet, neutral vegetables.
- Skipping the Skimming: Failure to remove foam and impurities leads to off-flavors and muddiness.
- Under- or Over-Salting: Do not salt your stock until you use it in a final recipe, as reduction can intensify saltiness.
- Neglecting Food Safety: Cool and refrigerate stock within 2 hours to prevent bacterial growth. Use shallow containers for rapid cooling.
Storage, Freezing, and Maintenance Best Practices
Short-Term Storage
Refrigerate stock in airtight containers. Use within 4–5 days for best flavor and food safety. Reboil before use if storing longer.
Freezing for the Future
- Cool stock quickly by submerging the pot in an ice water bath.
- Portion into usable sizes: ice cube trays for sauces, 1-quart containers for soups/stews.
- Label with date and type (e.g., “Chicken Stock, Jan 2024”).
- Freeze for up to 6 months without significant flavor loss.
Defrosting and Reheating
Thaw overnight in the refrigerator or directly in a saucepan over low heat. Do not use a microwave, as rapid heating can alter flavor and texture.
Creative Uses for Homemade Stock
- Soups and Stews: The classic destination for a rich stock—think French onion, minestrone, or Vietnamese pho.
- Risotto and Grains: Replace water with stock for unmatched flavor in rice, barley, or farro dishes.
- Deglazing Pans: Use stock to lift fond and create quick pan sauces for meats and vegetables.
- Poaching Liquids: Poach chicken, fish, or eggs in stock for a flavor boost.
- Sauces and Reductions: Build classic French sauces (velouté, demi-glace) or reduce stock for an intense glaze.
Conclusion: Elevate Your Home Cooking with Stock Craft
Slow-cooked stock-making is more than a culinary tradition—it’s an opportunity to infuse your home kitchen with deeper flavor, resourcefulness, and a sense of craft that connects you to centuries of gastronomic heritage. By investing in the right tools, making savvy use of affordable ingredients, and embracing expert techniques, you can produce restaurant-caliber broths that transform your daily meals.
Remember, exceptional stocks are not reserved for professional chefs or grand kitchens. With mindful simmering, attention to detail, and seasonal creativity, anyone can unlock the potential of humble bones and trimmings. The process is forgiving, adaptable, and endlessly customizable. Best of all, your homemade stocks will outshine any commercial alternative—delivering not only superior taste, but also the satisfaction of true culinary self-reliance.
As you begin (or continue) your stock-making journey, experiment with local ingredients, document your favorite batches, and share the results with friends and family. You’ll find that a bubbling pot of stock is more than just the start of a meal—it’s the start of a new level of kitchen confidence and inspiration. So gather your bones, prepare your pot, and let the slow magic begin.


If I only have an aluminum pot at home, will that really make a big difference in the flavor or safety of my stock, or are there ways to get around the hot spots and metallic taste mentioned in the article?
Using an aluminum pot can sometimes cause hot spots, which may lead to uneven cooking, and in rare cases, a slight metallic taste in acidic stocks. To minimize this, keep the heat low and stir occasionally to prevent scorching. Avoid leaving acidic ingredients like tomatoes in contact with the pot for long periods. With careful temperature control, you can still achieve a flavorful stock safely.
How much does making a big batch of slow-cooked stock typically cost compared to store-bought broth? I’m trying to stick to a budget, so I’m curious if this process really saves money in the long run.
Making a large batch of slow-cooked stock at home is often more cost-effective than buying store-bought broth, especially if you use leftover bones and vegetable scraps. The main expenses are energy (for simmering) and any extra ingredients you choose to add. On average, homemade stock can cost less per quart, particularly if you’re repurposing kitchen leftovers, and you’ll get a richer, more customizable flavor.
The article talks about avoiding thin aluminum pots because of metallic flavors. If I only have an aluminum stockpot on hand, is there a way to minimize those off flavors, or is it really essential to invest in stainless steel?
If you’re using an aluminum stockpot, there are a few ways to reduce the chance of metallic flavors. Try not to cook acidic ingredients like tomatoes or wine for long periods, as acids can react more with aluminum. Keeping the simmer gentle and avoiding scraping the bottom can help too. While stainless steel is ideal for stocks, you can still make good stock in aluminum with these precautions if upgrading isn’t possible right now.
You mention avoiding thin aluminum pots to prevent metallic flavors. If my only option right now is an aluminum stockpot, is there anything I can do to minimize those off flavors while I save up for a better pot?
If you need to use an aluminum stockpot for now, try to avoid cooking acidic ingredients like tomatoes or vinegar, as those can react more with the metal and increase metallic flavors. Stir your stock frequently, and don’t leave it sitting in the pot after cooking; transfer it to a non-reactive container as soon as possible. These steps should help minimize off flavors until you can upgrade your cookware.
You mention that stainless steel is ideal for stockpots because it resists corrosion and distributes heat evenly. Have you noticed a significant difference in flavor or results when using enameled cast iron or other materials compared to stainless steel for slow-cooked stocks?
Both stainless steel and enameled cast iron work well for slow-cooked stocks, but they can yield slightly different results. Stainless steel doesn’t react with acidic ingredients, so the flavors stay clean and pure. Enameled cast iron retains heat beautifully and can promote gentle, even simmering, but it’s heavier and sometimes more prone to minor scorching if heat is too high. Overall, the differences in flavor are subtle; technique and ingredient quality matter more than pot material.
You mention using a heavy-bottomed stainless steel pot for stock making. Is there a noticeable difference in flavor or clarity if I use an enameled Dutch oven instead, or would that affect the results?
Using an enameled Dutch oven instead of a heavy-bottomed stainless steel pot is perfectly fine for making stock. Both provide even heat distribution and help prevent scorching. You shouldn’t notice any significant difference in flavor or clarity by using an enameled Dutch oven, as long as you avoid chipping the enamel and keep the heat low and steady.
I noticed you recommend an 8-quart stainless steel stockpot for home kitchens. Is there a significant difference in flavor or texture if I use a smaller or larger pot, or is this just about convenience and quantity?
The main reason for recommending an 8-quart pot is convenience and the amount of stock you can make at once. While you can use a smaller or larger pot, what matters most is not overfilling or crowding the ingredients. A smaller pot might concentrate flavors if you use less water, while a larger pot lets you make more stock, but it won’t significantly impact flavor or texture if proportions stay balanced.
You mentioned that stainless steel is the best choice for a stockpot because it resists corrosion and distributes heat evenly. Are there any mid-range brands you recommend for students on a budget, or would you suggest looking for used options instead?
For students on a budget, brands like Cuisinart, Tramontina, and Farberware offer good-quality stainless steel stockpots at reasonable prices. If you’re comfortable with it, looking for gently used options at thrift stores or online marketplaces can also help you get a higher-end pot for less. Just check that the pot is in good condition and has a heavy bottom for even heating.
You mention that homemade stocks can be a cost-effective luxury. Could you elaborate on some budgeting strategies for sourcing quality bones and vegetables without spending too much, especially for someone who cooks in smaller batches?
One way to save money on quality bones is to ask your local butcher or grocery store for soup bones or scraps, which are often inexpensive or even free. For vegetables, use trimmings like carrot tops, onion skins, and celery ends that you’d otherwise discard. Buying in bulk and freezing portions for future small batches also helps make stock-making affordable and convenient.
The article talks about using a tight-fitting lid to control evaporation, but is there a point during the simmering process when you should leave the lid off to concentrate flavors, or is it best to keep it covered the whole time?
You can adjust the lid during simmering depending on your desired outcome. Keeping the lid on helps minimize evaporation and yields a lighter, cleaner stock. If you want a more concentrated, richer flavor, try removing the lid for the last hour or so of cooking to let some liquid evaporate. Just keep an eye on the pot, and add water if the level drops too low.
How long should a typical simmering session last to really achieve that ‘liquid gold’ depth described? I’d love to know the minimum and ideal timeframes for slow-cooked stocks, especially for those of us with busy schedules.
For a deep, rich stock—the ‘liquid gold’ result—aim for at least 4 hours as a minimum simmering time. Ideally, letting it go for 8 to 12 hours brings out the most flavor and body, especially with bones. If you’re short on time, try a pressure cooker, which can deliver great depth in just 1–2 hours.
You mention cost-effective luxury and budgeting strategies for making stock at home. Could you share more specific tips on sourcing affordable bones and trimmings, especially if I don’t often have leftovers? Are there particular stores or methods you recommend for getting quality ingredients on a budget?
If you don’t have many leftovers, local butchers are a great source for affordable bones and trimmings—often sold at a low price or even given away if you ask. Many grocery stores also sell soup bones or poultry backs in the meat section. Ethnic markets, especially Asian or Latin American stores, usually offer a wide selection of bones and off-cuts at budget-friendly prices. Buying in bulk and freezing what you don’t use right away helps save money and ensures you always have stock ingredients on hand.
For someone new to making stock, how much active time does the whole process actually require, and are there any signs I should watch for to know when the stock is at its richest and ready to strain?
Making stock is mostly hands-off. You’ll spend about 20–30 minutes prepping ingredients, starting the pot, and occasionally skimming foam early on. After that, you mostly let it simmer for several hours. You’ll know the stock is ready when the flavor is deep and the color is richer; the vegetables will look spent, and any meat should be falling off the bone. If it smells rich and tastes savory, it’s time to strain.
If I were to prep stock ahead as part of weekly meal planning for my business, how long can homemade stock be safely stored in the fridge or freezer without losing its flavor and quality?
Homemade stock can be safely stored in the fridge for up to 4 to 5 days. For longer storage, freezing is a great option—stock keeps well in the freezer for about 3 to 4 months. To help maintain flavor and quality, cool the stock quickly before refrigerating or freezing, and always use airtight containers.
When you mention avoiding common pitfalls for beginners, what’s the most frequent mistake people make with simmering times or ingredient ratios that can impact the depth of flavor in homemade stocks?
One of the most frequent mistakes is either simmering the stock for too short a time or using too much water compared to the amount of bones and vegetables. A short simmer doesn’t allow enough time for flavors and nutrients to be fully extracted. Likewise, if the ingredient-to-water ratio is off, the stock can turn out weak and bland. For the best results, use a generous amount of bones and aromatic vegetables and let the stock simmer gently for several hours.
You mention that stainless steel is the best material for stockpots due to its resistance to corrosion and even heat distribution. Is there a significant difference in flavor or outcome if I use enameled cast iron or another material instead?
Using enameled cast iron instead of stainless steel for making stocks generally won’t cause a big difference in flavor, as both materials are non-reactive. However, enameled cast iron retains heat longer, which may cause stocks to simmer more vigorously unless carefully monitored. This could slightly reduce clarity or increase evaporation. For most home cooks, you’ll find both materials deliver excellent results if you control the heat.
The article emphasizes controlling evaporation during a long simmer by using a tight-fitting lid. Is there a recommended simmering timeframe that balances flavor extraction with energy efficiency for someone who doesn’t want to leave the stove on all day?
If you want to balance flavor and efficiency, simmering your stock gently with a tight-fitting lid for about 3 to 4 hours is usually enough. This timeframe lets you extract deep flavors without needing to run your stove all day, and the lid helps minimize evaporation, saving both water and energy.
When it comes to budgeting, you touch on stocks as a cost-effective luxury. Could you provide more detail on how to source affordable yet high-quality bones and aromatics, especially if I don’t have a lot of kitchen scraps to use up?
To source affordable, high-quality bones, try visiting local butcher shops or meat counters and ask for soup bones or leftover cuts, which are often inexpensive. Farmers’ markets may offer deals on bones as well. For aromatics, buy onions, carrots, and celery in bulk—they store well and are budget-friendly staples. Even without many scraps, these basic ingredients will help you create a rich, flavorful stock without overspending.
The article talks about stock as a budget-friendly luxury, but I’m curious about how much electricity or gas a long simmer actually uses. Do you have any tips for keeping utility costs low when making stock at home?
Simmering stock for hours does use energy, but there are ways to keep costs down. Try making stock in larger batches to get more value from each cooking session. Using a slow cooker or pressure cooker is also more energy-efficient than an open stovetop. Some people let the stock come to a boil, then turn off the heat and let it steep with the lid on, repeating as needed. These methods can help save on your utility bills.
The article talks about budgeting strategies for homemade stock. Do you have any tips on how to source quality bones and vegetables affordably, especially if I don’t have easy access to a butcher or farmer’s market?
If you don’t have a butcher or farmer’s market nearby, try checking your local grocery store for soup bones, poultry backs, or meat trimmings—these are often sold at a low price. Supermarkets sometimes have discounted produce racks where you can find slightly bruised or overripe vegetables ideal for stock. You can also save veggie scraps and bones in your freezer over time until you have enough to make a batch. This approach is both budget-friendly and reduces food waste.