Introduction: The Rise of Home Fermentation Culture
Fermentation, once reserved for ancient cellars and professional kitchens, has become a cornerstone of modern home culinary craft. Whether it’s transforming cabbage into tangy kimchi, coaxing cucumbers into crisp pickles, or nurturing wild sourdough starters, fermentation offers both a journey into flavor complexity and an invitation to culinary experimentation. But unlike casual kitchen projects, fermenting foods safely and consistently requires more than a mason jar and a sense of adventure—it demands intentional setup, the right tools, and a clear understanding of safety protocols. For home cooks seeking to move beyond sporadic batches and into sustained, creative fermentation, building a dedicated fermentation station is the next logical step.
In this comprehensive guide, we’ll explore how to design and equip a home fermentation station that balances food safety, workflow efficiency, and flavor innovation. You’ll learn which tools are truly essential, how to create a safe and organized environment, and ways to push the boundaries of traditional ferments with seasonal inspiration and advanced techniques. Whether you’re a seasoned fermenter or a curious beginner eager to explore the world of cultured foods, this post will empower you to elevate your craft and enjoy the nuanced flavors of home fermentation with confidence.
Why Build a Dedicated Fermentation Station?
Consistent Results
Fermentation is a living process that thrives on consistency. By carving out a permanent area for your ferments, you minimize variables like temperature fluctuations, cross-contamination, and accidental jostling. This control leads to more predictable flavors and textures, batch after batch.
Workflow Efficiency
Having your tools, vessels, and ingredients organized in one place means less time spent hunting for supplies and more time focused on the craft. A dedicated station streamlines prep, monitoring, and cleanup, encouraging you to ferment more often and with greater creativity.
Enhanced Food Safety
Fermentation is generally safe, but mistakes—such as improper sanitation or using the wrong materials—can lead to spoilage or health risks. A well-designed station helps you maintain cleanliness and implement food-safe practices at every stage.
Creative Possibilities
With the logistics handled, your mind is free to experiment—layering flavors, trialing new vegetables, or playing with wild yeasts. A fermentation station is a launchpad for culinary innovation, not just preservation.
Choosing the Right Location: What Makes a Space Ideal?
Temperature and Light
Most ferments thrive in a stable, moderate temperature—typically between 60°F and 75°F (15°C to 24°C). Avoid locations near ovens, radiators, or drafty windows. Indirect light is preferable, as strong sunlight can degrade color and flavor or overheat your jars.
Accessibility and Traffic Flow
Pick a spot that’s easy to access for daily monitoring but not in the way of high-traffic kitchen activities. A dedicated countertop segment, pantry shelf, or utility cart can all work, provided you can keep ferments undisturbed.
Ventilation and Odor Control
Fermentation generates aromas—sometimes robust ones. Good airflow helps prevent concentrated odors. If possible, set up near a window or in a well-ventilated pantry. For especially pungent projects like sauerkraut or fish sauce, consider a secondary station in a basement or mudroom.
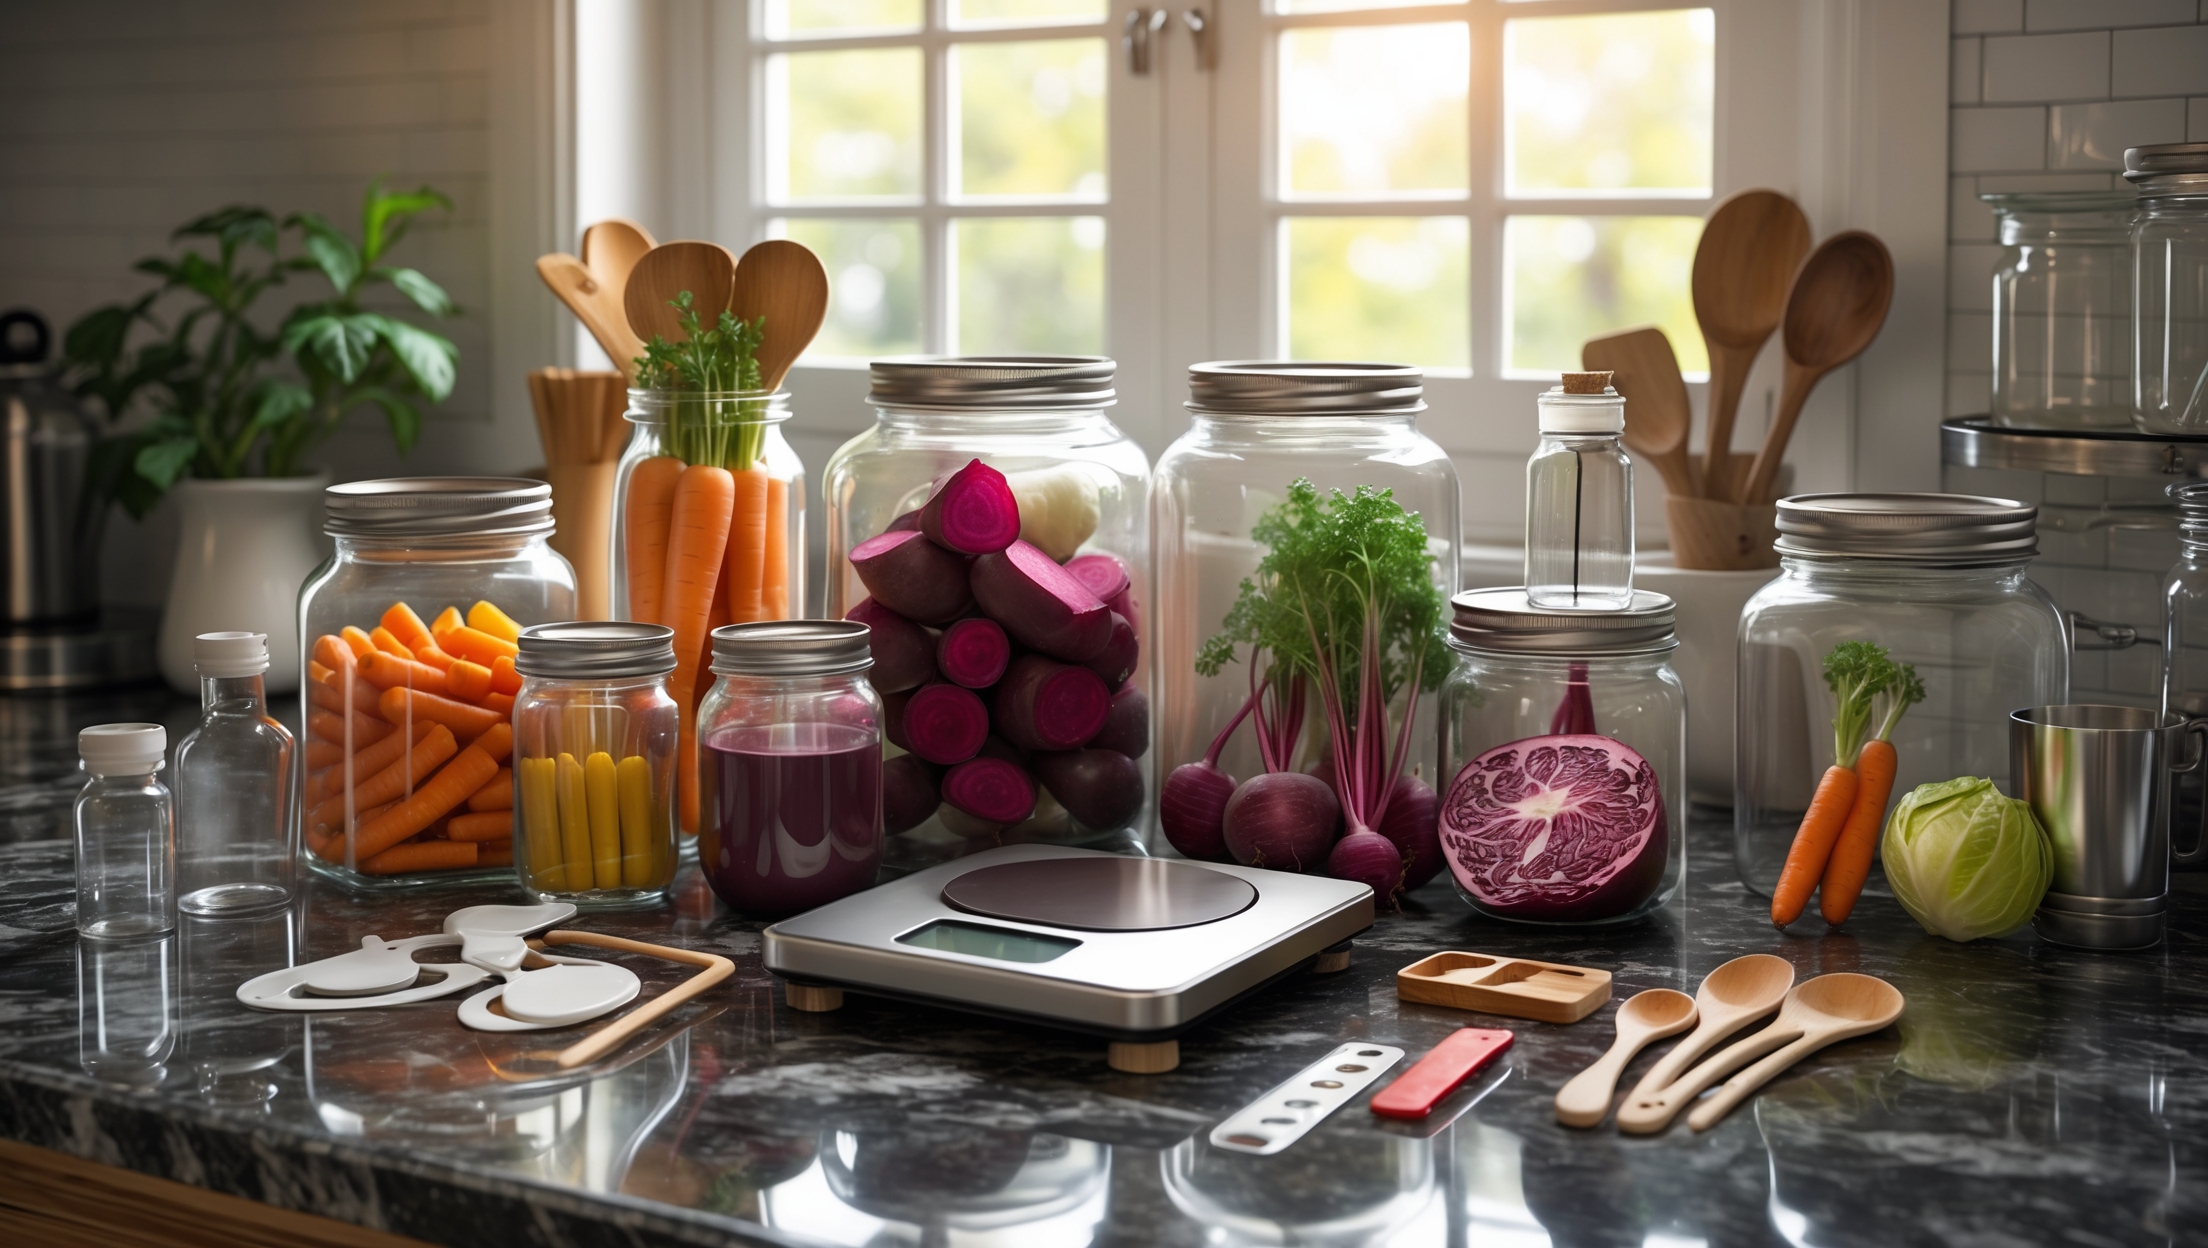
Essential Equipment for Your Fermentation Station
Fermentation Vessels
- Glass Jars and Crocks: Non-reactive, easy to sanitize, and available in a range of sizes. Ideal for lacto-ferments (pickles, kimchi, sauerkraut).
- Ceramic Fermentation Crocks: Traditional and excellent for large batches. Ensure food-safe glazes.
- Food-Grade Plastic Containers: Useful for large kimchi batches or brining, but always confirm BPA-free and food-safe ratings.
Lids, Weights, and Airlocks
- Fermentation Lids: Specialized lids with airlocks or silicone valves allow gasses to escape while keeping contaminants out.
- Glass or Ceramic Weights: Keep vegetables submerged in brine, preventing mold.
Measuring and Testing Tools
- Digital Scale: Precision is key for salting and brining.
- Graduated Measuring Cups/Spoons: For salt, water, and starter cultures.
- pH Strips or Digital Meters: Monitor acidity levels for food safety (especially important for fermented vegetables).
- Thermometer: Track ambient and ferment temperatures.
Other Essential Tools
- Large Mixing Bowls: For combining and massaging vegetables with salt.
- Tamper or Pounder: Packs vegetables tightly into vessels, reducing air pockets.
- Funnels: For pouring brine or transferring ingredients.
- Labels and Markers: Date and detail every batch for tracking and experimentation.
- Sanitizing Solution/Spray: Food-safe sanitizer (like Star San or diluted vinegar) for prepping surfaces and tools.
Organization and Workflow: Setting Up for Success
Cleaning and Prep Zone
Dedicate a section for washing produce, sanitizing vessels, and prepping ingredients. Keep cleaning brushes, scrubbers, and towels within reach to encourage regular sanitation before and after each batch.
Active Fermentation Zone
Arrange your jars and crocks in a single layer—never stack, to avoid uneven fermentation or breakage. Use trays or mats under vessels to catch spills and make cleanup easier.
Storage and Curing Area
Once ferments are complete, they often need to mature or be stored in cooler, darker conditions. Dedicate a shelf or small fridge for finished products, labeled with dates and flavor notes.
Tracking and Documentation
Keep a fermentation notebook or digital spreadsheet nearby. Record each batch’s date, ingredients, salt percentage, ambient temperature, flavor notes, and outcomes. This log becomes invaluable when troubleshooting or recreating a particularly successful ferment.
Food Safety Fundamentals for Home Fermentation
Sanitation Best Practices
- Always start with clean hands, sanitized tools, and vessels.
- Use food-safe detergents and avoid harsh chemicals that could leave residues.
- Rinse produce thoroughly and trim away damaged or moldy spots.
- Sanitize work surfaces before and after preparing ferments.
Salinity and pH: The Science of Safe Fermentation
- Salt Percentage: Most vegetable ferments require 2–3% salt by weight to inhibit harmful bacteria while encouraging lactic acid bacteria.
- pH Monitoring: Safe ferments generally reach a pH below 4.6 within a few days. Use pH strips or meters, especially for experimental or low-salt recipes.
Signs of a Healthy vs. Problematic Ferment
- Healthy ferments smell pleasantly sour, briny, or yeasty—never rotten, musty, or putrid.
- White surface “kahm” yeast is harmless; fuzzy, colorful molds (black, blue, pink) are not—discard affected batches.
- Vegetables should remain submerged at all times; top up with brine if needed.
Flavor Innovation: Push Beyond the Basics
Seasonal and Local Ingredients
Use your fermentation station to explore beyond standard cabbage and cucumbers. Try carrots with ginger, radishes with citrus, or even fruit-based ferments like pineapple tepache or fermented tomato salsa. Shop farmers’ markets for unique, peak-season produce to inspire new creations.
Spices, Herbs, and Aromatics
Layer in garlic, hot peppers, dill, bay leaves, or even green tea for added depth. Toast spices before adding for richer flavor. Always research compatibility, as some herbs may inhibit fermentation if used in excess (like rosemary or sage).
Wild vs. Starter Cultures
Experiment with wild fermentation, using only the microbes present on the vegetables, or introduce commercial starter cultures for more controlled results—especially useful for dairy or grain ferments like yogurt or sourdough.
Multiple Batches and Small-Batch Experimentation
Set up several small jars with different spice blends or brine strengths. Compare results and refine your personal “house style” over time.
Maintenance and Long-Term Care of Your Fermentation Station
Regular Cleaning Schedule
- Deep clean all vessels and tools after each ferment cycle.
- Wipe down shelves, mats, and trays weekly to prevent buildup of brine residue or stray mold spores.
- Regularly inspect and replace cracked jars, degraded lids, or worn-out silicone parts.
Seasonal Adjustments
- Monitor ambient temperature as seasons change. In hot weather, move ferments to cooler spots or use a fermentation chamber (a modified wine fridge or cooler with a thermostat).
- Recalibrate pH meters and thermometers quarterly for accurate readings.
Inventory Management
- Rotate finished ferments by date; label all jars clearly.
- Keep a running list of supplies (salt, pH strips, jars) to avoid mid-batch shortages.
Budgeting: Building a Station Without Breaking the Bank
Prioritize Essentials
Start with basic glass jars, a digital scale, and a few weights. Upgrade to specialized crocks or airlocks as your skill and enthusiasm grow.
DIY Solutions
- Silicone fermentation lids can be made from food-grade silicone sheets.
- Repurpose glass weights from clean, smooth stones (boiled first) or small glass bowls.
Buy Secondhand Smartly
- Look for glass jars and crocks at thrift stores—inspect for chips or cracks.
- Sanitize all secondhand equipment thoroughly before use.
Common Myths About Home Fermentation—Debunked
- Myth: “Fermentation is risky and likely to cause food poisoning.”
Fact: When done with proper sanitation and salt/pH controls, fermentation is one of the safest preservation methods. - Myth: “You need expensive, specialized equipment.”
Fact: Basic glass jars and household tools can suffice for most projects; advanced gear is optional. - Myth: “All molds are dangerous.”
Fact: Surface kahm yeast is common and harmless; fuzzy, colored molds should always be discarded. - Myth: “Ferments can be left anywhere, under any conditions.”
Fact: Consistent temperature and cleanliness are crucial for reliable results.
Case Study: From Chaos to Craft—Transforming a Home Kitchen
Consider the story of Alex, a home cook whose growing love of kimchi and sourdough led to jars crowding every available countertop. Frustrated by inconsistent results and accidental spills, Alex decided to transform a seldom-used pantry shelf into a fermentation station. By installing a sturdy wire rack, adding a tray for active batches, and organizing tools in labeled bins, the workflow improved dramatically. Alex tracked each batch in a fermentation log and invested in a digital pH meter for peace of mind. The result? Fewer spoiled batches, more creative experimentation, and a new sense of pride in every bubbling jar.
Conclusion: Crafting a Tradition of Flavor and Safety
Building a home fermentation station is more than a practical upgrade—it’s a declaration of culinary curiosity and a commitment to both tradition and innovation. With the right tools and an organized workflow, you can confidently explore the world of wild yeasts, probiotics, and naturally preserved flavors. By prioritizing food safety, you protect not just your health but the integrity of each handcrafted batch. And by documenting your journey, you create a personal archive of flavor—one that evolves with every season and experiment.
A dedicated fermentation station fosters both creativity and consistency. It encourages you to look beyond recipes, to play with local produce, to test new techniques, and to share your discoveries with friends and family. Most importantly, it transforms fermentation from an occasional kitchen adventure into a sustainable, inspiring part of your lifestyle. As you build and refine your station, remember that every bubbling jar is a testament to patience, craftsmanship, and the timeless joy of culinary exploration. So gather your jars, sharpen your senses, and let your fermentation journey begin—a world of taste and tradition awaits, right in your own home.