Introduction: The Allure of Artisan Flavored Butters
Few culinary crafts deliver a higher ratio of effort to reward than homemade artisan flavored butters. Whether you’re slathering a fragrant compound butter on fresh sourdough or finishing a sizzling steak with a dollop of herbed delight, these spreads elevate everyday meals into memorable feasts. In the world of taste and craft, flavored butters are a canvas for creativity and a showcase for both seasonal bounty and personal flair.
Yet, while the concept is simple—blending quality butter with flavorings—the devil is in the details. Many beginners stumble over common pitfalls: overcomplicating flavors, mishandling ingredients, or storing their creations incorrectly. Flavored butters, like all artisan crafts, reward care, technique, and a willingness to experiment. This post dives deep into the secrets of artisan flavored butters, revealing the classic mistakes to avoid, how to take inspiration from the seasons, which tools make the process seamless, and how to store your butters for ultimate freshness and safety. Whether you’re a seasoned home chef or a curious beginner, get ready to transform your kitchen with the vibrant world of gourmet butters.
Beginner Mistakes to Avoid When Crafting Flavored Butters
1. Using Low-Quality Butter as a Base
Flavored butters amplify the qualities of their base ingredient. Using cheap or heavily processed butter can result in muted flavors, greasy textures, or strange aftertastes. Always choose high-fat, unsalted, European-style butter for best results. Look for brands with minimal ingredients—just cream, and perhaps cultures.
2. Overloading with Ingredients
It’s tempting to add a little of everything—herbs, spices, zest, cheese, and more—but restraint is key. Too many flavors can muddle the final product, leading to confusion on the palate. Limit yourself to three main flavor profiles per batch, ensuring each ingredient shines and complements the others.
3. Adding Wet Ingredients Without Preparation
Watery add-ins like fresh herbs, roasted garlic, or citrus juice can cause butter to separate or spoil quickly. Always pat fresh herbs dry, and drain or squeeze out excess moisture from add-ins before blending. For garlic or shallots, roasting or sautéing first reduces water content and mellows harsh notes.
4. Skipping the Salt Check
Salt is a flavor amplifier, but salted butter gives you less control. Stick with unsalted butter and add salt to taste after mixing in your flavorings. This is especially important if you’re adding salty ingredients like cheese, miso, or anchovies.
5. Improper Blending Techniques
Under-mixing can produce uneven distribution; over-mixing can make butter greasy or cause it to split. Start with softened (not melted) butter. Use a fork, silicone spatula, or stand mixer paddle to gently but thoroughly combine your ingredients. Avoid food processors for delicate blends unless you’re making a whipped butter.
6. Neglecting Storage and Food Safety
Homemade flavored butters are prone to spoilage, particularly those containing fresh produce or dairy. Storing at the wrong temperature, or leaving out at room temperature for too long, can cause bacterial growth. Always refrigerate immediately and use within recommended timeframes (see Storage Mastery below).
7. Forgetting to Taste and Adjust
Flavors can change after chilling. Before rolling up your butter, taste and adjust seasoning while still soft. Chill a small spoonful, taste again, and tweak if necessary.
Essential Tools and Equipment for Flavored Butter Craft
- High-Quality Butter Knife or Spatula: For blending and spreading.
- Mixing Bowls: Preferably glass or stainless steel for easy cleanup and no residual odors.
- Microplane or Zester: For citrus zest, garlic, or hard cheeses.
- Herb Scissors or Sharp Chef’s Knife: Clean, even cuts prevent bruising and wateriness in herbs.
- Parchment or Wax Paper: For rolling and shaping logs or disks.
- Plastic Wrap or Silicone Storage Bags: For airtight storage and freezing.
- Labeling Materials: Masking tape and a marker to note flavors and dates.
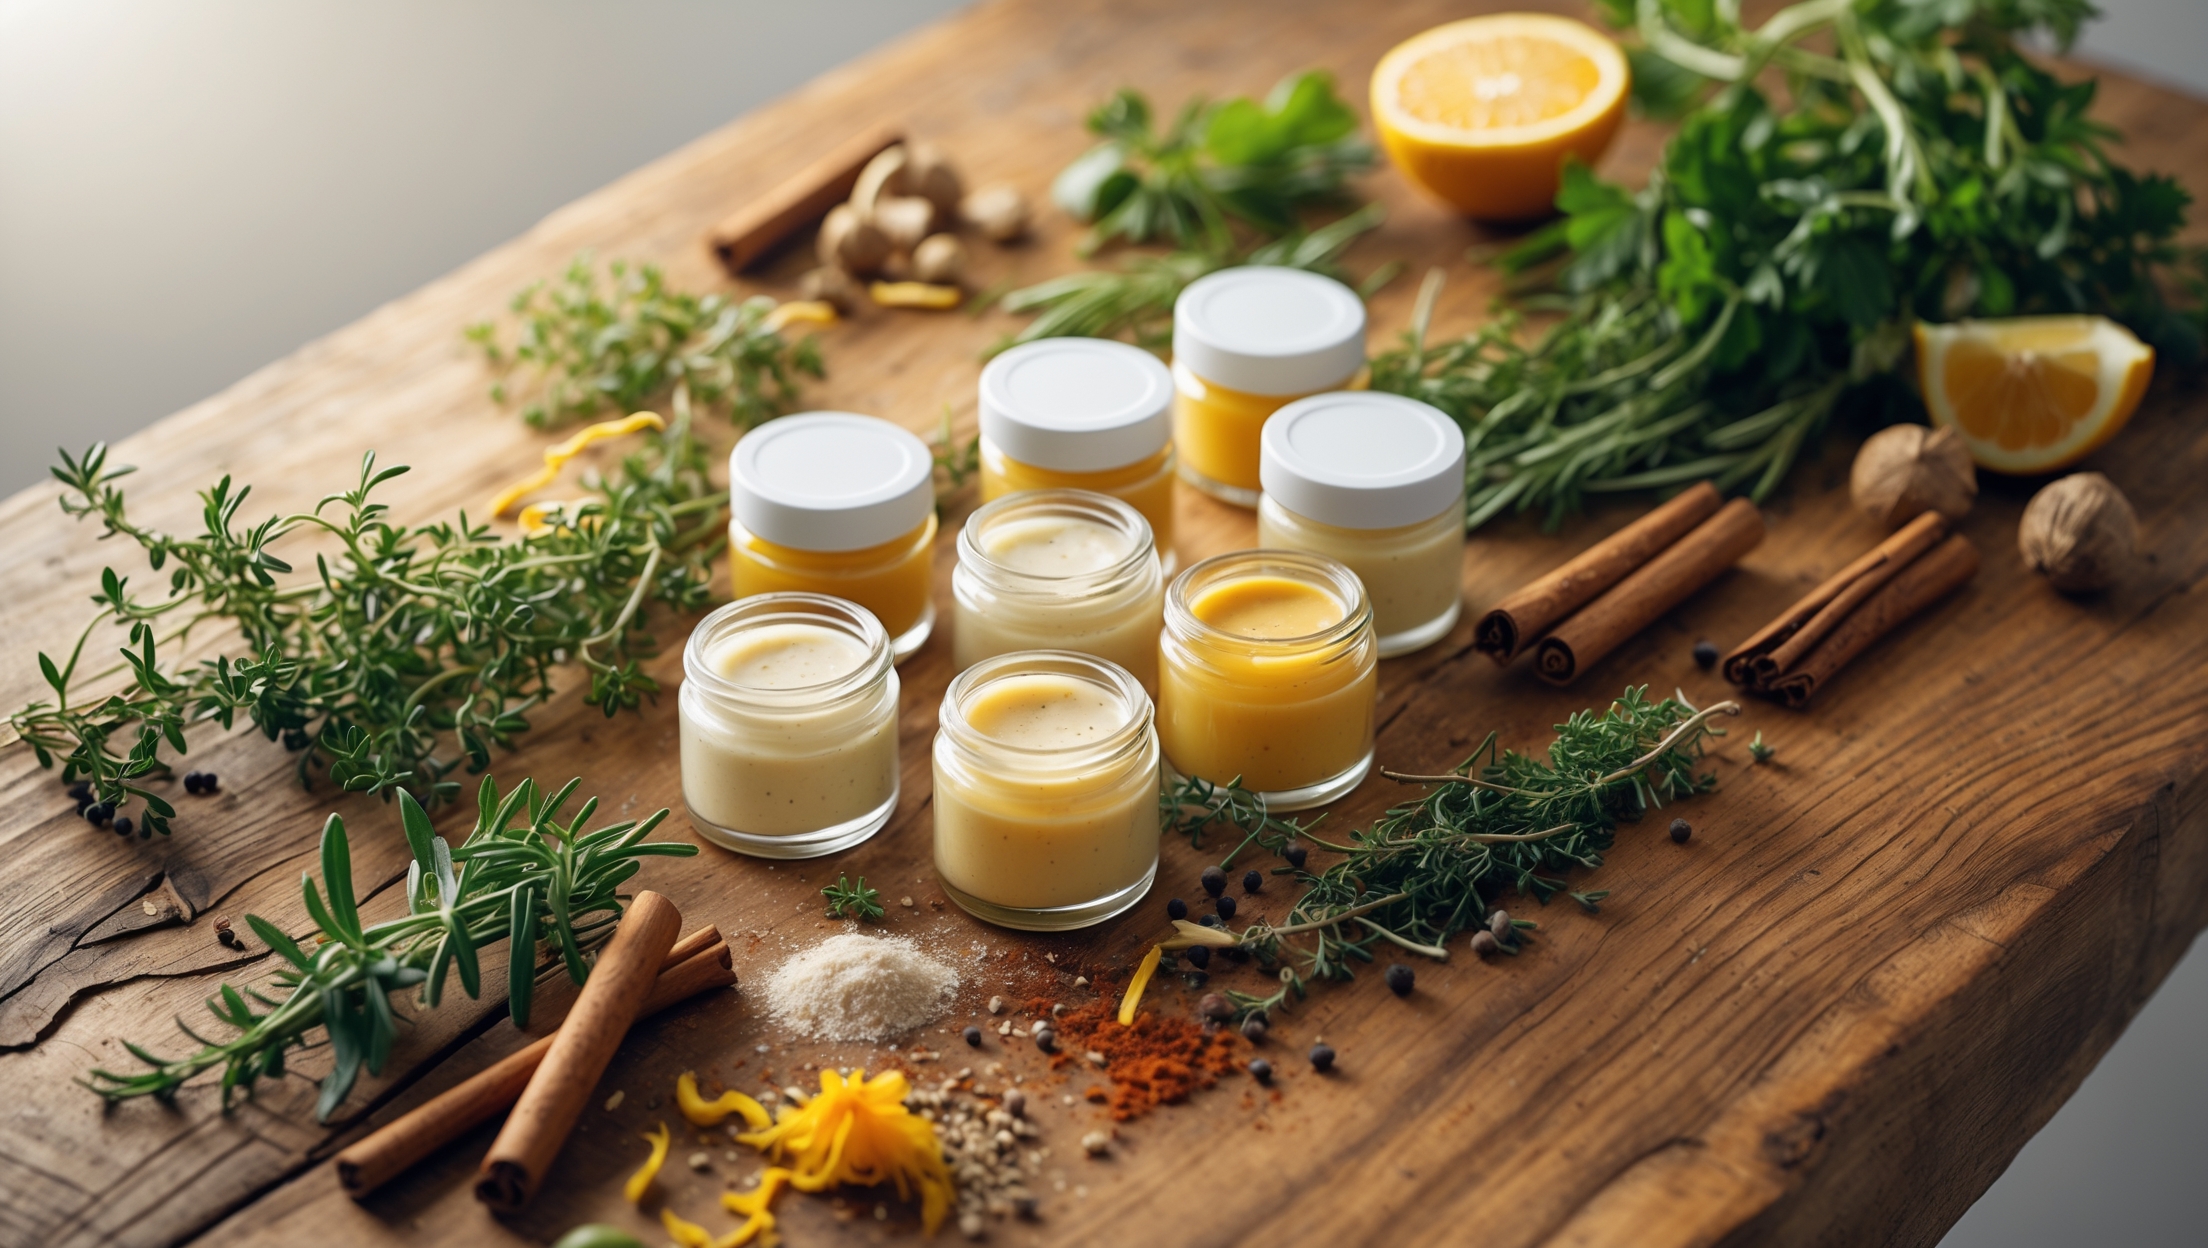
Seasonal Inspiration: Crafting Butters Year-Round
Spring: Fresh and Fragrant
- Lemon-Herb Butter: Chopped chives, parsley, tarragon, and lemon zest.
- Radish and Dill Butter: Finely grated radish, dill, and a pinch of sea salt.
Summer: Bold and Bright
- Roasted Garlic and Basil Butter: Slow-roasted garlic cloves, fresh basil, and cracked black pepper.
- Charred Corn and Chili Butter: Grilled corn kernels, chili flakes, and lime zest.
Autumn: Rich and Earthy
- Sage and Brown Butter: Toasted sage leaves, browned butter solids, and a sprinkle of nutmeg.
- Maple-Pecan Butter: Toasted pecans, a drizzle of maple syrup, and a touch of cinnamon.
Winter: Comfort and Warmth
- Cranberry-Orange Butter: Dried cranberries, orange zest, and a dash of clove.
- Spiced Honey Butter: Raw honey, ground ginger, and a pinch of cardamom.
Tips for Balancing Flavors Seasonally
- Pair robust butters (like roasted garlic or blue cheese) with hearty breads and grilled meats.
- Use delicate butters (like citrus-herb) for vegetables, seafood, or fresh rolls.
- Consider the moisture content of add-ins: dried fruits and toasted nuts last longer than fresh herbs.
Step-by-Step Tutorial: Making Flavored Butter Like a Pro
Step 1: Soften the Butter
Let unsalted, high-quality butter sit at room temperature for 1–2 hours. It should be pliable but not melting. This ensures easy mixing.
Step 2: Prepare Ingredients
- Chop herbs finely and pat dry.
- Zest citrus directly into the bowl for maximum aroma.
- Roast, sauté, or toast any ingredients that need mellowing or flavor concentration (like garlic, nuts, or spices).
Step 3: Mix Thoroughly
Place softened butter in a mixing bowl. Add your flavorings and a pinch of salt. Using a silicone spatula or fork, gently blend until everything is evenly incorporated. Taste and adjust salt or acidity if needed.
Step 4: Shape and Chill
- Spoon the butter onto parchment or wax paper.
- Roll into a log, twist the ends, and press gently to compact.
- Alternatively, spoon into ramekins or silicone molds for disks or pats.
Refrigerate at least 2 hours before slicing or serving.
Step 5: Label and Store
Write the flavor and date on masking tape or a label. Most fresh herb butters keep up to 1 week refrigerated, or up to 3 months frozen (see below for detailed storage guidance).
Storage Mastery: Keeping Your Flavored Butters Fresh and Safe
Short-Term Storage (Refrigerator)
- Store in airtight containers or wrapped tightly in parchment and plastic wrap.
- Place at the back of the fridge, where temperatures are most consistent.
- Use within 5–7 days for butters with fresh herbs, citrus, or garlic.
- Butters with dried ingredients (nuts, dried fruits, spices) can last 2–3 weeks.
Long-Term Storage (Freezer)
- Freeze logs or pats individually wrapped in plastic, then stored in a sealed bag.
- Label with flavor and preparation date.
- Use within 3 months for peak flavor and safety.
- Thaw overnight in the refrigerator, not on the counter, to prevent bacterial growth.
Food Safety Tips
- Never leave flavored butter out at room temperature for more than 2 hours.
- If you see mold, off smells, or separation, discard immediately.
- For butters with high-risk ingredients (fresh garlic, soft cheese), consider freezing after 2–3 days if not consumed.
- Clean all utensils and surfaces thoroughly before and after making flavored butters.
Creative Serving and Pairing Ideas
- Serve herbed butters with grilled vegetables, corn on the cob, or steamed fish.
- Try sweet butters (like honey-cinnamon or berry-lime) on pancakes, waffles, or scones.
- Make compound butter coins for topping steaks or roasted poultry just before serving.
- Use flavored butters as a finishing touch for risotto, pasta, or roasted potatoes.
- Gift small jars of seasonal butters wrapped with twine and a handwritten note.
Common Myths Debunked
- Myth: “Flavored butters must be eaten immediately.”
Fact: Properly stored, they keep for weeks (or months if frozen). - Myth: “Only savory flavors work.”
Fact: Sweet butters are incredible on breads and desserts. - Myth: “Only chefs can make gourmet butters.”
Fact: Anyone with basic kitchen tools can make artisan-quality spreads. - Myth: “Adding raw garlic is unsafe.”
Fact: While raw garlic can be risky if left at room temperature, refrigerated or frozen garlic butters are safe if consumed promptly.
Conclusion: Elevate Your Table, One Spread at a Time
Artisan flavored butters are a gateway to a richer, more flavorful home dining experience. With a few essential tools, a sense of seasonal adventure, and a keen eye for food safety, anyone can produce gourmet spreads that rival those of fine restaurants. By avoiding beginner mistakes—like overloading flavors, neglecting storage, or using low-quality bases—you set yourself up for buttery success. Explore the changing palettes of each season, from spring’s herbal freshness to winter’s spiced warmth, and let your own culinary creativity guide you toward new combinations.
The beauty of artisan butters lies not just in their taste, but in their flexibility: a single batch can transform a meal, surprise a guest, or brighten up a weekday breakfast. With careful storage, your creations can be enjoyed over time or shared as thoughtful gifts. Remember, culinary craft is as much about enjoyment as it is about precision. Taste, adjust, and most importantly—savor the process. As you master the secrets of flavored butters, you’ll find yourself inspired to experiment further, discovering new dimensions of taste and hospitality in your own kitchen.