Introduction: The Rise of Home Curing & Charcuterie Culture
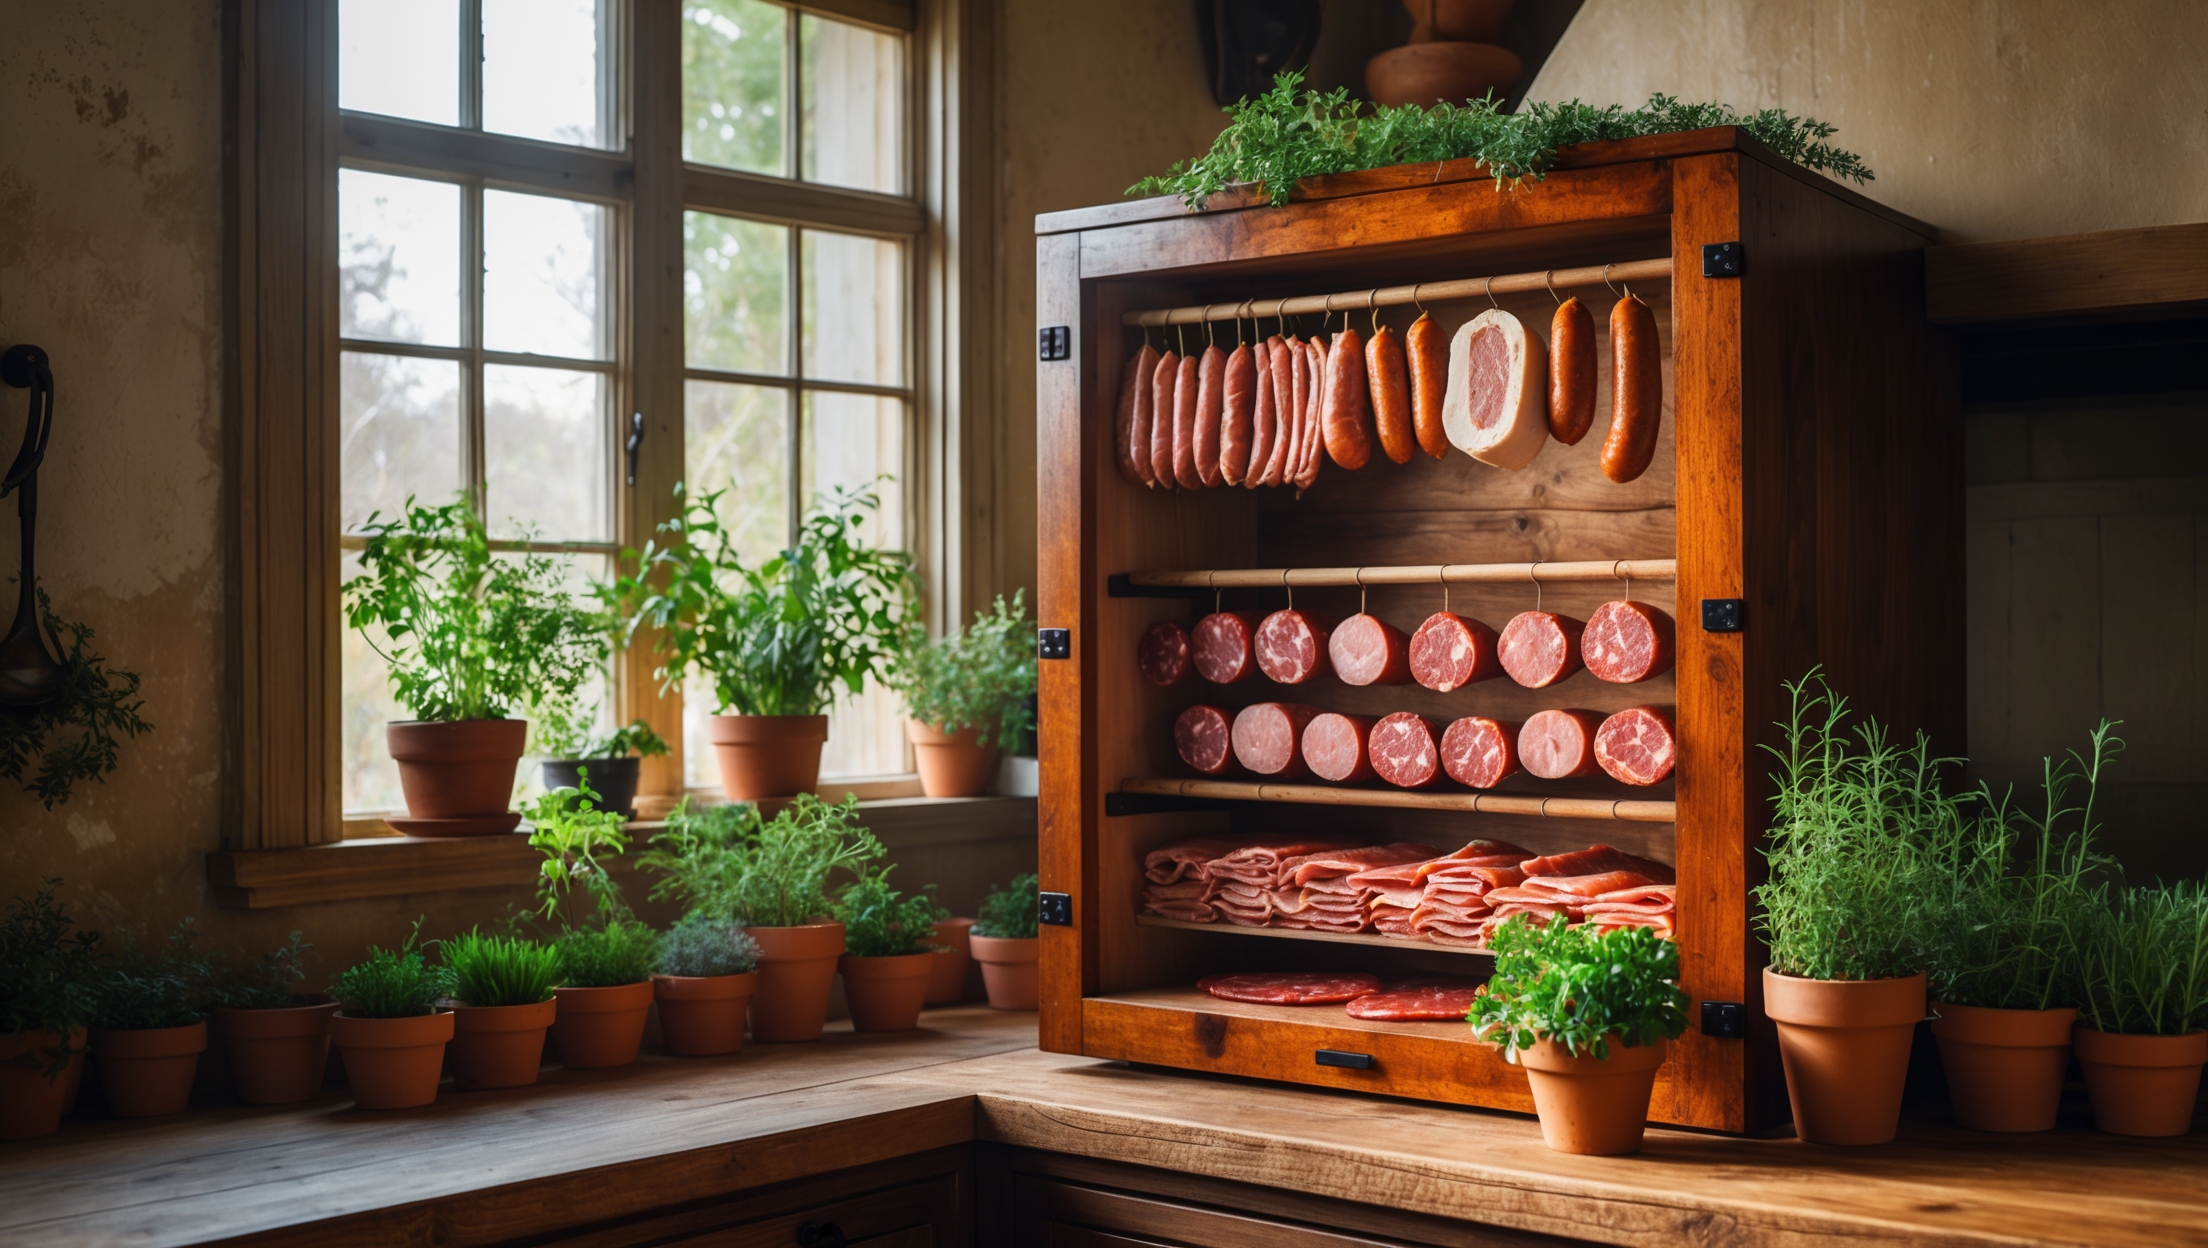
From bresaola to pancetta, home-cured meats have quietly claimed a place among the most rewarding culinary crafts. The growing interest in charcuterie culture isn’t just about indulging in rich flavors or artisanal tradition—it’s a creative journey that blends precise technique, deep respect for ingredients, and a keen sense of seasonality. For passionate cooks and culinary creators, few projects deliver as much satisfaction as crafting your own prosciutto, coppa, or duck breast, aged to perfection in a dedicated curing cabinet.
However, home curing is not simply a matter of hanging meat in the cellar and hoping for the best. Achieving safe, consistent, and delicious results requires a controlled environment—one that mimics the temperature, humidity, and airflow of traditional European curing spaces. Enter the home curing cabinet: a specialized setup that empowers you to craft charcuterie year-round, regardless of your local climate.
This comprehensive guide will walk you through the essential tools and materials for setting up a home curing cabinet, outline key safety and food science principles, and highlight seasonal charcuterie projects to inspire your culinary creativity. Whether you’re a curious beginner or an ambitious home chef, discover how to elevate your kitchen craft and savor the stories behind each slice.
Why Build a Home Curing Cabinet?
Beyond the Refrigerator: The Art of Controlled Aging
Traditional charcuterie relies on precise environmental conditions to ensure that meats cure safely and develop their signature flavors and textures. While refrigerators are excellent for keeping food cold, they’re far too dry and cold for proper curing. Specialized curing chambers (or cabinets) allow you to fine-tune humidity (70–80%), temperature (50–60°F/10–16°C), and airflow—key variables that influence both safety and gastronomic outcome.
- Consistent Results: Minimize spoilage and off-flavors with stable conditions.
- Year-Round Curing: Forget seasonality constraints and unpredictable weather.
- Creative Freedom: Experiment with regional styles, spice blends, and ingredient pairings.
- Food Safety: Reduce the risk of harmful bacteria or mold growth.
- Showcase Craftsmanship: Impress guests with authentic, hand-crafted charcuterie boards.
Essential Tools and Equipment for a Home Curing Cabinet
The Cabinet or Chamber: Picking Your Foundation
Your curing cabinet can take several forms, but the most popular (and cost-effective) option is a repurposed upright refrigerator or wine cooler. These units offer good insulation and are readily available second-hand.
- Size: Choose a unit large enough to hang several pieces of meat without touching.
- Sealing: Ensure the door seals tightly to maintain internal conditions.
- Interior Space: Remove shelving and add food-safe hooks, rods, or stainless racks.
Temperature Control: Precision is Key
Most refrigerators chill far below the optimal curing range, so you’ll need an external temperature controller. These plug-and-play devices let you set your desired temperature, cycling the fridge on and off as needed.
- Digital Temperature Controller: (e.g., Inkbird ITC-308) with probe sensor.
- Thermometer/Hygrometer: For internal monitoring (digital or analog).
Humidity Control: Achieving the Goldilocks Zone
Maintaining 70–80% relative humidity is critical; too little and meat dries out, too much and you risk unsafe mold. This is usually achieved by adding a small humidifier (ultrasonic is best for precise control) and, if needed, a dehumidifier or desiccant packs for damp climates.
- Humidifier: Small, adjustable unit inside the cabinet.
- Humidity Controller: (e.g., Inkbird IHC-200) to automate the humidifier.
- Desiccant Packs or Mini-Dehumidifier: Optional, for high-humidity environments.
Air Circulation: The Unsung Hero of Curing
Good airflow prevents moisture pockets and discourages undesirable mold. A small, food-safe fan (think: computer fan with a low-voltage adapter) is ideal for gentle, continuous circulation. Avoid direct blasting on meats.
- Low-Speed Fan: Small, energy-efficient, and quiet.
- Timer or Manual Switch: For periodic operation if needed.
Food-Grade Hardware: Hanging and Shelving
Stainless steel hooks, S-hooks, and rods are ideal for hanging. Avoid galvanized or painted metals, which may corrode or leach chemicals. Shelving should be removable and easy to sanitize.
- Stainless Steel Hooks/Rods: For hanging larger cuts.
- Plastic or Stainless Trays: For smaller items or catching drips.
Sanitation Supplies and Monitoring
- Food-Safe Sanitizer: For prepping the cabinet and hardware.
- Spray Bottles: For misting surfaces and maintaining humidity.
- pH Meter/Test Strips: Optional, for advanced safety monitoring.
Building Your Curing Cabinet: Step-by-Step Setup
1. Sourcing and Cleaning Your Cabinet
Start by sourcing a suitable upright refrigerator or wine chiller. Clean thoroughly with a food-safe sanitizer—don’t forget seals and crevices. Let dry completely before installing equipment.
2. Installing Temperature and Humidity Controllers
Mount both controllers externally. Run the temperature probe inside (usually through the door seal or a drilled hole, sealed with food-grade silicone). Place the humidity probe at meat level, away from direct airflow or humidifier output for accurate readings.
3. Setting Up Humidification and Airflow
- Position the humidifier on the cabinet floor, with the nozzle angled away from meat.
- Add a drip tray or absorbent mat under to catch spills.
- Place the fan in a corner or mount on the side wall for gentle circulation—test with a strip of tissue to ensure airflow is mild.
4. Installing Hanging Hardware
Mount stainless rods or removable racks at the top of the cabinet. Space hooks well apart to prevent meats from touching. For small items, add wire baskets or trays below.
5. Power and Safety Considerations
Ensure all devices are plugged into a surge-protected power strip outside the cabinet. Check cords for wear and avoid overloading circuits. Keep all electronics above floor level to prevent water damage from spills or condensation.
6. Initial Testing: Empty Run
Before introducing any food, run the cabinet for at least 48 hours. Monitor temperature and humidity, making adjustments until you consistently hit:
- Temperature: 50–60°F (10–16°C)
- Humidity: 70–80%
Log readings every few hours to establish baseline stability. Fine-tune controller setpoints and fan cycles as needed.
Food Safety: Best Practices and Safety Checklist
Understanding the Risks
Curing meat at home is safe—provided you control for temperature, humidity, and airflow. The greatest risks are pathogenic bacteria (like Listeria or Salmonella), unwanted molds, and excessive drying.
Critical Food Safety Steps
- Source Meat Responsibly: Choose fresh, high-quality cuts from reputable suppliers.
- Use the Right Curing Salts: Curing salts (e.g., Prague Powder #1 or #2) inhibit bacterial growth and are essential for most recipes. Follow dosage instructions exactly.
- Maintain Clean Hands and Work Surfaces: Sanitize all surfaces, tools, and your hands before handling meat.
- Monitor Cabinet Conditions: Check and log temperature/humidity daily. Invest in a backup thermometer/hygrometer for peace of mind.
- Inspect Regularly for Mold: White, powdery mold is generally safe and can be wiped away with vinegar. Green or black mold means you must discard the affected meat.
- Weigh Meats Before and During Curing: Most cured meats are ready when they’ve lost 30–40% of their initial weight.
- pH Testing: For fermented sausages, test pH to ensure it drops below 5.3 within 2–3 days.
Home Curing Safety Checklist
- ✔ Cabinet cleaned and sanitized before use.
- ✔ Controllers and probes properly installed and calibrated.
- ✔ Humidifier and fan placed away from meat, not blowing directly.
- ✔ All meat surfaces checked for spoilage or unusual odors before and during curing.
- ✔ Daily environmental monitoring.
- ✔ Immediate removal of any meat showing green/black mold.
- ✔ Proper use and storage of curing salts and spices.
- ✔ Accurate record-keeping (dates, weights, conditions).
Seasonal Charcuterie Projects: Inspiration Throughout the Year
Spring and Early Summer
- Lonzino (Cured Pork Loin): Delicate and lean, ready in 1–2 months—perfect for spring gatherings.
- Cured Duck Breast (Magret de Canard Séché): Quick and elegant, finished in just a few weeks.
- Spiced Coppa: Begin in cool spring; ready for summer antipasti boards.
Late Summer and Autumn
- Bresaola: Beef eye of round cured with juniper, rosemary, and red wine; ideal for end-of-summer picnics.
- Chorizo Seco: Spicy Spanish sausage that bridges summer grilling and autumn stews.
- Salumi di Fegato: Liver-enriched sausage cured as the weather cools.
Winter Projects
- Pancetta: Cured pork belly rolled with black pepper and herbs, ready for hearty winter pasta dishes.
- Guanciale: Cured pork jowl, a must for authentic carbonara and amatriciana.
- Spiced Venison Salami: Ideal for hunters; cure during the coldest months for best results.
Pairing and Serving Ideas
Once your charcuterie is ready, showcase it with seasonal accompaniments: fresh figs or pickled vegetables in summer, roasted nuts and dried fruit in winter, and crusty artisan breads year-round. A well-curated home curing cabinet lets you tailor your boards to the seasons, local markets, and your own creative influences.
Maintenance and Troubleshooting: Keeping Your Cabinet in Top Form
Routine Cleaning
- Sanitize all internal surfaces and hardware between batches.
- Check for and remove any condensation buildup.
- Clean humidifier reservoirs weekly to prevent biofilm and mineral deposits.
Periodic Calibration
- Verify thermometer and hygrometer accuracy monthly using calibration kits or salt tests.
- Recalibrate controllers as needed for precision.
Common Issues & Solutions
- Humidity Too Low: Add a larger humidifier, increase setpoint, or use water trays.
- Humidity Too High: Open the door briefly to vent, add desiccant packs, or run a mini-dehumidifier.
- Temperature Fluctuations: Check door seal, controller placement, and ambient room temperature.
- Unwanted Mold: Improve airflow, increase cleaning frequency, and check for spoiled meat.
- Stale or Off Odors: Clean cabinet thoroughly, ensure meat is fresh, and avoid overcrowding.
Conclusion: Savoring the Craft—Your Home Curing Journey
Building and maintaining a home curing cabinet is a rewarding intersection of science, tradition, and culinary artistry. Beyond the technical details, it cultivates patience, attention to detail, and a deeper appreciation for the stories embedded in every slice of cured meat. With the right tools, a steadfast commitment to safety, and a willingness to experiment, home charcuterie becomes more than a hobby—it’s a creative outlet that connects you to centuries of food culture and the rhythms of the seasons.
As you explore new recipes and perfect your technique, you’ll find every batch tells a story: of the cut you selected at the market, the blend of spices you chose, and the care you took in monitoring your cabinet’s delicate balance. Sharing your creations with friends and family elevates even ordinary gatherings into memorable feasts, while your knowledge of the craft inspires others to discover the joys of slow food and handmade flavor.
Whether you dream of replicating the robust salumi of Italy, the smoky sausages of Spain, or developing your own signature style, a home curing cabinet opens doors to culinary adventures limited only by your imagination. With each successful project, you become part of a living tradition—one that marries science, seasonal inspiration, and the pleasure of the table. Here’s to your next curing season, and to the stories you’ll create, cure, and savor.




I’m interested in trying home curing, but as a busy parent, I worry about the maintenance aspect of a curing cabinet. How much hands-on time does it typically require to keep temperature, humidity, and airflow in the right range?
Home curing cabinets are designed to automate much of the temperature and humidity control, so once everything is set up, daily hands-on time is usually minimal—often just a few minutes to check readings and make small adjustments if needed. You might spend 10–15 minutes once or twice a week cleaning the cabinet and monitoring airflow. Setting up a reliable system upfront makes ongoing maintenance much easier for a busy schedule.
I’m new to home curing and a bit concerned about food safety. What are the most common mistakes beginners make with temperature or humidity in curing cabinets, and how can I avoid them?
A common mistake is letting the temperature or humidity fluctuate outside safe ranges. Too high a temperature can cause spoilage, while too low humidity can dry the outside of meats too fast, trapping moisture inside. Aim for 55–60°F and 70–80% humidity. Use reliable digital sensors, check your cabinet daily, and calibrate equipment regularly to avoid issues.
For someone on a budget who’s interested in starting with smaller charcuterie projects, are there ways to modify an old fridge or do you recommend investing in a dedicated curing cabinet from the start?
Repurposing an old fridge is a practical and budget-friendly way to start small-scale charcuterie. You can add a temperature and humidity controller, a small fan for air circulation, and a hygrometer to monitor conditions. This setup works well for beginners and avoids the cost of a dedicated curing cabinet, which is more of an investment for advanced or larger projects.
The article mentions that a curing cabinet can let you do charcuterie year-round regardless of climate. Are there any specific seasonal meats or recipes you’d recommend for beginners to try first as the seasons change?
For beginners, starting with pancetta or bresaola in the cooler months is a good idea, since these cuts are more forgiving and require less complex seasoning. As the weather warms, you might try coppa or simple salamis, which benefit from the precise humidity control of a curing cabinet. Seasonal herbs like rosemary in winter or wild garlic in spring can add a nice touch to your recipes as the year progresses.
Once you have your curing cabinet set up and running, how often do you need to check on the meats or adjust settings to make sure things are aging safely and correctly? I work long hours and don’t want to miss anything important.
Once your curing cabinet is running, it’s best to check on your meats and monitor the cabinet’s temperature and humidity at least once a day, especially in the first week. After that, if everything remains stable, you can check every couple of days. Investing in a digital monitor with alarms can help you stay on top of changes remotely, so you won’t miss anything even with a busy schedule.
Could you shed a bit more light on airflow in the curing cabinet? I get that temperature and humidity are key, but I’m not sure how much air movement is too much. Do you recommend a specific type of fan or method to avoid drying out the meat edges?
Airflow in a curing cabinet should be gentle and consistent—not strong enough to create drafts that dry out the meat edges, but enough to prevent stagnant air. A small computer or muffin fan running at low speed is ideal. Set it up to circulate air gently throughout the cabinet without blowing directly onto the meats. This helps maintain even humidity and temperature, reducing the risk of case hardening while supporting safe curing.
You mentioned that traditional charcuterie spaces have certain airflow needs. Is there a simple way to create this kind of airflow at home, or do I need to invest in something special beyond a modified fridge and humidifier?
You don’t need to make a huge investment to achieve proper airflow at home. A small, low-speed computer fan inside your modified fridge can help circulate air gently, which is usually enough for most home curing projects. Just be sure the airflow is not too strong, as that can dry out the surface of your meats too quickly. Monitor regularly to ensure even conditions.
You talk about the importance of temperature and humidity control for successful curing, but is there a significant difference between using a modified fridge versus building a curing cabinet from scratch? Would one give noticeably better results or be easier for someone on a budget to set up?
Using a modified fridge is typically easier and more budget-friendly, since you’re starting with an insulated, sealed space and only need to add a temperature and humidity controller. Building a curing cabinet from scratch offers more flexibility in size and features but usually costs more and takes more effort. Both methods can yield great results if you manage the environment precisely, so for most beginners or budget-conscious hobbyists, modifying a fridge is often the best choice.
Could you break down what essential tools and materials I should invest in first when setting up a home curing cabinet? I want to get started but am trying to stick to a reasonable budget as I test things out.
To get started on a budget, focus on the basics: a dedicated fridge or wine cooler for your cabinet, a reliable digital temperature and humidity controller, and a small fan for air circulation. Invest in a good hygrometer-thermometer combo to monitor conditions. For curing, you’ll need stainless steel hooks or racks, food-safe trays, and non-reactive containers for brining or marinating. These essentials will let you begin safely and effectively without overspending.
For those of us dealing with fluctuating home temperatures and humidity between seasons, do you recommend any particular strategies or equipment to keep a curing cabinet stable, especially during hot and humid US summers?
To keep your curing cabinet stable during hot and humid summers, consider using a dedicated temperature and humidity controller paired with a small refrigeration unit and a humidifier or dehumidifier. Insulating the cabinet helps reduce outside fluctuations. Regularly monitor conditions with accurate sensors to ensure your charcuterie cures safely and consistently all year round.
The article mentions that achieving the right humidity and temperature is crucial for safe home curing. What are some affordable tools or devices you’d recommend for accurately monitoring and controlling these conditions inside a curing cabinet?
For accurate monitoring, you can use a digital hygrometer-thermometer combo, which tracks both temperature and humidity inside the cabinet and is usually quite affordable. To control humidity, consider a small ultrasonic humidifier and a basic humidity controller that allows you to set a target range. For temperature, a mini fridge with an external temperature controller can help maintain stable conditions. These tools together should give you both control and peace of mind during curing.
You talked about crafting charcuterie year-round by mimicking traditional European curing spaces. If I want to try seasonal projects like duck breast in winter and coppa in summer, are there different settings or safety considerations I should keep in mind for each season?
Yes, different meats and seasons call for some adjustments. Duck breast (like duck prosciutto) in winter often benefits from cooler, less humid settings—around 55°F and 65–70% humidity. Coppa in summer may need even tighter humidity control and good airflow to prevent spoilage, since higher temperatures can speed up unwanted bacterial growth. Always monitor temperature and humidity closely, and use reliable curing salts for safety.