Introduction: The Allure of Cold Brew Coffee at Home
Cold brew coffee has transcended the status of seasonal trend and claimed its place as a year-round staple for coffee aficionados and casual drinkers alike. Its smooth, low-acidity profile and versatile preparation methods offer an inviting canvas for culinary creativity. While coffee shops have popularized cold brew with creative infusions and nitro taps, more home brewers are discovering that mastering cold brew in their own kitchens is both accessible and rewarding. But what does it really take to set up your own cold brew station at home? How do you balance cost, equipment, and evolving flavor trends? In this detailed guide, we’ll break down every aspect of crafting exceptional cold brew—from step-by-step brewing techniques and smart budgeting, to exploring trending flavors and troubleshooting common pitfalls. Whether you’re a coffee enthusiast seeking a new weekend project or a culinary creator looking to refine your beverage repertoire, this guide will empower you to brew with confidence and creativity.
Understanding Cold Brew: What Sets It Apart?
The Science of Cold Extraction
Unlike traditional hot brewing methods, cold brew relies on time rather than heat to extract flavors from coffee grounds. Steeping coarsely ground coffee in cold water for 12-24 hours results in a beverage with lower acidity, reduced bitterness, and a uniquely smooth mouthfeel. This gentle extraction process allows subtle flavor notes—like floral, chocolaty, or fruity undertones—to shine through in ways that hot coffee can sometimes mask.
Cold Brew vs. Iced Coffee: Key Differences
- Brewing Method: Cold brew is steeped in cold water for hours; iced coffee is brewed hot and then cooled.
- Acidity & Bitterness: Cold brew is less acidic and less bitter.
- Flavor Profile: Cold brew highlights smooth, mellow, and sometimes sweet flavors.
- Concentration: Cold brew is often made as a concentrate, allowing for dilution and creative mixing.
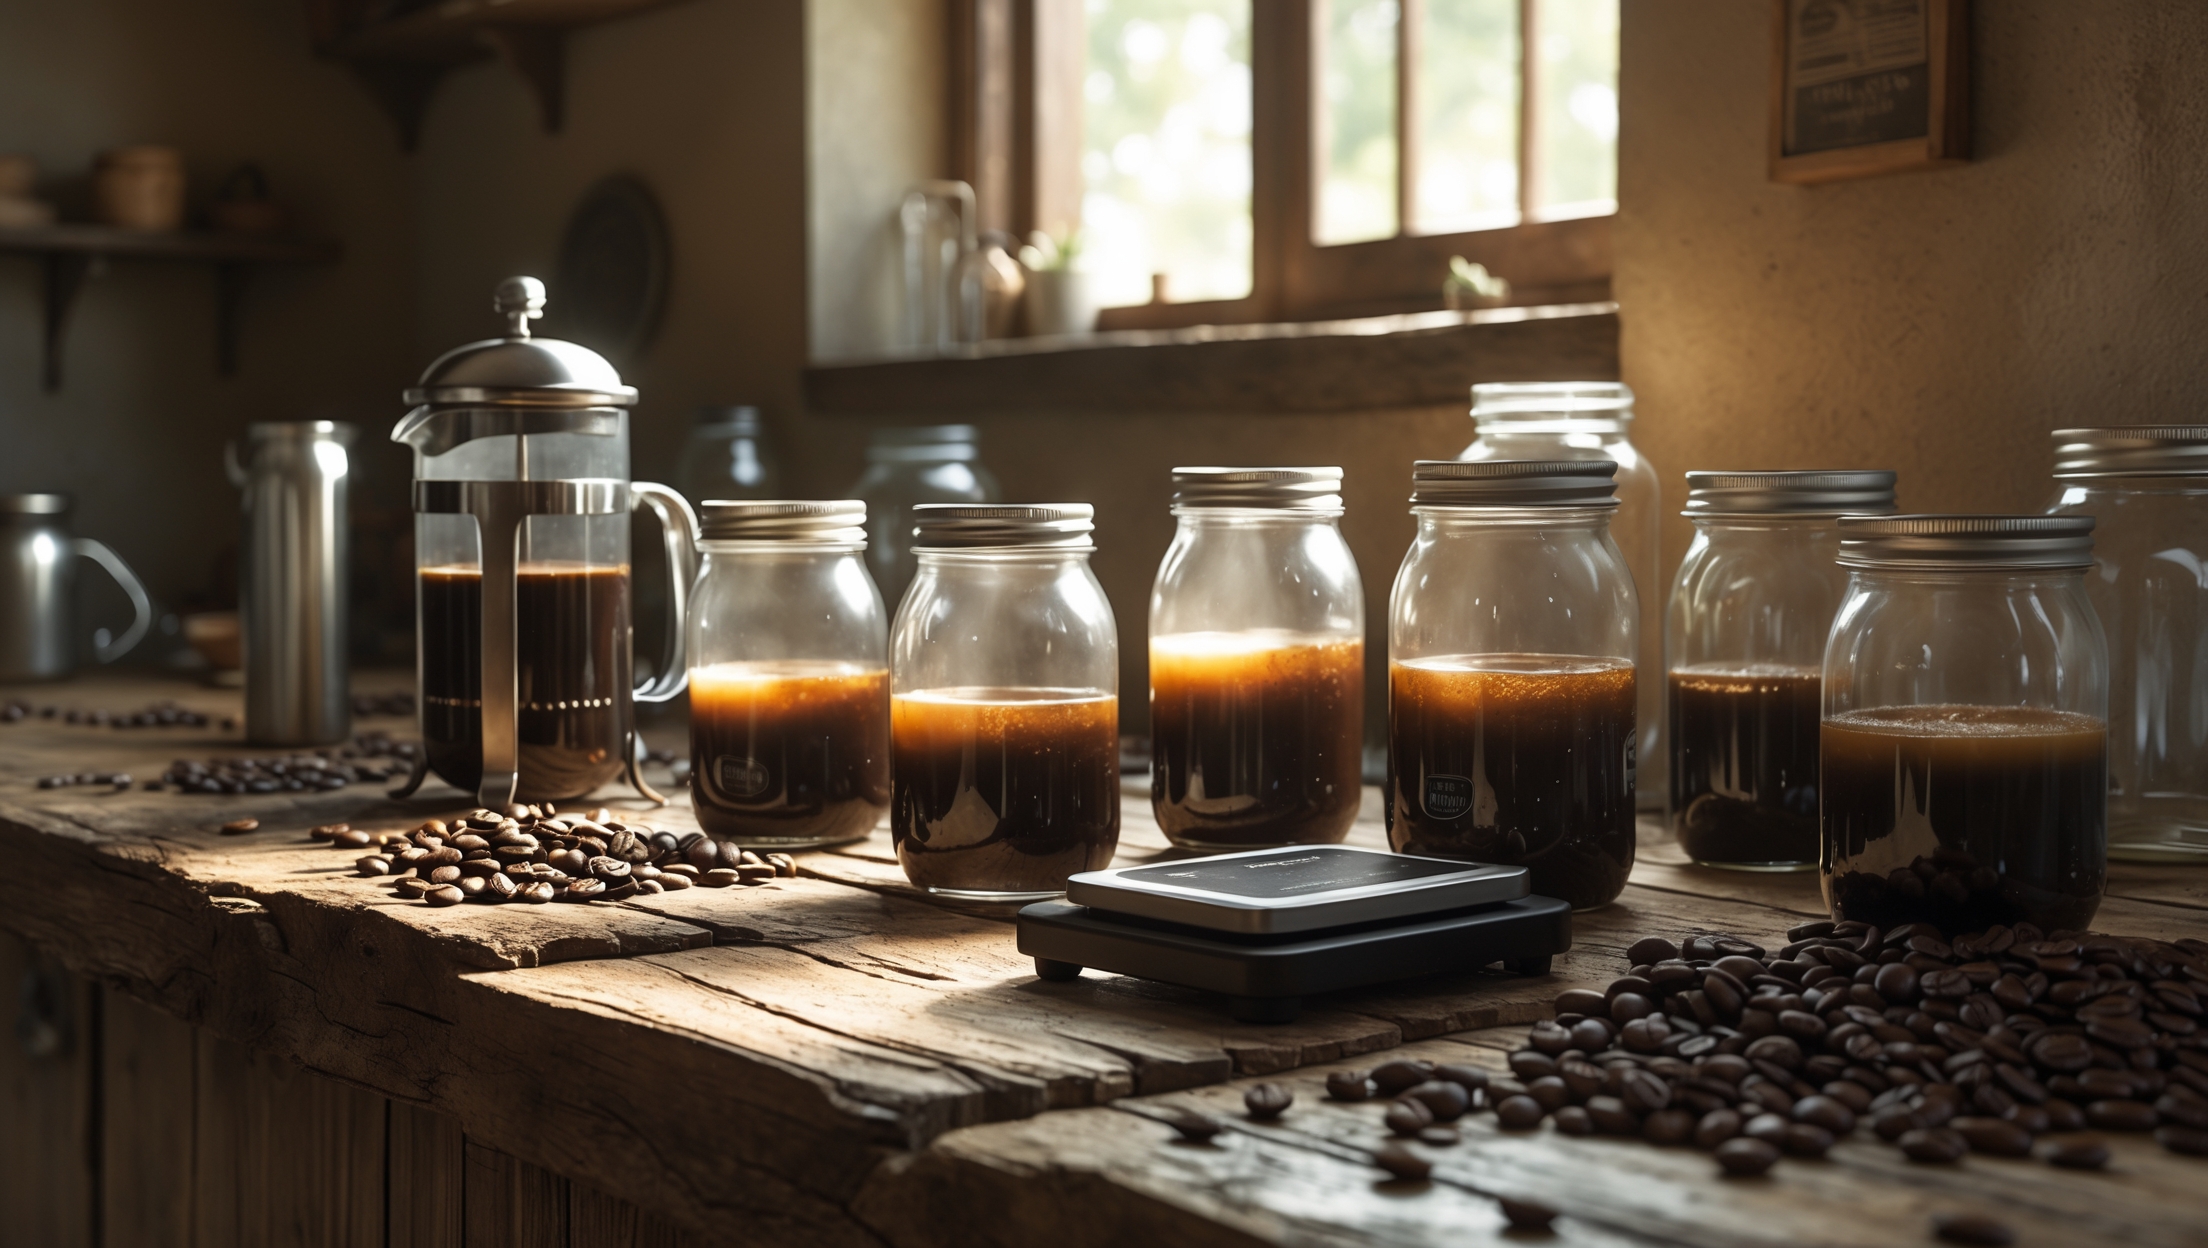
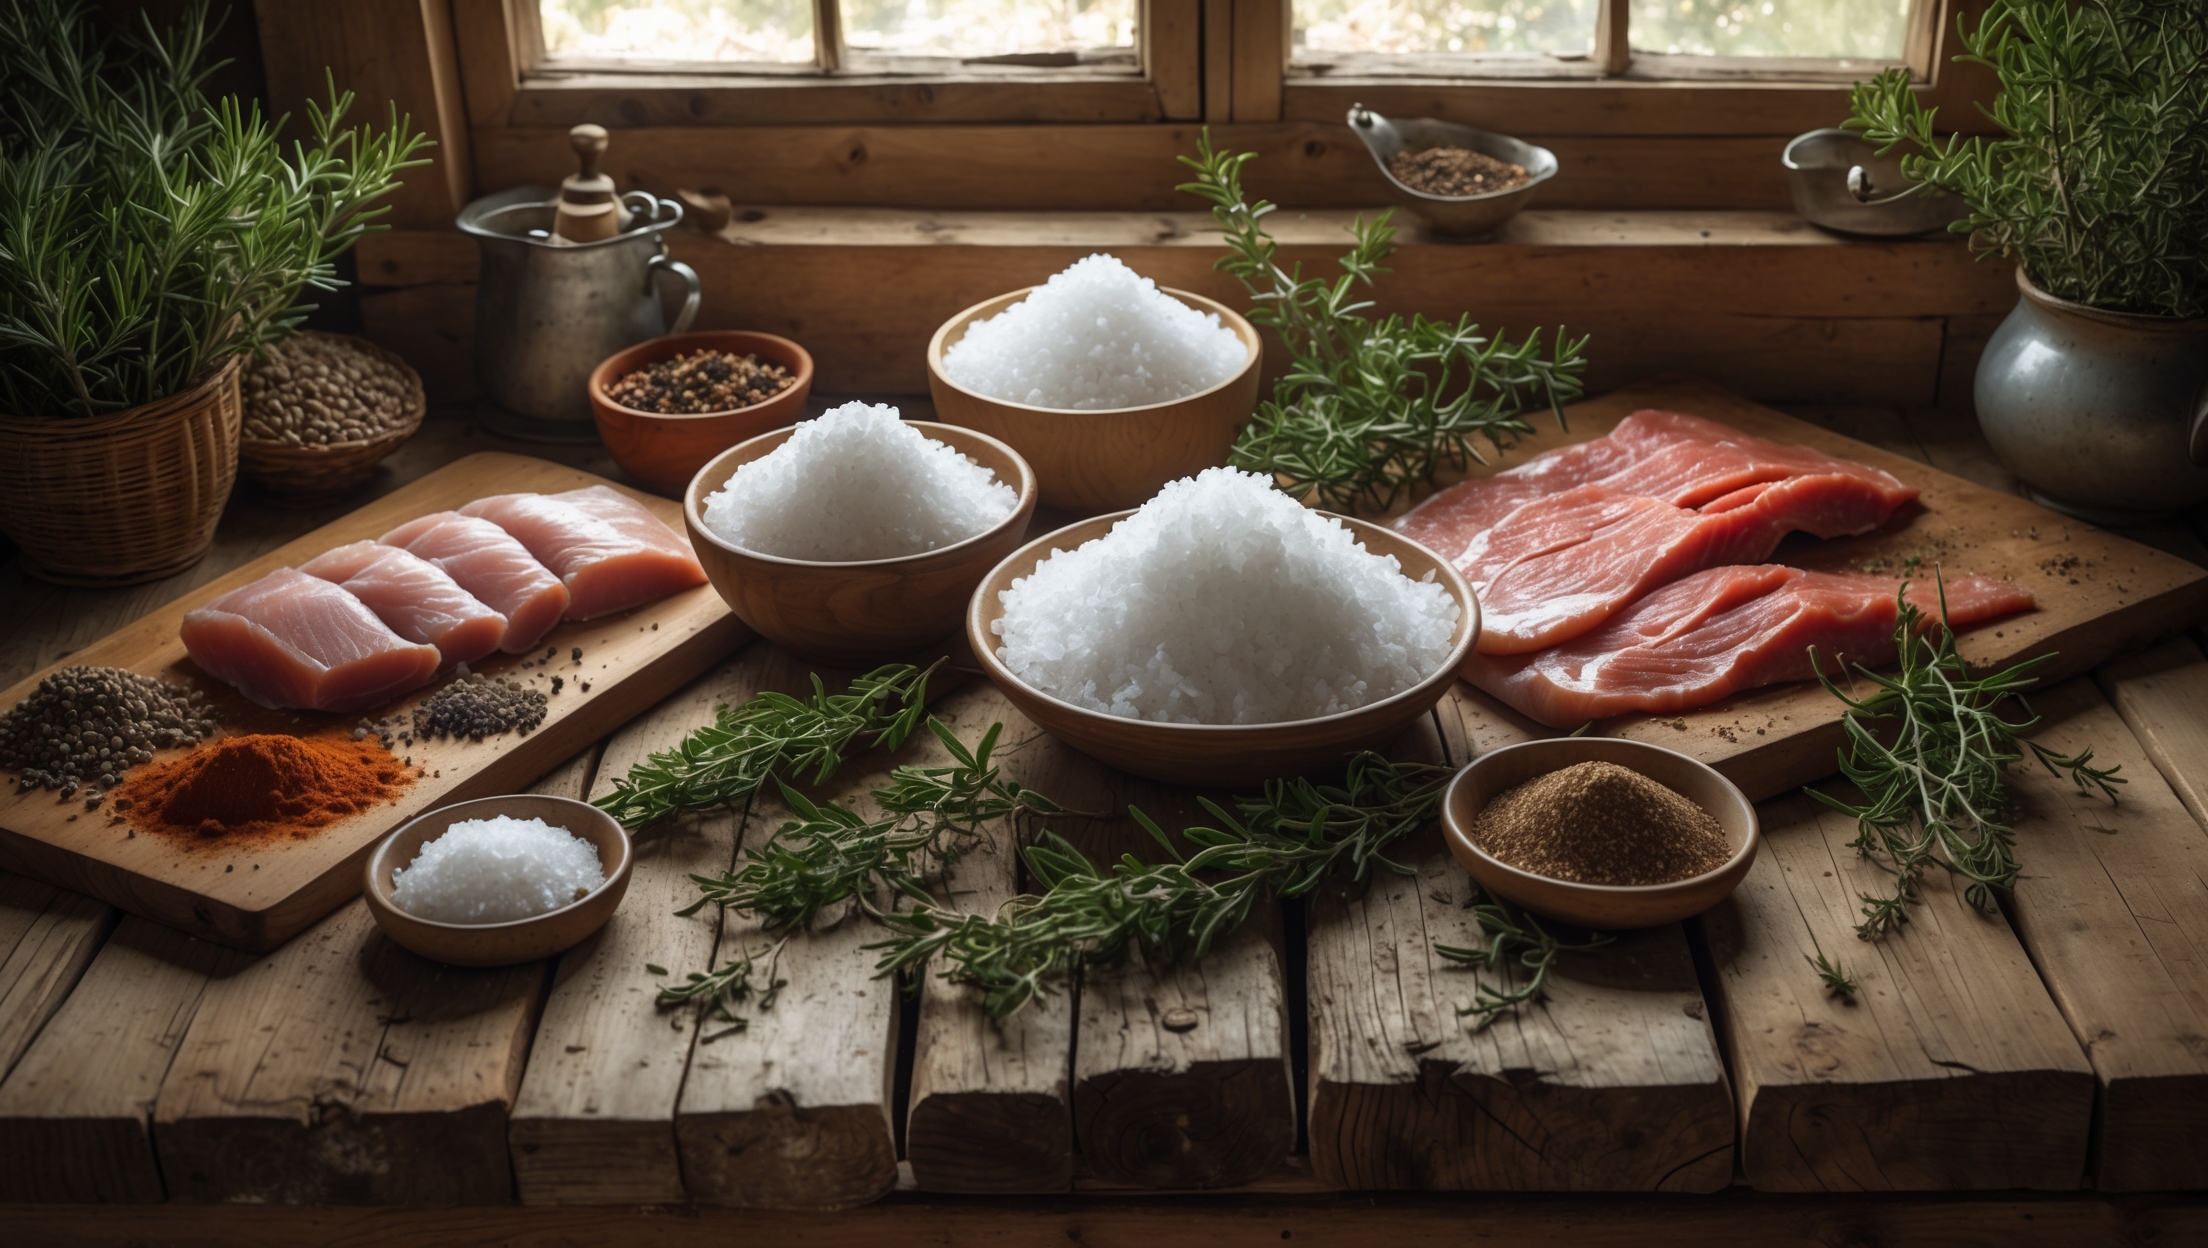
Essential Equipment: Tools for Home Cold Brew Mastery
Starter Setup: Minimalist Approach
You don’t need expensive gadgets to begin. Many home brewers start with a large mason jar, a fine mesh strainer, and cheesecloth or a nut milk bag. This setup is cost-effective and yields excellent results with a little care.
- Mason Jar: At least 1-liter capacity recommended.
- Fine Mesh Strainer: Stainless steel preferred for durability.
- Cheesecloth/Nut Milk Bag: For filtering fine coffee particles.
Scaling Up: Dedicated Cold Brew Makers
For those ready to invest in convenience and consistency, commercial-style cold brew makers offer added ease. Popular models include the Toddy Cold Brew System, Hario Mizudashi, and Oxo Cold Brew Coffee Maker. These systems integrate built-in filtration, easy draining, and larger batch sizes.
- Cold Brew System: $30–$50
- French Press (alternative): Can double as a cold brew vessel for small batches.
- Digital Scale: For precise coffee-to-water ratios.
- Grinder: Burr grinders provide the most even coarse grind, essential for optimal extraction.
Optional Upgrades
- Glass Bottles: For storing and serving finished cold brew.
- Immersion Chiller: For quick chilling if you’re pressed for time.
- Nitro Tap System: For advanced crafters seeking the creamy texture of nitro cold brew.
Cost Breakdown: Brewing Cold Brew on Any Budget
Initial Investment
- Basic Setup: $10–$20 (mason jar, strainer, cheesecloth)
- Dedicated Maker: $30–$50
- Burr Grinder: $40–$100 (optional but recommended for serious brewers)
Recurring Costs
- Coffee Beans: $10–$20 per pound, depending on quality and origin.
- Filters/Cheesecloth: $1–$2 per use (reusable options available)
- Water: Minimal, but filtered water is best for flavor clarity.
Cost per Batch
For a 1-liter batch:
- Coffee: 80g (about 1/5 lb) = $2–$4
- Water: Negligible
- Total: ~$2–$5 per liter (compared to $4–$6 per single serving at cafes)
Savings Strategies
- Buy beans in bulk or join a subscription service for discounts.
- Invest in reusable filters or nut milk bags.
- Repurpose glass bottles for storage instead of buying new.
Step-by-Step: Crafting Cold Brew at Home
1. Selecting the Right Beans
Choose fresh, whole beans. Light or medium roasts highlight fruity, floral notes; darker roasts emphasize chocolate and caramel flavors. Single-origin beans can add unique complexity, while blends offer balance.
2. Grinding: Coarse Is Key
Grind beans just before brewing, aiming for a consistency similar to raw sugar. Too fine, and your brew will be muddy and over-extracted; too coarse, and extraction will be weak.
3. Ratio: Coffee to Water
The golden ratio for cold brew concentrate is 1:5 (coffee:water by weight). For ready-to-drink, aim for 1:8. Start with 80g coffee to 400ml water for concentrate, or 80g to 640ml for ready-to-drink.
4. Steeping Time and Temperature
- Steep Duration: 12–18 hours at room temperature, or 18–24 hours in the fridge.
- Container: Use glass or food-grade plastic; metal can impart off-flavors.
5. Filtration
First, strain through a fine mesh to catch major grounds. Then, filter through cheesecloth, a nut milk bag, or a paper filter to remove fine particles. Multiple filtrations yield a cleaner brew.
6. Storage
Store your cold brew in airtight glass bottles or jars in the fridge. Consume within 7–10 days for peak flavor. Always keep cold to prevent spoilage.
7. Serving
- Dilute Concentrate: Mix 1:1 with water, milk, or a milk alternative.
- Ice: Use large cubes to reduce dilution.
- Garnish: Try orange peel, cinnamon stick, or a sprig of mint.
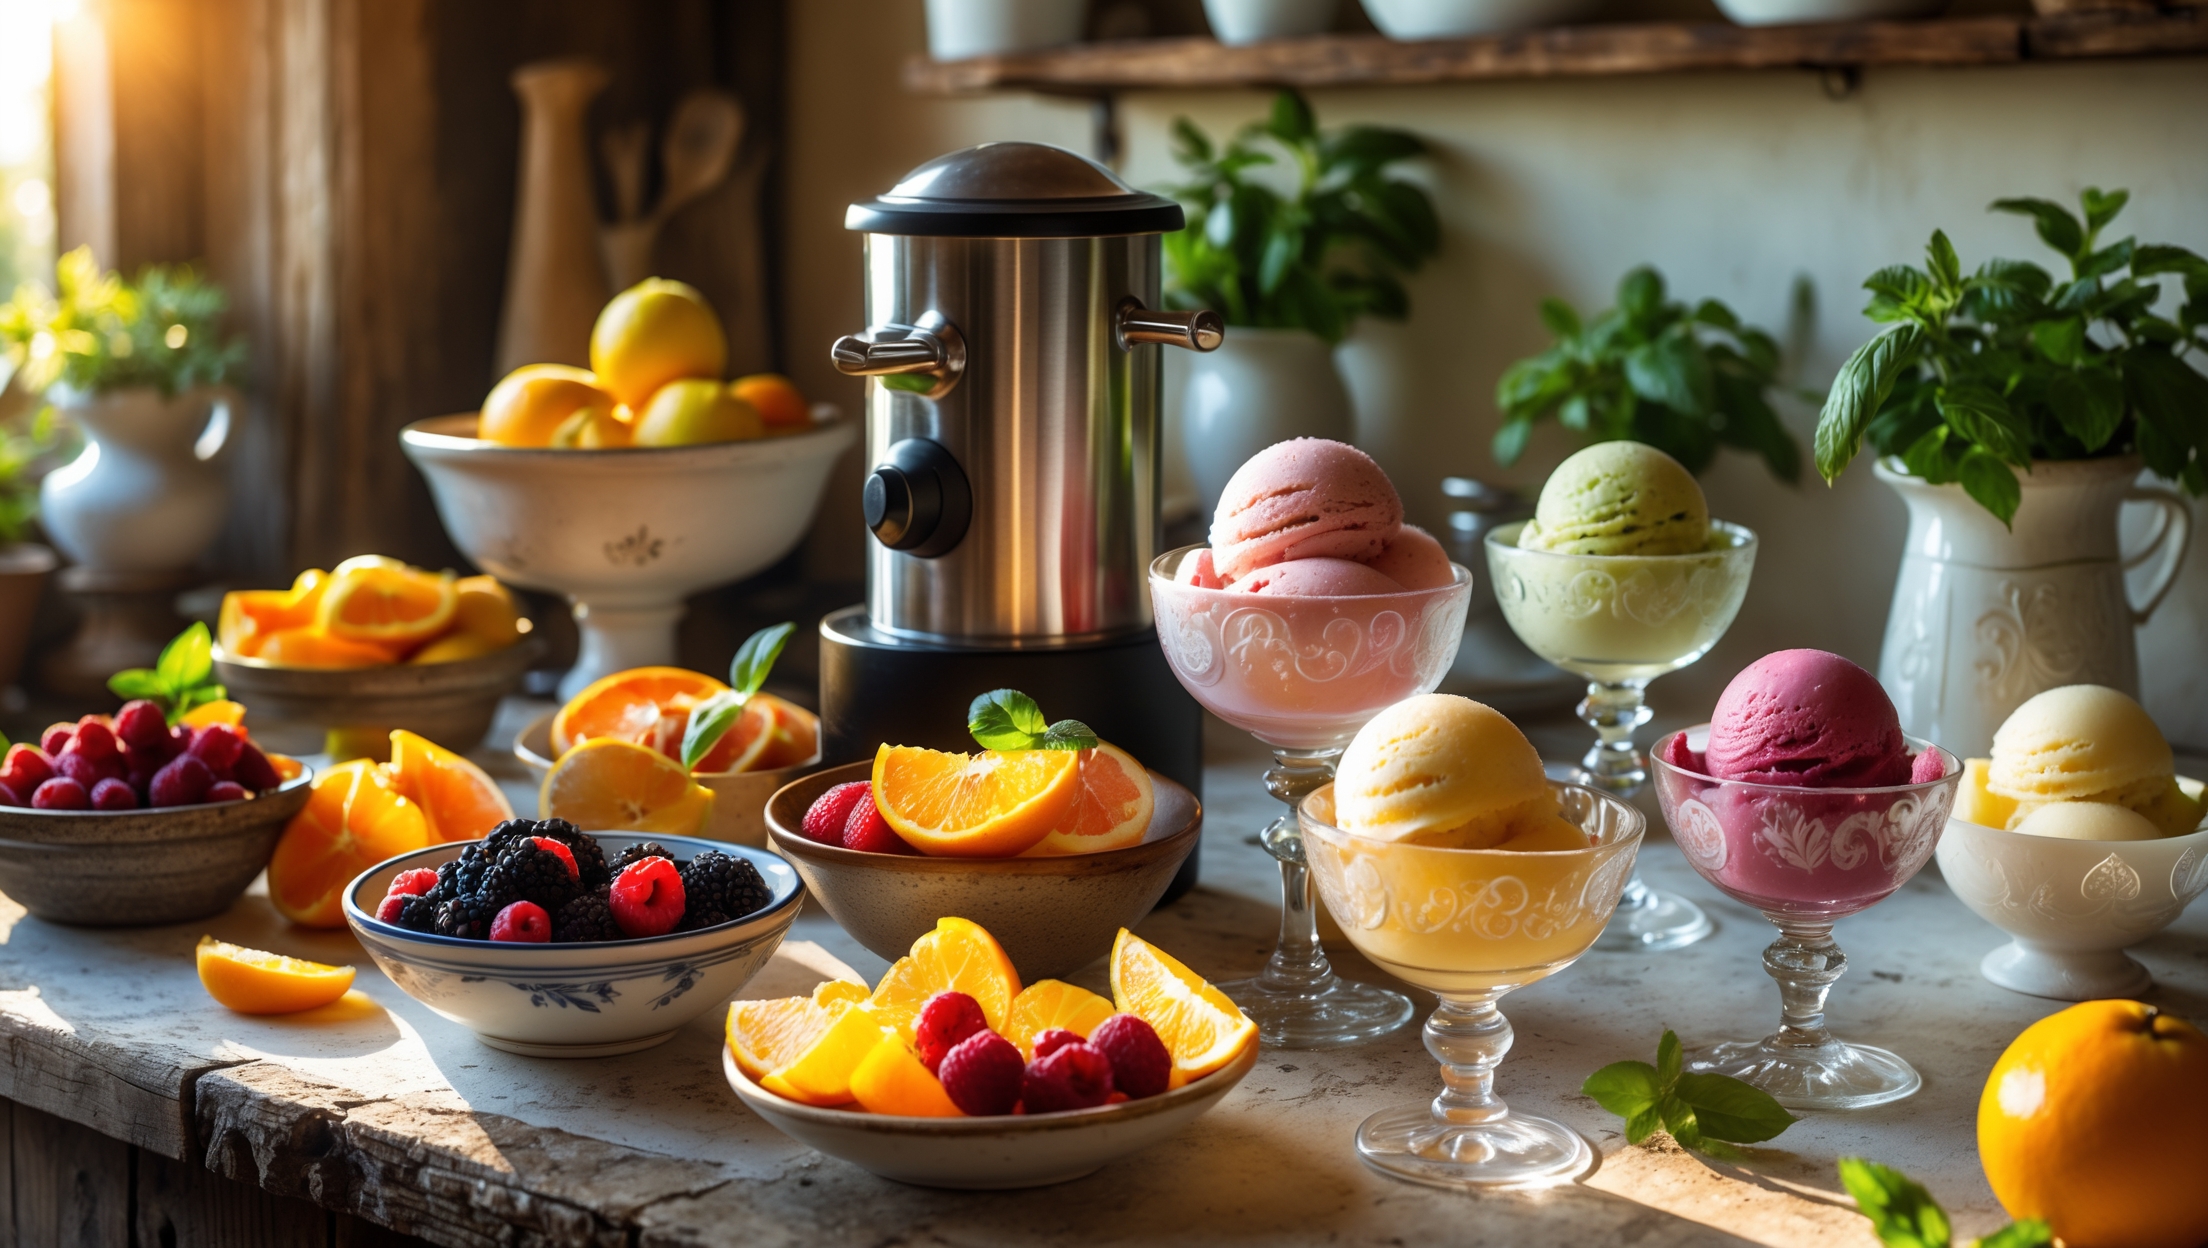
Trending Flavors and Creative Infusions
Seasonal and Culinary-Inspired Additions
- Spring: Lavender, rose petals, or cardamom pods.
- Summer: Citrus zest, toasted coconut, fresh berries.
- Autumn: Cinnamon, pumpkin spice, maple syrup.
- Winter: Vanilla bean, star anise, cocoa nibs.
Infusing Flavors
Add botanicals or spices to your grounds before steeping, or infuse the finished cold brew for 2–4 hours. Strain thoroughly before serving. Start with small amounts to avoid overpowering the base flavor.
Specialty Sweeteners and Milks
- Oat, almond, or coconut milk for creaminess.
- Honey, agave, or flavored simple syrups (try hazelnut, vanilla, or ginger).
- Salted caramel or dark chocolate sauce for decadent twists.
Serving Innovations
- Nitro tap for a creamy, cascading effect.
- Cold foam toppers, infused with vanilla or cinnamon.
- Coffee mocktails—blend cold brew with tonic water, bitters, or fruit juices for a sophisticated no-alcohol drink.
Maintenance Best Practices: Ensuring Consistent Quality
Cleaning and Sanitizing Equipment
- Wash all brewing vessels and filters with hot, soapy water after each use.
- Deep clean reusable filters and containers weekly with a mild vinegar solution to prevent buildup and odor.
- Disassemble and clean grinders regularly to maintain grind quality.
Storing Coffee Beans
- Buy in small quantities and store in airtight, opaque containers.
- Keep beans in a cool, dark place away from moisture and heat.
- Avoid refrigeration or freezing for daily-use beans.
Quality Control
- Taste test each batch and adjust grind size, steep time, or ratios as needed.
- Log your recipes and results to refine your process over time.
Common Mistakes and How to Avoid Them
- Using Pre-Ground Coffee: Pre-ground coffee stales quickly and often isn’t coarse enough, leading to over-extraction and muddiness.
- Incorrect Grind Size: Too fine yields bitterness; too coarse, weak or sour brew.
- Under/Over Steeping: Less than 10 hours means flat flavor; more than 24 hours can make the brew woody or musty.
- Improper Filtration: Skipping fine filtration results in gritty, unclear coffee.
- Poor Storage: Leaving cold brew at room temperature or in open containers can cause rapid spoilage.
Case Study: A Home Brewer’s Cold Brew Journey
From Trial and Error to Refined Craft
Emma, a passionate home coffee enthusiast, began her cold brew adventure with a simple mason jar and supermarket beans. After a few lackluster batches, she invested in a burr grinder and sourced single-origin beans from a local roaster. By logging her ratios and experimenting with steep times, Emma achieved a perfectly balanced cold brew. She later infused her batches with orange zest in summer and vanilla bean in winter, surprising friends and family with her evolving creations. Emma’s story highlights the value of patience, note-taking, and willingness to experiment—essential traits for any aspiring cold brew crafter.
Safety Checklist for Home Cold Brew Brewing
- Always use clean, sanitized equipment.
- Store finished cold brew in hermetically sealed containers in the refrigerator.
- Discard any batch that develops off-odors, unusual cloudiness, or visible mold.
- Label batches with the brew date for freshness tracking.
- Use filtered water to minimize contamination risk.
Conclusion: Elevating Your Cold Brew Craft
Cold brew coffee offers home brewers a unique opportunity to blend culinary creativity with practical craft. By investing in the right tools, understanding core techniques, and exploring trending flavors, you can transform simple ingredients into a beverage that rivals—and often surpasses—your favorite café. The journey from basic brews to signature infusions is paved with experimentation, careful observation, and a willingness to learn from each batch. Remember, even small tweaks in grind size, steep time, or bean selection can yield remarkable changes in the final cup.
Beyond the practical rewards, making cold brew at home is a celebration of taste, patience, and the sensory pleasures of the kitchen. Whether you’re crafting a bold concentrate for early mornings or a floral-infused cold brew for leisurely weekends, your efforts will be rewarded with drinks that are distinctly your own. Track your learning, share your creations, and don’t hesitate to push the boundaries of what cold brew can be. With each batch, you’re not just following a recipe—you’re participating in a craft that connects global coffee culture with your personal culinary journey. Happy brewing!
I’m trying to set up a cold brew station at home but I’m worried about balancing equipment costs with getting good results. What’s the minimum gear you recommend starting with for a busy household, and are there any budget-friendly hacks for making larger batches?
To start out, you really just need a large mason jar or pitcher, a fine mesh strainer or cheesecloth, and coarsely ground coffee. For busy households, using a big container lets you brew larger batches at once without much fuss. If you’re looking to scale up even more, try repurposing a clean food-safe bucket for brewing, and strain into bottles or carafes for storage. This keeps costs low and still delivers smooth cold brew.
When you mention balancing cost and equipment for a home cold brew setup, are there any budget-friendly tools or DIY alternatives that still deliver good results compared to pricier specialized gear?
Absolutely, you can make great cold brew without expensive equipment. Many home brewers use large mason jars, French presses, or even basic pitchers with a fine mesh strainer or cheesecloth for filtering. These options are affordable and still give you smooth cold brew. Just make sure to use a coarse grind and allow enough steeping time for the best flavor.
When you talk about smart budgeting for setting up a cold brew station at home, what are the must-have pieces of equipment that actually make a difference, and where do you find it’s not worth spending extra?
For a home cold brew setup, a quality grinder and a reliable cold brew maker or large jar are worth investing in—they really impact flavor and consistency. Paper filters or a reusable mesh filter are also important. It’s usually not necessary to spend extra on high-end specialty coffee scales, fancy dispensers, or branded glassware unless you want the aesthetics. Focus your budget on good beans and solid brewing basics.
I noticed that cold brew brings out different flavor notes like floral or fruity undertones. If my homemade cold brew ends up tasting flat or overly bitter, what are the most common mistakes in the process, and how can I troubleshoot for better flavor at home?
Flat or overly bitter cold brew can happen due to several factors. Common mistakes include using beans that are too finely ground, brewing for too long, or using water that’s too hot. For better flavor, try using coarsely ground coffee, sticking to a 1:5 to 1:8 coffee-to-water ratio, and steeping in the fridge for 12 to 18 hours. Make sure your beans are fresh and experiment with different origins to highlight those floral or fruity notes.
The article mentions trending flavors and creative infusions for cold brew at home. Are there any simple flavor combinations or steps you’d recommend for someone new to cold brew who wants to try something beyond plain coffee?
If you’re new to cold brew and want to experiment with flavors, start by adding a cinnamon stick or a few slices of orange peel to your coffee grounds before brewing. You can also try adding a splash of vanilla extract or a few crushed cardamom pods. These additions are simple, require no special equipment, and give your cold brew a unique twist without overwhelming the coffee flavor.
When making cold brew at home, is there a particular grind size or type of coffee bean that works best to highlight those floral or chocolaty undertones you mentioned? Or does it all come down to personal taste?
To bring out floral or chocolaty undertones in cold brew, start with a coarse grind—similar to raw sugar. This helps prevent over-extraction and bitterness. Light to medium roast beans are great for floral notes, while medium to dark roasts usually highlight chocolate flavors. Try experimenting with single-origin beans if you want more pronounced undertones. Ultimately, your personal taste matters most, so feel free to adjust grind and bean type to find your perfect flavor.
I noticed the article mentions exploring trending flavors for cold brew at home. Are there any easy infusions or mix-ins that have caught on recently, and do those require extra equipment or just simple ingredients?
Trendy cold brew infusions right now include flavors like vanilla bean, cinnamon, orange peel, and even lavender. These are easy to try at home—just add the ingredients directly to your coffee grounds before steeping. No special equipment is needed, just your usual cold brew setup and some fresh ingredients or dried spices, making it simple and fun to experiment with new flavors.
You mentioned that cold brew relies on a long steeping period of 12–24 hours. Is there a noticeable difference in flavor or strength if I steep for the shorter versus the longer end of that range, and how should I decide which is best for my taste?
Yes, steeping cold brew for 12 hours will typically give you a lighter, smoother flavor, while steeping for 24 hours results in a stronger, bolder brew with more pronounced coffee notes and sometimes added bitterness. If you prefer a milder, less intense coffee, start with 12 hours. For a richer, more robust taste, try 18–24 hours. You can experiment in small batches to see which steeping time suits your personal preference best.
When you mention balancing cost and equipment for setting up a cold brew station at home, what are some budget-friendly equipment options for someone just starting out? Is it possible to get good results with basic kitchen items or do I really need special cold brew makers?
You can absolutely make great cold brew with basic kitchen items. A large jar or pitcher, a fine mesh strainer, and coffee filters or even a clean cloth work well for beginners. Specialty cold brew makers are convenient but not essential. Starting with what you have keeps costs down, and you can upgrade later if you want more convenience or features.
You highlight that cold brew concentrate allows for dilution and creative mixing. For someone new to cold brew, is there a recommended water-to-coffee ratio to start with, and how can I adjust it if my first batch turns out too strong or too weak?
A good starting point for cold brew concentrate is a 1:4 coffee-to-water ratio by weight—for example, 100 grams of coffee to 400 milliliters of water. If your batch tastes too strong, simply add cold water or milk when serving until it suits your preference. If it’s too weak, use less water or more coffee next time, or steep the grounds a bit longer.
You mentioned trending flavors and creative infusions for home cold brew. Are there particular ingredients or combinations you’ve found work well without overpowering the natural coffee notes, especially when experimenting at home?
Subtle ingredients work best for infusing cold brew without masking the coffee’s character. Citrus peels, like orange or lemon, add brightness without being too bold. Lightly crushed cardamom pods, a cinnamon stick, or a hint of vanilla bean can complement coffee nicely. For herbal options, fresh mint or a sprig of rosemary gives a unique twist while letting the coffee shine. Start with small amounts and taste as you go to achieve the right balance.
You mention that cold brew is often made as a concentrate and can be diluted. Do you have any tips on the best ratios or methods for diluting the concentrate without losing the flavors, especially when experimenting with new trending flavors at home?
A common starting ratio for diluting cold brew concentrate is 1:1—equal parts concentrate and water or milk. For stronger flavor, try 2:1 (concentrate to diluent). When experimenting with trending flavors, use chilled still or sparkling water, or flavored milks, to complement rather than overpower the coffee. Add your flavorings (like syrups or spices) after diluting, then adjust to taste. Taste as you go to find your preferred balance.
You mentioned that cold brew can highlight unique flavor notes like floral or fruity undertones. Are there any specific coffee bean varieties or origins you’d recommend for someone who wants to experiment with these trending flavors at home?
If you’re looking to experiment with floral or fruity undertones in your cold brew, try beans from Ethiopia or Kenya—Ethiopian Yirgacheffe often has delicate floral and citrus notes, while Kenyan beans can bring out berry and blackcurrant flavors. Beans from Colombia and Panama can also offer bright, fruity profiles. For best results, choose light to medium roasts, as these preserve the unique characteristics of each origin.
The article talks about trending flavors and creative infusions—what are some cost-effective ways for a small business like mine to experiment with these trends without overcommitting on supplies or ingredients?
You can try infusing small test batches of cold brew with ingredients like citrus peel, cinnamon sticks, or dried lavender, which are inexpensive and easy to source. Start with seasonal fruit or herbs already used in your kitchen to minimize waste. Offer limited-time specials to gauge customer interest before scaling up any new flavor permanently.
You mention that cold brew is usually made as a concentrate that can be diluted. What ratios do you recommend for diluting the concentrate for everyday drinking, and does this affect which flavor notes are most noticeable?
A common starting point is to dilute cold brew concentrate with water at a 1:1 ratio, but some people prefer 1 part concentrate to 2 parts water for a lighter drink. Diluting more will mellow stronger flavors and acidity, bringing out sweeter, chocolatey, or nutty notes, while less dilution keeps bolder flavors and more caffeine. Feel free to adjust until it matches your taste.
I’m new to making cold brew and saw you mentioned it takes 12 to 24 hours to steep. How do I know which end of that time range is best, and does the steeping time really make a noticeable difference in flavor?
The steeping time does make a noticeable difference. A 12-hour steep usually results in a lighter, smoother brew, while steeping for 24 hours creates a stronger, bolder flavor. If you like a milder taste, start with 12 hours. For richer, more intense coffee, go toward 18–24 hours. You can experiment within this range to find your preferred flavor.
I’ve noticed some home cold brew recipes suggest brewing at room temperature while others recommend refrigeration during the steeping process. Does the guide cover how temperature during the 12-24 hour extraction affects the flavor profile or safety of the final cold brew?
The guide does address how temperature impacts your cold brew. It explains that brewing at room temperature tends to produce a richer, more robust flavor, while steeping in the fridge results in a smoother, milder taste. It also notes that both methods are safe if you use clean equipment, but refrigeration can help reduce the risk of unwanted bacterial growth during longer extraction times.
When you talk about cold brew having a smoother and less acidic profile, does the origin or roast level of the beans make a noticeable difference in the final taste? I’m curious if certain coffees work better for highlighting those subtle flavor notes you mentioned.
Yes, both the origin and roast level of the beans play a big role in the final taste of cold brew. Lighter roasts from origins like Ethiopia or Colombia often bring out more floral or fruity notes, while darker roasts tend to have chocolatey or nutty flavors. Because cold brewing reduces acidity and bitterness, subtle flavors from high-quality beans can really shine through, so feel free to experiment to find what you enjoy most.
I noticed the article mentions trending flavors and creative infusions for cold brew. Which flavor combinations have proven most popular with customers, and are there any that consistently work better when made at home versus in a coffee shop?
Based on the article, popular flavors among customers include vanilla, caramel, coconut, and citrus infusions like orange or lemon. Spiced options such as cinnamon and cardamom are also favorites. Simple infusions like vanilla or cinnamon often turn out well at home since they require minimal equipment. More complex blends, especially those using fresh fruits or herbs, can sometimes be easier to manage in a coffee shop with specialized tools and consistent brewing conditions.
When troubleshooting common pitfalls, what are some signs that my cold brew steeped too long or not long enough? I’d love some guidance on how to identify and fix extraction issues, especially if my brew turns out overly bitter or flat.
If your cold brew tastes overly bitter or harsh, it likely steeped too long or used too fine a grind, causing over-extraction. If it tastes flat, weak, or watery, it probably didn’t steep long enough or the coffee-to-water ratio was too low. For bitterness, try reducing steep time or using a coarser grind. For flatness, extend steep time (up to 18–24 hours) or use more coffee grounds. Taste-testing small batches is a great way to fine-tune.
I’m new to making cold brew at home and noticed the article emphasizes using coarsely ground coffee and a long steeping time. Is there a specific grind size or coffee-to-water ratio that works best for beginners, or is it just trial and error to get the right flavor?
A good starting point for beginners is a coarse grind, similar to raw sugar or sea salt. For the coffee-to-water ratio, try using 1 cup of coarsely ground coffee for every 4 cups of cold water. Let it steep for 12 to 18 hours in the fridge. You can adjust the ratio or steeping time based on your taste preferences as you experiment.
When figuring out the actual cost of setting up a homemade cold brew station, which piece of equipment do you find offers the best balance between affordability and consistent results? Are there any budget-friendly cold brew makers you’d specifically recommend for someone just starting out?
A good quality cold brew pitcher or jar with a built-in filter usually offers the best mix of affordability and reliable results for beginners. Brands like Takeya and County Line Kitchen are popular, budget-friendly options that are easy to use and clean. These setups avoid the mess of DIY straining and help you achieve consistent, smooth cold brew without a big investment.
I see the article mentions exploring trending flavors in cold brew at home. Could you suggest a few popular flavor infusions that are easy to try without investing in a lot of extra equipment or fancy ingredients?
You can easily infuse your cold brew with popular flavors using simple ingredients you might already have. Try adding a cinnamon stick, a splash of vanilla extract, orange peel, or a few crushed cardamom pods during the steeping process. Once brewed, you could also stir in a bit of cocoa powder or coconut milk for a different twist. No special tools needed—just add these to your usual brewing jar.
You mention that cold brew requires steeping coffee grounds in cold water for 12-24 hours. In your experience, does the exact steeping time within that range noticeably impact the smoothness or flavor notes, and do you recommend adjusting it based on specific beans or roast profiles?
Yes, the steeping time makes a noticeable difference in both smoothness and flavor. Shorter steeping (12-16 hours) tends to produce a lighter, more delicate brew with brighter notes, while longer times (18-24 hours) extract deeper, bolder flavors and more body, sometimes adding slight bitterness. I recommend experimenting: lighter or fruity beans often shine with shorter steeps, while darker roasts or chocolatey profiles can benefit from longer extraction.
When you mention balancing cost and equipment for a home cold brew setup, what are the most essential tools you actually need to get started on a student budget? Are there any DIY alternatives that still give good results?
For a student budget, you only need a large jar or pitcher, a fine mesh strainer or cheesecloth for filtering, and fresh coarsely ground coffee. You don’t need a fancy brewer—just steep the grounds in water overnight in the jar, then strain with the mesh or cloth. DIY options like repurposed glass jars and reusable cloth filters work well and keep costs low while still producing tasty cold brew.
When setting up a home cold brew station as described, what type of grinder do you recommend for achieving the ideal coarse grind, and does the consistency really impact the extraction process significantly?
For home cold brew, a burr grinder is highly recommended because it delivers a consistent coarse grind, which is crucial for optimal extraction. Inconsistent grinds from blade grinders can lead to over- or under-extraction, affecting both flavor and clarity. Uniform coarse grounds help ensure a smoother, balanced cold brew with fewer bitter or muddy notes.
When setting up a home cold brew station as mentioned, is there a significant flavor difference between steeping for 12 hours versus 24 hours, especially when using single-origin beans? I’m trying to decide if the longer wait is really worth it in terms of taste.
Steeping single-origin beans for 12 hours usually gives you a cleaner, brighter flavor, while 24 hours often results in a richer, sometimes heavier taste with more pronounced chocolate or nutty notes. The longer steep can also bring out more bitterness or muddle some delicate flavors. If you enjoy subtle, fruity notes, 12 hours is likely best. For a bolder, deeper brew, 24 hours might be worth the wait.
When steeping the coffee for 12-24 hours, is there an ideal time within that range to maximize flavor without making it too strong or bitter? I’d love tips for balancing the smoothness you mentioned in the article.
For a balanced, smooth cold brew, 14 to 16 hours is usually a sweet spot. Steeping under 12 hours can make it weak, while going past 18 hours may bring out bitterness. Use coarsely ground coffee and cold or room temperature water, and taste it after 14 hours to see if you like the strength. If it’s too strong, you can always dilute with water or milk before serving.
If I accidentally let my cold brew steep for over 24 hours because I forgot about it, is there a way to salvage the batch or will it end up tasting too strong or bitter? Any troubleshooting tips for this kind of mistake?
If your cold brew steeped for over 24 hours, it may taste stronger and possibly more bitter than usual. You can try diluting it with water, milk, or a milk alternative to mellow out the flavor. Adding ice can also help. If it’s still too bitter, a touch of simple syrup or a pinch of salt can sometimes balance the taste. It’s still safe to drink, so see if adjusting helps before discarding the batch.
The article says cold brew brings out subtle flavor notes that hot coffee can sometimes mask. Are there specific bean origins or roast levels that are best for highlighting unique flavors in cold brew, or will any coffee work?
For cold brew, lighter to medium roast beans are often recommended because they tend to highlight more of the unique, subtle flavors like fruitiness or floral notes. Single-origin coffees, especially from regions like Ethiopia or Colombia, can really shine in cold brew, as their distinctive profiles come through well. While any coffee can technically be used, lighter roasts and specific origins usually give you a more interesting flavor experience.
You touched on how the slower cold extraction brings out unique flavor notes compared to hot brewing. Are there specific coffee bean origins or roast levels that you recommend for someone looking to highlight floral or fruity undertones in their homemade cold brew?
To highlight floral or fruity notes in your cold brew, consider using beans from Ethiopia or Kenya, as these origins are known for their bright and aromatic profiles. Opt for a light or medium roast since these roast levels tend to preserve delicate, complex flavors. Grind your beans just before brewing to keep those floral and fruity undertones as vibrant as possible in the finished cold brew.
If someone runs into the problem of their homemade cold brew coming out too bitter or muddy, what are the most common mistakes to look for with grind size, steeping time, or coffee-to-water ratio based on your step-by-step approach?
Bitterness or muddiness in cold brew often comes from using coffee grounds that are too fine, steeping for too long, or using too much coffee. For smoother cold brew, use a coarse grind, steep for 12–18 hours, and stick to the recommended ratio—usually about 1 cup of coffee to 4 cups of water. Adjusting these factors should help improve clarity and taste.
As a small café owner looking to experiment with cold brew at home before offering it in my shop, can you provide more specifics on how to budget for quality equipment without overspending? I’d like to know which items are truly essential for starting a home cold brew setup.
For a home cold brew setup, focus on essentials: a large glass jar or pitcher for brewing, a quality coffee grinder for consistent coarse grounds, filtered water, and a fine mesh strainer or cheesecloth for filtering. You don’t need specialized cold brew makers at first—these basics work well and keep costs down. Budget more for freshly roasted beans, since coffee quality has the biggest impact on flavor, and upgrade equipment only as your needs grow.
When setting up a cold brew station at home, are there certain pieces of equipment that make the biggest difference in flavor, or can I get by with just basic kitchen items like jars and strainers for good results?
You can definitely make tasty cold brew using basic kitchen items like jars and fine-mesh strainers—many home brewers do just that and are happy with the results. However, investing in a dedicated cold brew maker or a high-quality filter can help reduce sediment and make cleanup easier. The biggest flavor improvements actually come from using fresh, coarsely ground coffee and filtered water, rather than specialized gear.
If a batch of cold brew ends up tasting too bitter or flat, do you have any troubleshooting tips for adjusting either the steep time or coffee-to-water ratio to fix the flavor?
Absolutely! If your cold brew tastes too bitter, try reducing the steep time or using a coarser grind. You can also decrease the coffee-to-water ratio slightly. If it tastes flat or weak, increase the steep time or add a bit more coffee grounds to your next batch. Tweak these variables gradually and taste as you go to find your preferred flavor balance.
You mentioned balancing cost and equipment for a home cold brew setup. For someone just starting, what are the must-have tools versus optional upgrades, and about how much should I expect to spend if I’m aiming for good quality but still want to keep the budget reasonable?
For starting out, the essentials are a large jar or pitcher, a fine mesh strainer or cheesecloth, and good quality coffee beans. These basics can cost around $20–$40, depending on what you already have at home. Optional upgrades include a dedicated cold brew maker, a burr grinder for fresher coffee, or a reusable filter—these can add $30–$100 but are not necessary at first. You can make delicious cold brew with just the basics.
Your article talks about trending flavors and creative infusions. Do you have any suggestions for avoiding common pitfalls when experimenting with flavors, like fruits or spices, so they don’t overpower the coffee’s natural notes?
When adding flavors like fruits or spices to your cold brew, start with small quantities and taste as you go. Use whole spices rather than ground, as they infuse more gently. If using fruit, try adding slices instead of juice to avoid too much acidity or sweetness. Let the coffee steep with the additions for only part of the brewing time, then strain and taste. This helps preserve the coffee’s natural character.
In the article, you mention balancing cost and equipment when setting up a home cold brew station. Could you elaborate on which pieces of equipment are truly necessary for a beginner versus which are nice-to-have if you want to experiment with flavor infusions or nitro later on?
For beginners, the essentials are a large jar or pitcher, a fine mesh strainer or cheesecloth, and quality coffee beans. These basics let you brew and filter cold brew easily. If you want to explore flavor infusions, mason jars or reusable infusion bags are helpful but not required. For nitro cold brew, a whipped cream dispenser with nitrous oxide cartridges is needed, but that’s more of a specialty upgrade after you’ve mastered the basics.
The article talks about trending flavors and creative infusions for cold brew. If I want to experiment with adding things like spices or citrus, do I add them during the steeping process or after, and are there any flavors that don’t work well with cold brew?
You can add spices, citrus peels, or herbs during the steeping process to let their flavors infuse fully into the cold brew. For best results, avoid adding juices or fresh fruit directly, as they can introduce unwanted acidity or cloudiness. Some flavors, like dairy-based extracts or very pungent spices, may overpower the coffee, so use those with caution. Experimenting with small batches helps find what works best for your taste.
The article mentions that cold brew is usually made as a concentrate to allow for dilution and creative mixing. Do you have recommendations on the best water-to-coffee ratios for someone who wants to experiment with different strengths and flavors at home?
Absolutely! For a classic cold brew concentrate, a common starting ratio is 1:4 (one part coarsely ground coffee to four parts water by weight). If you prefer a lighter brew or ready-to-drink option, try 1:8. You can further dilute the concentrate with water, milk, or even sparkling water to taste. Experiment with small batches to find your ideal strength and flavor profile.
I’m really interested in the trending flavor infusions you referenced. Can you give some examples of what’s popular right now and maybe suggest which ones can be pulled off easily with basic ingredients at home?
Some of the most popular cold brew flavor infusions right now include vanilla, cinnamon, coconut, citrus (like orange or lemon peel), and floral notes such as lavender. For easy at-home options, try adding a split vanilla bean or a cinnamon stick directly into your coffee grounds before brewing. You can also experiment with a few strips of orange zest or a tablespoon of shredded coconut for a refreshing twist.
I’ve tried making cold brew at home but sometimes end up with a slightly bitter result, even though it’s supposed to be less acidic and smoother. Any troubleshooting advice on what I might be doing wrong with steeping time or grind size?
Bitterness in cold brew often comes from over-extraction, which can happen if the coffee steeps too long or if the grind is too fine. For a smoother taste, try using a coarse grind and steeping for 12–16 hours in the fridge. If you’ve been going longer or using a finer grind, reduce both and see if that helps balance the flavor.
I’m curious about the troubleshooting side you mentioned—what are some common mistakes home brewers make with steeping times or grind size, and how can those affect the final flavor and acidity of the cold brew?
Common mistakes with cold brew include steeping for too long or too short and using the wrong grind size. Over-steeping can lead to bitter, overly strong coffee, while under-steeping may result in a weak, flat flavor. Using grounds that are too fine often creates a cloudy brew with more acidity and bitterness, while too coarse a grind can make the coffee taste thin and lacking in character. For best results, use a medium-coarse grind and steep for 12–18 hours.
I noticed the article talks about smart budgeting when setting up a home cold brew station. Can you break down what the main up-front costs are and suggest any affordable equipment for beginners who don’t want to overspend at the start?
The main up-front costs for starting a home cold brew station are a brewing vessel (like a large mason jar or pitcher), a filter (such as a reusable mesh filter or cheesecloth), quality coffee beans, and possibly a grinder if you want the freshest flavor. For beginners, simple mason jars and mesh strainers are very affordable and get the job done well. You can upgrade equipment later as you get more into brewing.
You explained that cold brew is made as a concentrate and can be diluted. How do I know the right ratio of coffee to water for both brewing and serving, especially if I want to avoid ending up with something too weak or too strong?
For brewing cold brew concentrate, a common starting ratio is 1 part coffee to 4 parts water by weight. After brewing, you can dilute the concentrate with water or milk—usually 1 part concentrate to 1 or 2 parts liquid, depending on your taste. If you like it stronger, use less dilution; for a lighter drink, add more. Taste as you go to get your ideal strength.
I noticed you mentioned that cold brew usually needs to steep for 12-24 hours. Is there a big difference in flavor or strength if I let it steep on the shorter versus the longer end of that range?
Yes, there is a noticeable difference between steeping for 12 hours versus 24 hours. A shorter steep (around 12 hours) generally produces a lighter, brighter flavor and a bit less strength, while a longer steep (closer to 24 hours) results in a bolder, stronger, and sometimes more robust or even slightly bitter brew. It’s a good idea to experiment within that range to find the taste and strength you prefer.
You mentioned budgeting for a home cold brew setup. Could you elaborate on which equipment or accessories are truly worth spending more on versus where it’s okay to save or use DIY solutions?
For home cold brew, it’s worth investing in a good quality grinder and sturdy brewing vessel, as these directly affect flavor and consistency. You can save by using a reusable fine mesh strainer or cheesecloth instead of specialty filters, and mason jars work well as brewing containers. Accessories like fancy serving pitchers or dedicated cold brew taps are nice but not essential unless you entertain often.
You mention that cold brew highlights more subtle notes like floral or fruity undertones. Are there certain coffee bean origins or roast profiles that consistently bring out these flavors better when brewing cold, or is it all about experimentation?
Certain origins and roast profiles do tend to enhance specific flavors in cold brew. African beans, especially Ethiopian, often bring out floral and fruity notes when brewed cold. Lighter roasts preserve these delicate flavors better than dark roasts, which can taste more chocolatey or earthy. It’s still worthwhile to experiment, but starting with light to medium roasts from fruity regions is a good way to highlight those subtle undertones.
You mentioned that cold brew requires coarsely ground coffee and a long steep time. If I only have a standard drip coffee grinder, will that affect the flavor or texture of my cold brew? Also, is there a workaround if I can’t wait the full 12 to 24 hours to brew?
Using a standard drip coffee grinder usually means your grounds will be finer than ideal for cold brew. This can lead to a stronger, sometimes bitter flavor, and a bit more sediment in your drink. If you’re short on time, you can try increasing the coffee-to-water ratio and steeping at room temperature for 6 to 8 hours, but the flavor might be less smooth compared to the full cold steep.
You mentioned that cold brew is often made as a concentrate that can be diluted or customized. If I’m making cold brew for just myself, how much coffee and water should I use to start, and how do I figure out the best ratio for my taste?
For a single-serving batch, a common starting point is to use about 1 ounce (28 grams) of coarsely ground coffee to 1 cup (240 ml) of cold water. Let it steep for 12–18 hours, then strain. You can dilute the concentrate with water or milk to taste. To find your preferred strength, try adjusting the coffee-to-water ratio in future batches until you find what suits you best.
You mentioned that cold brew often brings out subtle flavor notes like floral or fruity undertones. Are there specific coffee beans or roast profiles you recommend for highlighting these flavors, especially if I want to stand out with unique offerings at my shop?
To highlight floral or fruity undertones in cold brew, consider single-origin beans from regions like Ethiopia, Kenya, or Colombia, as they naturally showcase these flavors. Look for light to medium roast profiles, since darker roasts tend to mute delicate notes. Experimenting with different origins and roasts will help you find standout combinations for your shop’s menu.