Introduction: Elevating Homemade Pasta with Drying Racks
Homemade pasta is more than just a dish—it’s a celebration of craft, culture, and the tactile joy of transforming flour and eggs into edible art. Yet, for both aspiring and seasoned pasta makers, one essential but often overlooked tool can make the difference between sticky disappointment and silky perfection: the pasta drying rack. Whether you dream of delicate angel hair or hearty pappardelle, the way you dry your noodles directly impacts texture, flavor, and shelf life.
In this comprehensive guide, we’ll delve into the world of home pasta drying racks. You’ll discover how the right equipment transforms your workflow, why technique matters as much as ingredients, and how to maintain your tools for artisan results every time. We’ll break down the types of racks, how to set up and use them efficiently, seasonal considerations, cleaning and storage best practices, and troubleshooting common drying dilemmas. If you want to elevate your pasta game—and avoid the heartbreak of clumped noodles—this is your roadmap.
Choosing the Right Pasta Drying Rack: Types and Materials
Why Use a Pasta Drying Rack?
Drying racks aren’t just for show—they play a crucial role in achieving the right texture and preventing your noodles from sticking or drying unevenly. A well-chosen rack allows for optimal air circulation, space efficiency, and even drying, whether you’re making a quick weeknight batch or prepping sheets for ravioli marathons.
Common Types of Home Pasta Drying Racks
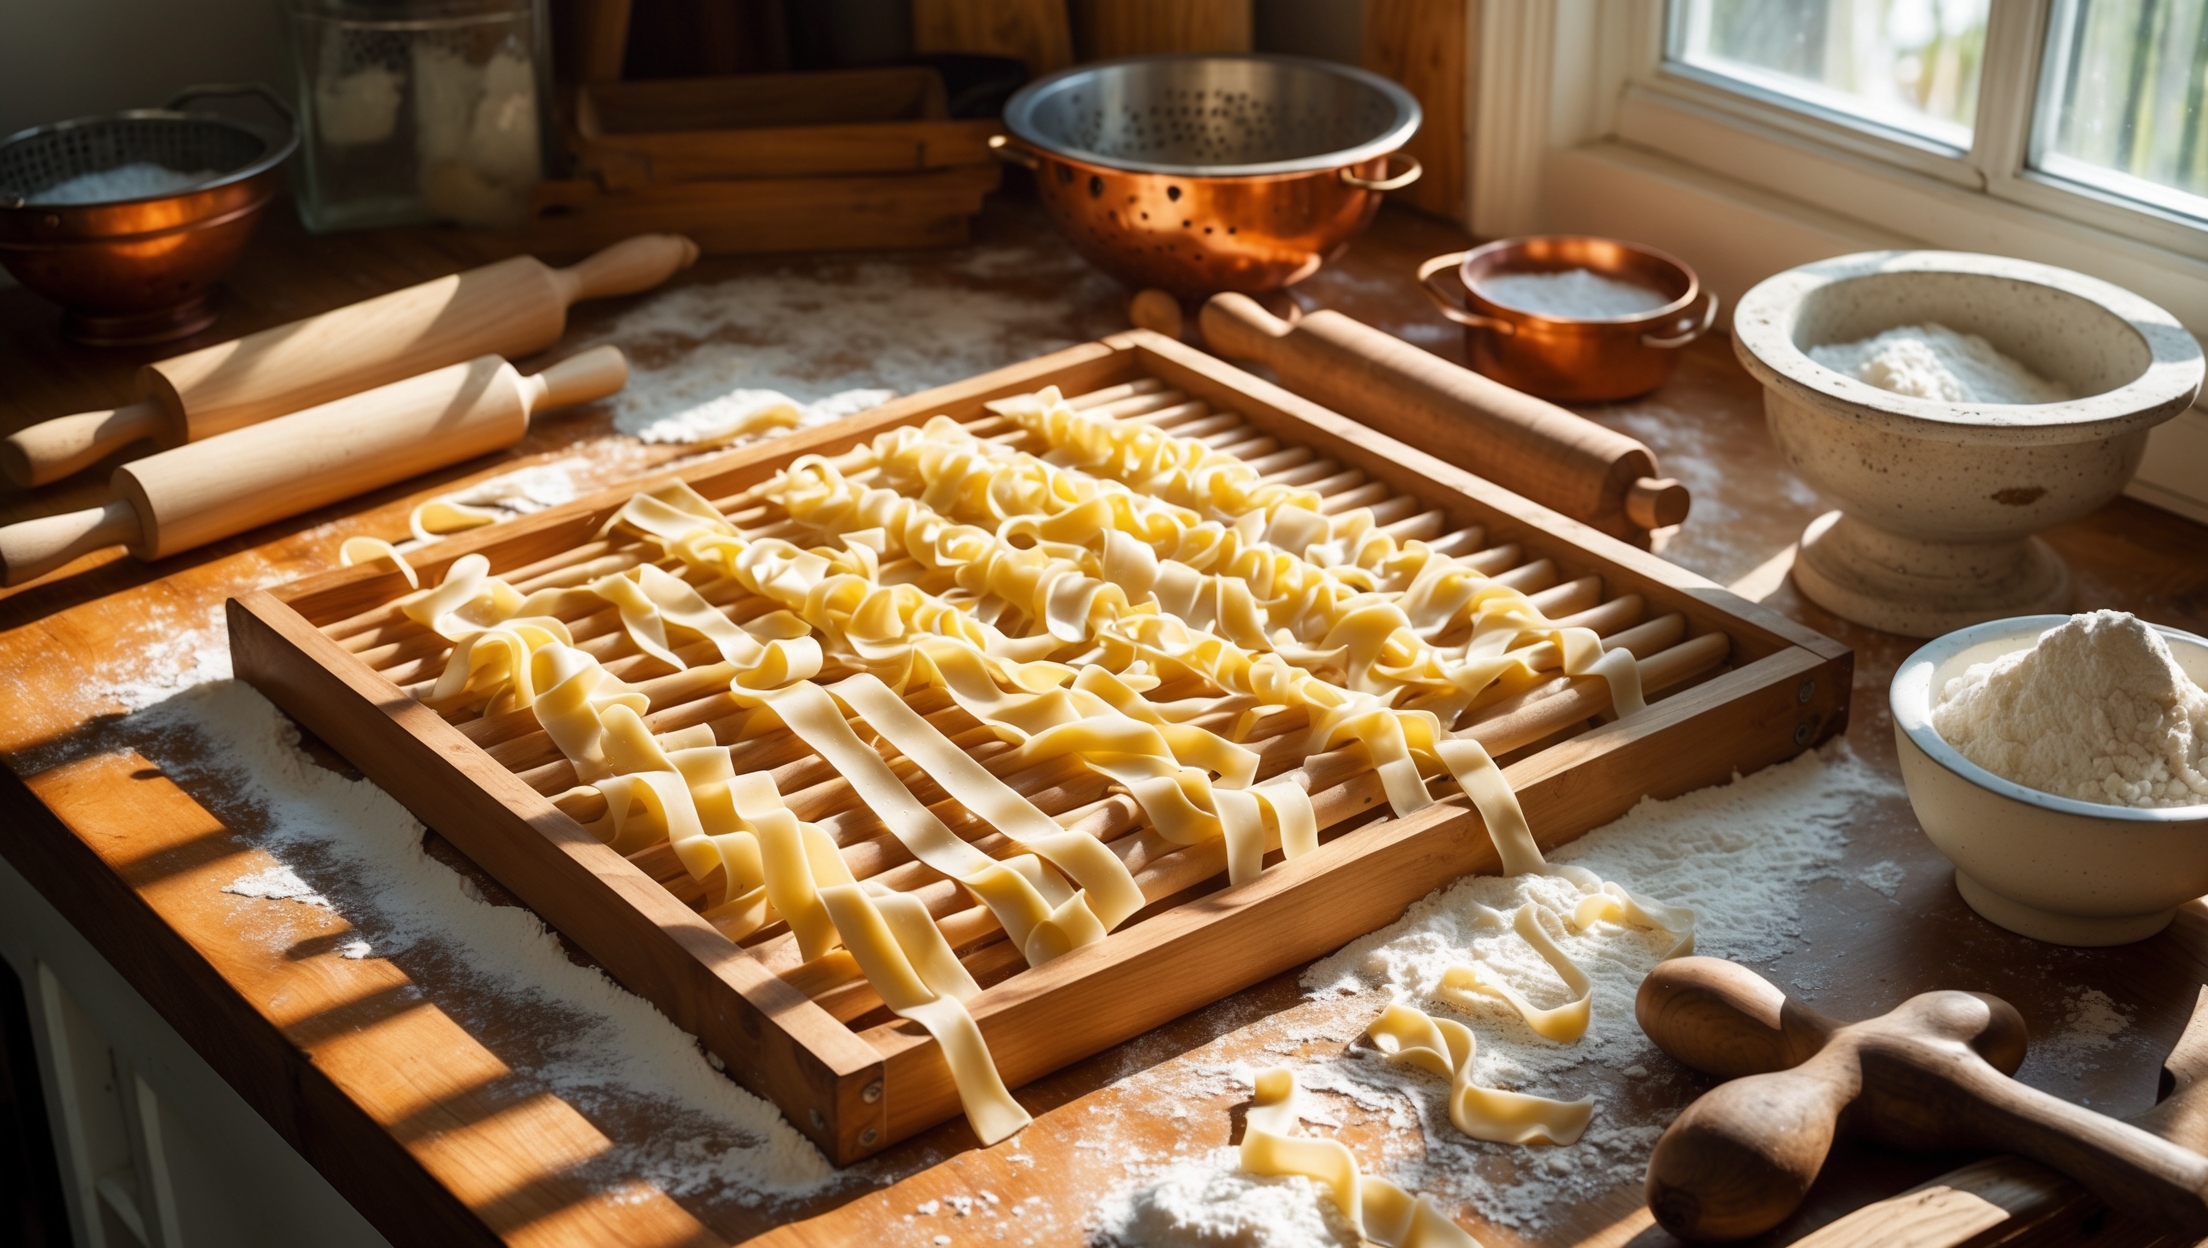
- Wooden Racks: Classic, sturdy, and naturally nonstick. They fit well with rustic or traditional kitchens and are gentle on delicate pasta shapes.
- Plastic Racks: Lightweight, often collapsible, and easy to clean. Modern plastics are food safe and less prone to warping.
- Stainless Steel Racks: Durable and highly hygienic, these are best for those who value easy sanitization and modern aesthetics.
- DIY Alternatives: In a pinch, you can improvise with clean broom handles, coat racks, or even dowels balanced between chairs—but purpose-built racks offer better hygiene and stability.
Material Considerations
When selecting your rack, consider:
- Size: How much pasta do you make at once? Collapsible or tiered racks save space.
- Spacing: Ensure enough room between arms or rods to prevent noodles from touching and sticking.
- Surface Finish: Smooth finishes prevent dough from snagging. Unfinished woods should be avoided as they can harbor moisture.
Essential Techniques: Setting Up and Using Your Pasta Drying Rack
Preparation Before Drying
The process starts before you even hang your noodles. After rolling and cutting your dough, dust it lightly with flour or semolina to prevent sticking. Shake off excess flour to avoid clumps. Work in small batches to keep pasta from drying out before hanging.
Step-by-Step Drying Process
- Assembly: Set up your rack on a clean, stable surface away from direct sunlight and humidity.
- Hanging: Drape noodles evenly over the arms/rods. For long shapes like fettuccine or spaghetti, hang them in manageable lengths—overlapping can lead to sticking.
- Spacing: Leave at least a finger-width gap between strands or sheets for optimal airflow.
- Rotation: If drying large batches, rotate noodles or swap positions halfway through to ensure consistent drying.
- Timing: Fresh pasta for immediate use needs only a brief drying (15–30 minutes). For storage, dry completely until brittle—this can take 12–24 hours depending on humidity.
Pro Tips for Specific Pasta Shapes
- Long Noodles: Hang straight for maximum length. If your rack is small, cut noodles to fit.
- Short Shapes: Lay on mesh trays or clean cloths in a single layer. Flip occasionally for even drying.
- Stuffed Pasta: Dry on semolina-dusted trays, not racks, to avoid tearing.
Cost Breakdown: Investing in a Quality Drying Rack
While you can improvise with household items, a dedicated pasta drying rack is a modest but valuable investment. Here’s what to expect:
- Basic Wooden or Plastic Racks: $10–$25. Suitable for occasional or small-batch makers.
- Premium Wooden or Stainless Steel Racks: $30–$60. Offer greater capacity, stability, and longevity.
- Multi-Tier or Collapsible Models: $20–$40. Ideal for maximizing drying space in compact kitchens.
Factor in cost per use: a quality rack lasts for years, pays off in pasta saved from sticking, and can serve double-duty for drying herbs or other kitchen projects.
Seasonal Considerations: Drying Pasta Year-Round
How Weather Affects Drying
Humidity, temperature, and airflow all impact pasta drying time and success. Here’s what to watch for:
- High Humidity (Summer or Rainy Seasons): Pasta may take longer to dry and can develop mold if not monitored carefully. Use fans or air conditioning to increase airflow.
- Low Humidity (Winter or Dry Climates): Pasta dries quickly, but brittle noodles can crack. Check frequently and avoid over-drying.
- Temperature Extremes: Avoid placing racks near stoves, ovens, or direct sunlight, as uneven heat can cause inconsistent drying.
Adapting Technique by Season
- In winter, allow pasta to dry in a warm, draft-free spot, but avoid placing directly near a heater.
- During humid months, use a dehumidifier, or dry pasta in smaller batches to reduce the risk of spoilage.
- Take advantage of gentle breezes in spring and fall by opening a window—just use a mesh cover to keep insects at bay.
Maintenance Best Practices: Cleaning and Storing Your Rack
Cleaning Wooden Racks
- Wipe with a dry cloth after each use to remove flour and dough residue.
- If needed, use a slightly damp cloth—never soak or submerge, as wood can warp.
- Allow to air dry completely before storing to prevent mildew.
- Every few months, check for splinters or rough spots and sand lightly if needed.
Cleaning Plastic and Stainless Steel Racks
- Wash with warm, soapy water after each use.
- Rinse thoroughly and dry with a clean towel.
- Ensure all joints and hinges (in collapsible models) are dry before folding and storing.
Storage Tips
- Store racks in a cool, dry place.
- For collapsible racks, keep in a dust-free cabinet or storage bag.
- Periodically inspect for signs of wear, mold, or insect activity, especially if stored for long periods.
Extending Rack Longevity
- Avoid heavy weights or impacts that can damage arms or rods.
- Don’t use racks for non-food items to maintain hygiene.
Troubleshooting: Common Pasta Drying Problems and Solutions
Sticking or Clumping Noodles
- Cause: Insufficient flour dusting or overcrowding on the rack.
- Solution: Dust noodles generously and ensure ample spacing. Hang in smaller batches.
Uneven Drying
- Cause: Poor airflow, uneven spacing, or thick pasta sections.
- Solution: Rotate noodles and rack position; use a small fan to increase circulation.
Cracking or Brittle Pasta
- Cause: Over-drying, especially in low humidity.
- Solution: Check pasta frequently and remove when just dry enough for your intended storage method.
Mold or Off-Odors
- Cause: High humidity or inadequate drying before storage.
- Solution: Ensure pasta is completely dry before storing; use a dehumidifier if needed.
Creative Uses: Beyond Pasta
- Dry homemade noodles for Asian dishes (ramen, udon, soba).
- Hang fresh herbs for drying.
- Air-dry small batches of edible flowers or fruit peels for culinary use.
- Use as a staging rack for decorated cookies or confections.
Conclusion: Embracing the Craft of Pasta Drying
At its core, pasta making is a blend of tradition, intuition, and innovation. While ingredients and technique form the soul of your dish, the right tools—like a well-chosen drying rack—are the backbone that supports creativity and consistency. By investing in a quality rack, mastering setup and drying techniques, and caring for your equipment, you ensure every batch of pasta is as delicious as it is beautiful.
Remember, the act of hanging noodles to dry is a ritual that connects you to generations of culinary artisans—from Italian nonnas to modern home cooks. Each strand tells a story of patience and pride. With the insights and tips from this guide, you’re now equipped to troubleshoot, experiment, and perfect your craft throughout the seasons. So clear your counter, dust off your rolling pin, and let your pasta creations shine—supported, quite literally, by the humble but mighty drying rack. Here’s to delicious results and the enduring joy of hands-on, heartfelt cuisine.


You mention that wooden racks are naturally nonstick and fit well with traditional kitchens. Are there any maintenance tips specific to wooden racks to prevent them from absorbing odors or getting moldy over time?
To keep wooden pasta racks in good shape, wipe them with a dry or slightly damp cloth after use and make sure they’re completely dry before storing. Avoid soaking or washing them with lots of water, as this can cause warping or mold. Occasionally, you can rub them with a bit of food-safe mineral oil to help prevent odors and keep the wood conditioned.
I have always dried my pasta on clean kitchen towels, but you mentioned issues with uneven drying and clumping. Could you explain what kinds of pasta shapes benefit the most from using a drying rack instead of towels?
Pasta shapes like fettuccine, tagliatelle, spaghetti, and other long strands benefit the most from a drying rack. Hanging them allows air to circulate evenly, preventing them from sticking together or clumping, which can often happen on towels. Racks are also useful for delicate or filled shapes like tortellini and ravioli when you want to ensure even drying without the risk of sticking.
You mention that drying technique matters as much as the ingredients themselves. For someone who lives in a very humid climate, are there special considerations or adjustments you’d recommend when using racks to ensure pasta dries evenly?
In a humid climate, it’s helpful to use a dehumidifier or air conditioning in your drying area to control moisture. Spread the pasta in a single layer on the racks without overcrowding, and turn it occasionally to help prevent sticking. You can also use a fan set on low to improve air circulation and encourage even drying.
You mention wooden, plastic, and stainless steel racks as common options. Which type would you recommend for someone who needs to make large batches but has limited kitchen space? Durability and storage are both concerns for me.
Given your need to make large batches with limited kitchen space, a collapsible stainless steel drying rack would likely suit you best. Stainless steel racks are durable, easy to clean, and many models fold flat for storage. They can handle the weight of large pasta batches and won’t absorb moisture or odors like wood can. Just make sure to choose a model that folds compactly to maximize your storage space.
Between wooden, plastic, and stainless steel racks, is there a type you find most suitable for someone with limited kitchen space who also wants easy cleaning? I’m trying to figure out which material offers the best balance of convenience and functionality for a small apartment.
For a small apartment and easy cleaning, plastic pasta drying racks are usually the most practical. They’re lightweight, often foldable for compact storage, and can be washed quickly by hand or even in the dishwasher. Wooden racks need careful drying and can stain, while stainless steel, though durable, is typically bulkier. A foldable plastic rack should strike a good balance of space-saving and convenience.
I’m curious about drying pasta in more humid climates. The article mentions seasonal considerations, but are there any specific tips for adjusting drying times or setup if I live somewhere with high humidity?
In humid climates, pasta takes longer to dry and can sometimes become sticky. To help, try using a fan to improve air circulation around your drying rack, and avoid stacking pasta pieces. If possible, run a dehumidifier in the drying area. You might also need to increase drying time by several hours, or even overnight, to ensure the pasta is fully dried.
You mentioned both plastic and wooden pasta drying racks—do you find one is better for cleaning and long-term maintenance? I have a small kitchen and want to avoid any racks that might harbor odors or become difficult to sanitize over time.
Plastic pasta drying racks are generally easier to clean and sanitize, especially in smaller kitchens. They don’t absorb moisture or odors and can usually be washed with soap and water without worry. Wooden racks can develop lingering smells or stains if not dried thoroughly, and they may require more careful cleaning. For your situation, a plastic rack would be the lower-maintenance and more hygienic option.
I love making pasta with my kids, but we don’t have a lot of storage space. Are the plastic or stainless steel racks generally more compact or easier to store than wooden ones, or would a DIY option be better for small homes?
Plastic and stainless steel pasta drying racks are typically more compact and often fold flat, which makes them easier to store in small spaces than most wooden racks. A DIY option could work well if you tailor it to your available storage—some people use collapsible dowels or repurpose dish racks. Choose a design that can be disassembled or folded to fit your cabinet or drawer.
If I want to make pasta in advance for a dinner party, how long should I actually leave the noodles on the drying rack before storing them, and do different shapes or thicknesses change the drying time?
You should let pasta dry on the rack for at least 1 to 2 hours before storing it, but the exact time can vary. Thicker noodles or filled shapes like ravioli may need up to 4 hours to dry, while thin strands like spaghetti often dry more quickly. Make sure the pasta feels dry to the touch before transferring it to an airtight container.
You mention that technique matters as much as ingredients when using a pasta drying rack. Could you elaborate on what common mistakes people make with drying technique, and how to avoid ending up with clumped or misshapen noodles?
A common mistake is overcrowding the rack, which prevents airflow and leads to clumping. Make sure noodles are spaced well apart so they don’t touch. Another problem is not dusting the pasta lightly with flour before hanging, which can cause sticking. Also, avoid hanging noodles too long in a humid environment, as this can make them lose shape. Dry them in a cool, dry place and rotate strands gently if needed to help them dry evenly.
When you talk about seasonal considerations for drying pasta, does humidity in the air make a big difference? I live in a pretty humid climate and am worried my noodles might not dry properly even with a rack.
Humidity plays a big role in pasta drying. In a humid climate, pasta dries more slowly and can stay sticky, increasing the risk of spoilage or mold. To help, try drying your pasta in an air-conditioned room or use a fan to improve air circulation. Spread the noodles in a single layer and avoid overcrowding the rack, so air can reach all surfaces.
You mention that modern plastic racks are less prone to warping, but how do they hold up over time compared to wooden ones, especially when it comes to cleaning and supporting heavier pasta shapes like pappardelle?
Modern plastic racks typically last well over time since they’re resistant to moisture and less likely to warp compared to wood. They’re also much easier to clean—usually a quick wash will do, and some are even dishwasher safe. For heavier pasta like pappardelle, sturdy plastic racks generally provide enough support, but make sure the arms don’t flex too much under the weight. Wooden racks are strong too, but need more careful cleaning and maintenance.
When drying pasta at home, how do you decide whether to go with a wooden rack or a stainless steel one? Does one help more with preventing the noodles from sticking together, especially in humid climates?
Choosing between a wooden or stainless steel pasta drying rack often comes down to personal preference and your local climate. Wooden racks absorb a bit of moisture, which can help prevent sticking, making them a solid choice in humid environments. Stainless steel racks don’t absorb moisture but are easier to clean. For especially humid climates, a wooden rack might give you a slight edge against noodles sticking together.
I don’t make fresh pasta that often, so I hesitate to invest in a specialty rack. Could you explain more about the DIY alternatives mentioned? What are some safe and effective everyday items I could use at home without buying extra kitchen gear?
If you don’t want to buy a pasta drying rack, there are several safe DIY options at home. You can drape pasta over clean broom or mop handles balanced between two chairs, use a clean clothes hanger, or lay pasta strands flat on a floured kitchen towel. Just make sure any surface is clean and food-safe. Space the pasta apart to allow for even drying.
You mentioned that the way pasta is dried can affect flavor and shelf life. How long should I let fresh pasta dry on a rack before I can safely store it, and are there signs I should watch for to avoid under- or over-drying?
For safe storage, fresh pasta should dry on a rack for 12 to 24 hours at room temperature, depending on humidity. The pasta should feel completely firm and snap easily rather than bend. Signs of under-drying include stickiness or flexibility, while over-drying might cause cracking. Make sure there’s no moisture left before storing to prevent mold or spoilage.
You touched on troubleshooting common drying dilemmas, but what’s your advice if the noodles are still sticking together even when using a rack? Am I overcrowding the rack, or could it be something about my dough or drying environment?
If your noodles are sticking together on the rack, overcrowding is a likely cause—make sure each strand or piece has enough space for air to circulate. Also, check that your dough isn’t too wet; try dusting it lightly with flour before hanging. Finally, ensure your drying environment isn’t too humid, as moisture can prevent proper drying and cause sticking.
Do you have any advice for someone with limited kitchen space on choosing between a collapsible plastic rack and a stainless steel one? I want to avoid clutter but also need something durable.
If space is tight, a collapsible plastic rack is usually the better option since it folds up small and is lightweight, making storage easy. Plastic racks are also quite durable for home use and less likely to scratch surfaces. Stainless steel racks are sturdy and long-lasting, but tend to be bulkier, so unless you have a dedicated spot for it, plastic will help avoid clutter while still lasting a long time.
You mention cleaning and storage best practices for pasta drying racks. Could you elaborate on how to properly clean wooden racks without damaging them or causing them to warp over time?
To clean wooden pasta drying racks, gently brush off flour and dough remnants with a soft, dry cloth or a pastry brush. Avoid soaking or washing with lots of water, as moisture can cause warping and cracks. If needed, wipe lightly with a damp cloth, then dry immediately with a towel. Store the rack in a dry area, away from humidity and direct sunlight to maintain its shape and prevent mildew.
If I’m just getting started and want to try different pasta shapes at home, is there a particular type of drying rack that provides the most versatility, or would a DIY approach be better for staying on a budget?
For beginners exploring different pasta shapes, a simple, multi-rod wooden drying rack is very versatile and affordable. It lets you hang long noodles and even drape short shapes over the rods. If you want to stay on a tight budget, you can use clean household items like broom handles or coat hangers for a DIY solution. Both options work well, so it depends on your preference for convenience versus cost.
I see that the article describes different rack types, including DIY alternatives. Could you elaborate more on what kind of household items can safely substitute for a dedicated pasta drying rack without risking the noodles sticking or becoming uneven?
Certainly! Common household items that work well as pasta drying racks include clean wooden broom handles balanced between two chairs, unused clothes drying racks, or the backs of clean wooden chairs. Just make sure the surfaces are free of dust and lightly floured to prevent sticking. Avoid plastic or metal surfaces that can cause condensation or uneven drying. Spacing the noodles apart is also key for even drying.
The article talks about troubleshooting common drying dilemmas. Could you give an example of what to do if my pasta keeps sticking together on the rack? I tried angel hair last weekend and ended up with a lot of clumps.
Angel hair pasta is especially prone to clumping because it’s so thin and delicate. To prevent sticking, make sure to toss your freshly cut strands with a little semolina or flour before hanging them on the rack. Also, avoid crowding the strands too closely together—leave some space for air to circulate. If possible, hang the pasta as soon as it’s cut, rather than letting it sit in a pile, which can cause sticking.
Could you give more details on troubleshooting sticky noodles during drying? Sometimes my tagliatelle still clumps together even with good air circulation, and I’m not sure if it’s the technique or the rack that’s causing the problem.
Sticky tagliatelle is often caused by just a bit too much surface moisture or insufficient flour dusting. Try dusting your cut noodles lightly with semolina or all-purpose flour before hanging. Make sure the noodles aren’t overlapping on the rack, and separate any that stick together right away. If your room is humid, consider using a fan to help speed up drying. Sometimes, racks with closely spaced rods can cause bunching—if that’s the case, drape smaller batches or use extra rods for more space.
You brought up some troubleshooting tips for drying pasta, but what should I do if my noodles are still a little sticky even after using the rack? Are there adjustments I should make to my technique or drying time?
If your noodles remain sticky after using the drying rack, you may need to space them further apart or dust them with a bit more flour before drying. Try increasing the drying time or placing the rack in a room with better airflow and lower humidity. If possible, flip the noodles halfway through to ensure even drying on all sides.
I’ve struggled with my pasta sticking together even when using a rack. Does the drying technique change depending on the shape of the noodle, like angel hair versus pappardelle, or is there a universal method that works for both?
Drying technique does change depending on the noodle shape. Thin noodles like angel hair should be spread out more and separated well on the rack to prevent clumping, while wider noodles like pappardelle can sometimes be laid flat on clean towels, dusted with flour, and turned occasionally. There isn’t a one-size-fits-all method, but ensuring good airflow and enough space between strands helps for all shapes.
Could you clarify how long pasta should typically stay on a drying rack before it’s ready to cook or store? The excerpt mentions shelf life, but I’m curious about recommended drying times for different pasta types, especially for thicker noodles like pappardelle.
For most pasta shapes, thin noodles like spaghetti or fettuccine typically need 12 to 24 hours on a drying rack in a well-ventilated space. Thicker noodles, such as pappardelle, may require up to 36 hours to ensure they’re fully dry. To check, the pasta should snap cleanly when bent. Once thoroughly dried, it can be stored in an airtight container for several months.
I noticed you mentioned wooden, plastic, and stainless steel racks. For someone just starting out and mostly making fettuccine or spaghetti, do certain materials help prevent sticking more than others, or is it mostly about technique and airflow?
Wooden racks tend to help prevent sticking a bit better because the slightly rough surface absorbs some moisture from the pasta. That said, technique and airflow play a bigger role overall. Make sure your pasta is lightly floured and spaced out, and keep the drying area well ventilated regardless of the rack material you choose.
If I don’t have a proper drying rack yet, what kinds of DIY alternatives actually work without making the noodles stick together or dry unevenly? I’d love some simple suggestions before I invest in a real rack.
You can use several common household items as a DIY pasta drying rack. Try laying clean broom handles or wooden spoons across the backs of two chairs and drape the noodles over them. A clean laundry drying rack works well too. If you’re drying short pasta like fusilli or farfalle, spread them out in a single layer on a floured baking sheet, making sure they don’t touch. Just ensure good airflow and avoid overlapping the noodles.