
Introduction: The Allure and Precision of Sous Vide Cooking
Few culinary techniques have captured the imagination of home cooks and professional chefs alike quite like sous vide. French for “under vacuum,” sous vide uses precise temperature control to achieve unparalleled consistency, transforming everyday ingredients into restaurant-quality creations. With the rise of affordable immersion circulators and vacuum sealers, more home kitchens than ever are embracing this elegant approach. Yet, as with any craft, the path to sous vide mastery is paved with pitfalls—errors in technique, unsafe practices, and underestimating the importance of the right gear can all turn a promising meal into a disappointing, or even dangerous, experience.
This comprehensive guide is designed for curious home cooks ready to unlock the full potential of sous vide. We’ll walk you through the most common beginner mistakes and show you how to avoid them, offer a practical guide to choosing and maintaining essential equipment, and provide clear safety protocols so you can cook with confidence. Whether you dream of perfectly tender steaks, custards with no risk of curdling, or vegetables that retain their vivid color and bite, this post will equip you with the knowledge and practical strategies to elevate your kitchen craft.
Understanding Sous Vide: How It Works and Why It Matters
The Science Behind Sous Vide
Sous vide cooking involves sealing food in an airtight bag and submerging it in a water bath held at a precisely controlled temperature, typically using an immersion circulator. Unlike traditional cooking methods that rely on high heat and variable temperatures, sous vide allows food to cook gradually, never exceeding the set temperature. This results in even doneness, moisture retention, and flavor concentration.
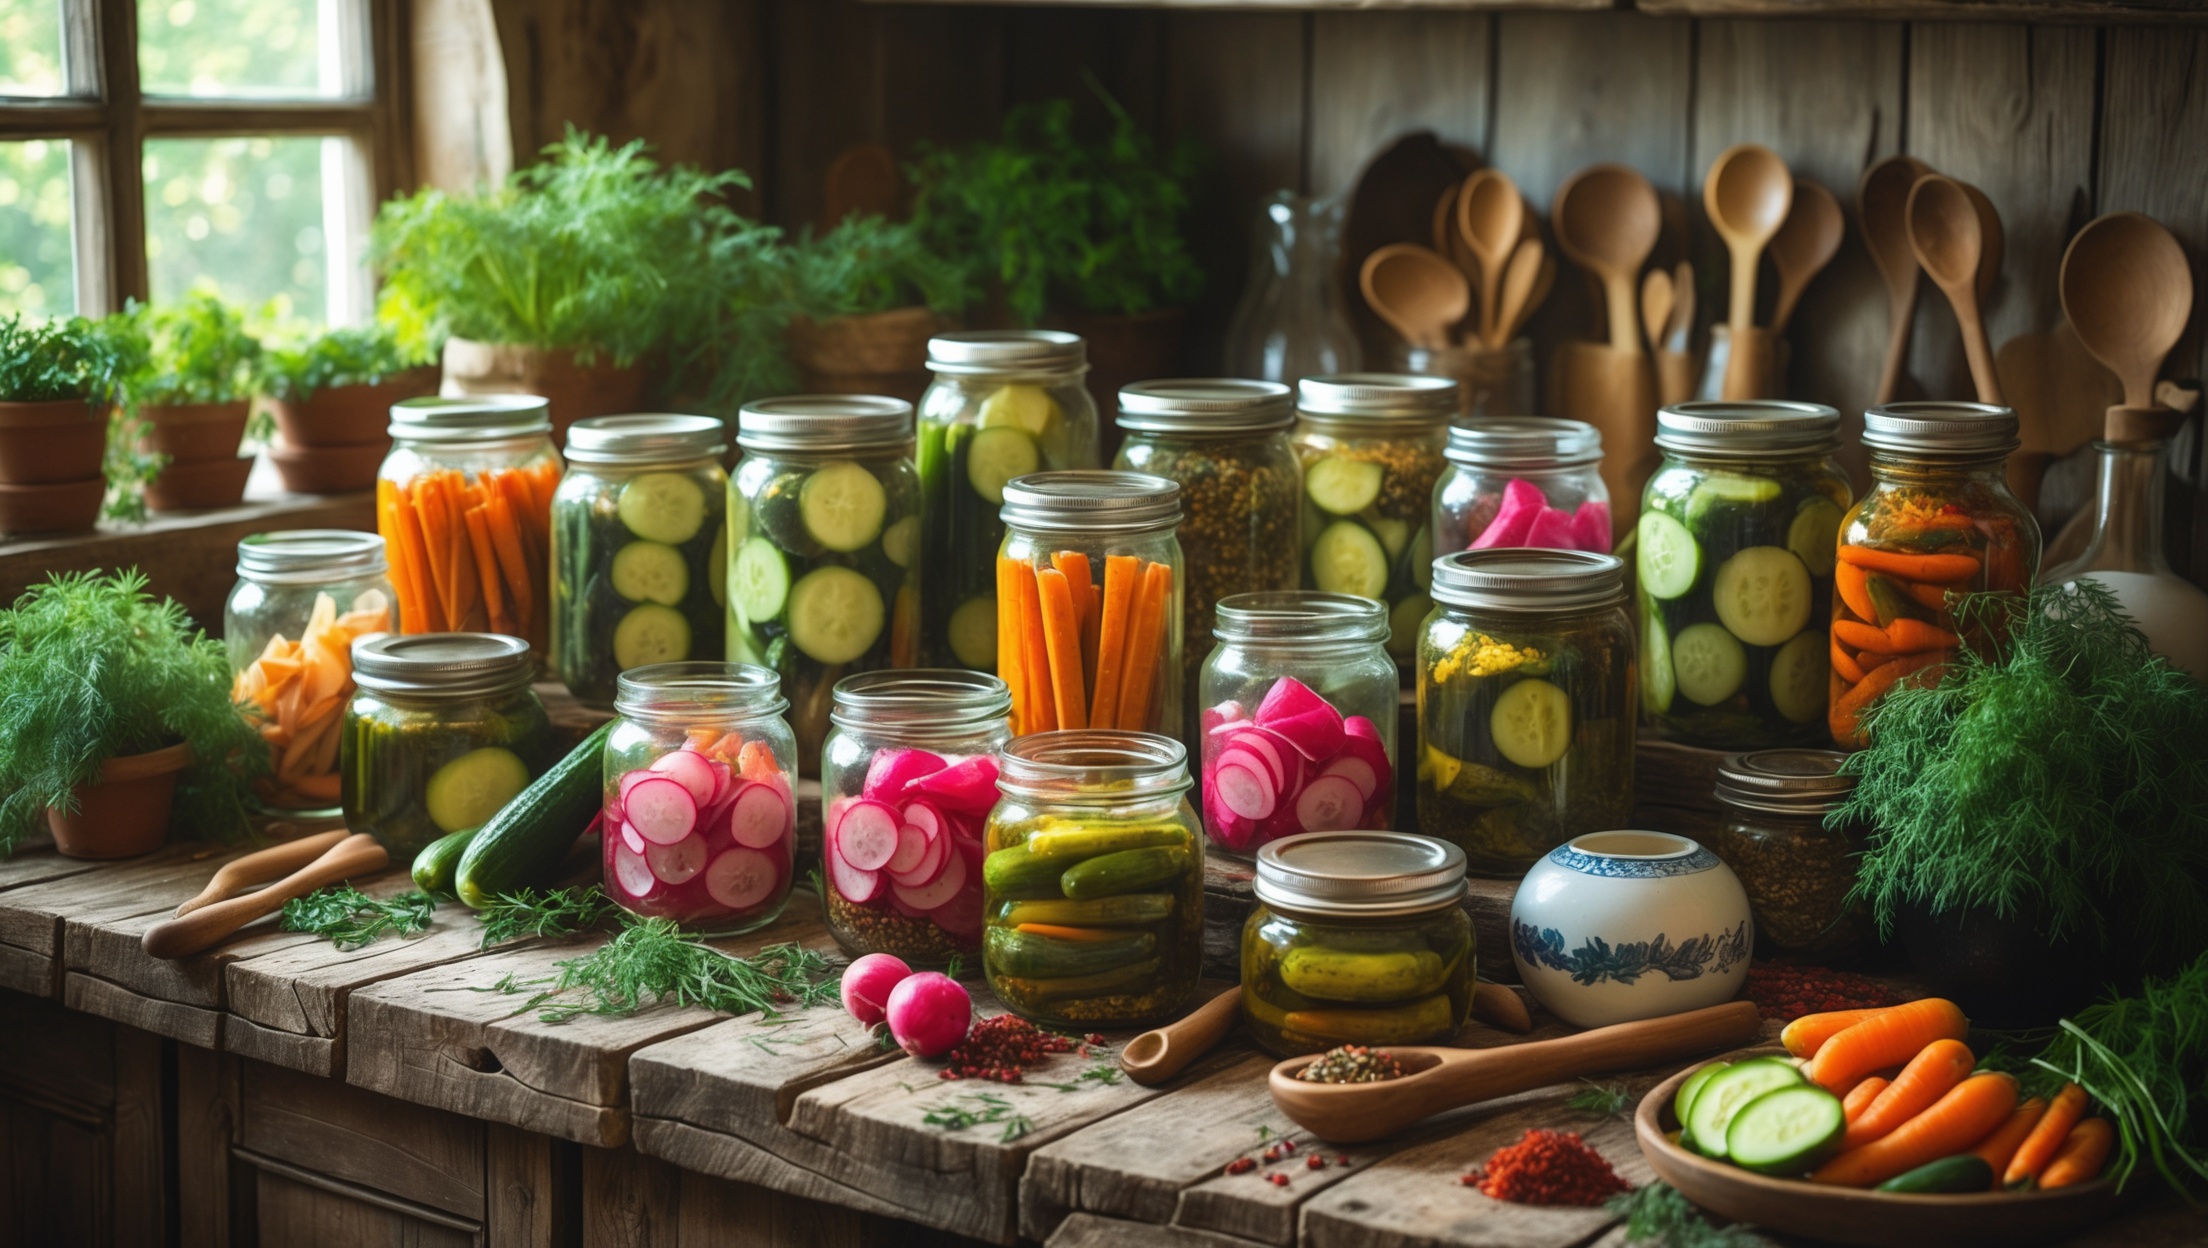
Common Applications
- Proteins: Steaks, chicken breasts, fish, pork chops, and eggs benefit from sous vide’s gentle, even heating.
- Vegetables: Carrots, beets, and potatoes retain texture and color.
- Desserts: Custards and cheesecakes are nearly foolproof with controlled temperatures.
Beginner Mistakes to Avoid in Sous Vide Cooking
1. Ignoring Food Safety Fundamentals
Because sous vide operates at lower temperatures and for longer durations, food safety is critical. Many first-timers don’t realize that certain bacteria thrive in temperatures below 54°C (129°F). Always follow recommended time-temperature guidelines from reputable sources (like the USDA or Baldwin’s Practical Guide).
- Never cook poultry below 60°C (140°F) without extended pasteurization times.
- Cool cooked foods rapidly if not serving immediately—use an ice bath to bring the temperature below 4°C (40°F) within 2 hours.
2. Poor Bagging Technique
Improper sealing can lead to water ingress or air pockets, both of which compromise cooking. Avoid overfilling bags, and ensure all air is removed using either a vacuum sealer or the water displacement method. Double-bagging is wise for long cooks (over 8 hours) or when dealing with sharp bones or edges.
3. Overcrowding the Water Bath
If bags are packed too closely, water can’t circulate freely, leading to uneven cooking. Leave space between pouches and use racks or clips to position them upright if needed. Never stack items in a way that prevents water flow.
4. Choosing the Wrong Temperature
Precision is the essence of sous vide. Beginners often err by picking arbitrary temperatures. Consult reliable charts for your protein and doneness preference. For example, steak at 54.5°C (130°F) is medium-rare; chicken breast at 62.8°C (145°F) is juicy and safe.
5. Neglecting the Importance of Searing
Sous vide delivers perfect doneness, but not the flavorful crust or appealing color that comes from Maillard reactions. Always finish proteins with a hot sear (in a skillet, over a grill, or with a torch) for both flavor and aesthetics. Dry the surface thoroughly before searing to avoid steaming.
6. Inconsistent Timing
While sous vide offers a wide window for doneness, too short a cook and you risk unsafe or tough food; too long and texture can suffer (e.g., mushy eggs). Use accurate timing guidelines, and set timers to avoid guesswork.
7. Failing to Season Properly
Some flavors infuse beautifully during sous vide (herbs, garlic, spices), but others, like alcohol, can intensify unpleasantly. Avoid adding raw alcohol to the bag, and be judicious with strong aromatics. Salt lightly—liquid retention means less is often more.
Essential Sous Vide Equipment: A Practical Guide
Immersion Circulators
The heart of any sous vide setup is the immersion circulator. Key features to consider:
- Temperature Accuracy: Look for ±0.1°C (±0.2°F) precision.
- Power: 800–1200 watts is ideal for rapid heating and large water baths.
- Build Quality: Stainless steel parts resist corrosion. Removable covers ease cleaning.
- Connectivity: WiFi or Bluetooth models allow remote monitoring.
Water Baths and Containers
While any large pot works, dedicated polycarbonate containers (12–20 quart) are more efficient, especially when paired with an insulated lid to minimize heat loss and evaporation. For long cooks, insulation is key—consider sous vide water bath jackets or cooler hacks for energy savings.
Vacuum Sealers
Crucial for eliminating air and ensuring submersion, vacuum sealers come in two types:
- Edge Sealers: Affordable, compact, suitable for most home use.
- Chamber Sealers: More expensive, but excel with liquids, marinades, and delicate items.
If you’re just starting, edge sealers are sufficient. For liquids, chill before sealing or freeze into cubes to prevent sucking up into the machine.
Vacuum Bags and Alternatives
Use food-safe, BPA-free vacuum bags designed for sous vide. Avoid zip-top bags for high-temperature or long cooks. Reusable silicone bags are a sustainable alternative, but check temperature ratings carefully.
Clips, Racks, and Weights
Clips and racks help organize bags, ensuring even water flow. Sous vide weights (food-safe stainless steel or silicone pouches) prevent floating, especially with vegetables or poultry.
Thermometers and Timers
While immersion circulators display temperature, a reliable instant-read thermometer allows you to double-check food safety, especially with larger cuts or when troubleshooting. A kitchen timer (or your phone) helps track cook and chill times.
Finishing Tools
- Cast Iron Skillet: Delivers a hard sear for steaks and chops.
- Butane Torch: Provides precision searing for delicate proteins or finishing edges.
- Wire Rack: Elevates food for air circulation while searing or resting.
Safety Essentials: Sous Vide with Confidence
Time and Temperature: The Path to Pasteurization
Safety in sous vide hinges on understanding the relationship between time and temperature. Lower temperatures can safely pasteurize food if held long enough. For example, chicken cooked at 60°C (140°F) is safe after 27.5 minutes, while 65°C (149°F) requires only 8.5 minutes. Use trusted tables and always err on the side of caution.
Preventing Bacterial Growth
- Minimize Time in the Danger Zone (4°C–54°C / 40°F–129°F): Don’t leave food at room temperature before or after cooking.
- Chill Rapidly: If not serving immediately, transfer bags to an ice-water bath (half ice, half water) until the core temperature is below 4°C (40°F), then refrigerate or freeze.
- Don’t Reuse Bags for Different Foods: Cross-contamination can occur. Always use clean, food-grade bags for each cook.
Handling Raw and Cooked Foods
Keep raw and cooked foods separate, and always wash hands, surfaces, and tools after handling raw proteins. Label bags with contents and dates to track freshness, especially for batch cooks or meal prep.
Safe Reheating
When reheating sous vide-cooked food, bring it to at least 54°C (129°F) for 45 minutes to ensure food safety. Avoid microwaves for proteins—they can destroy texture and undo the benefits of sous vide.
Choosing the Right Bags
Use only bags labeled as sous vide safe. Avoid cheap plastics or non-food-safe alternatives, which may leach chemicals at higher temperatures.
Step-by-Step: Setting Up Your Home Sous Vide Station
1. Choose and Position Your Equipment
Select a stable countertop near a power outlet. Place your water container on a heatproof surface, and set up your immersion circulator according to manufacturer instructions.
2. Fill and Preheat the Water Bath
Fill your container with hot tap water to reduce preheat time. Set your circulator to the desired temperature, and allow the bath to come to temp before adding food.
3. Prepare and Bag Your Ingredients
- Pat proteins dry and season as desired. For herbs or aromatics, place them on top of the protein to prevent flavor loss.
- Vacuum seal, ensuring no air pockets remain. For delicate items, use the gentle or pulse setting.
4. Submerge and Cook
Clip bags to the sides or use racks to keep them from touching. Double-check all portions are fully submerged. Start your timer once the food enters the bath.
5. Finish and Serve
Once cooked, remove from the bag, pat dry, and sear as needed. Serve immediately, or chill rapidly for later use.
Maintenance and Best Practices for Your Sous Vide Gear
Cleaning Your Immersion Circulator
- After each use, wipe the exterior with a damp cloth. For the heating coil and impeller, soak in a vinegar-water solution (1:1 ratio) monthly to dissolve mineral buildup.
- Check for trapped food particles or debris, especially after long cooks.
Vacuum Sealer Care
- Remove and clean drip trays after every use, especially when sealing juicy foods.
- Wipe down exterior surfaces, and store with the lid open to avoid seal compression.
Bag and Container Hygiene
- Dispose of single-use bags responsibly. Wash reusable bags with hot, soapy water and allow to air dry thoroughly.
- Sanitize water bath containers periodically, especially after protein cooks. Use a mild bleach solution (1 tablespoon bleach per gallon of water) followed by thorough rinsing.
Storage Tips
Keep all gear dry and stored in a clean area. Store vacuum rolls and bags away from heat and sunlight to prevent degradation.
Advanced Tips: Taking Your Sous Vide Craft Further
Batch Cooking and Meal Prep
Sous vide is ideal for preparing proteins in bulk. Cook chicken breasts or steaks in advance, chill, and refrigerate for up to a week. For longer storage, freeze cooked, vacuum-sealed bags. Reheat directly from frozen by adding 30–60 minutes to the cook time.
Infusions and Rapid Pickling
Sous vide isn’t just for proteins. Make flavored oils, syrups, or even rapid pickles by bagging ingredients and heating at 60°C (140°F) for 1–2 hours. Always strain and store infusions in sterilized containers.
Customizing Texture
Experiment with different time-temperature combinations to achieve your preferred texture. For example, eggs can be cooked at 63°C (145°F) for a custard-like yolk, or at 75°C (167°F) for traditional hard-boiled consistency.
Creative Plating
Use sous vide to prepare components in advance, then finish and assemble dishes just before serving for maximum impact and minimal stress. This is a secret weapon for advanced dinner parties and multi-course meals.
Conclusion: Elevate Your Kitchen with Sous Vide Mastery
Sous vide cooking represents a fusion of science, artistry, and culinary curiosity. With the right knowledge, precision tools, and diligent safety practices, any home cook can produce results that rival fine dining establishments. Avoiding beginner mistakes—like improper bagging, overcrowding, or unsafe temperatures—not only ensures better taste and texture, but also keeps your kitchen safe. Investing in quality gear pays dividends in reliability and ease, while ongoing maintenance keeps your equipment performing at its best.
Perhaps most importantly, sous vide empowers you to experiment joyfully and confidently. From perfect steaks and silky eggs to infusions and desserts, the possibilities expand with each cook. As you refine your craft, remember that mastery comes from both careful technique and playful exploration. Set up your station, follow best practices, and enjoy the satisfaction of serving flawless, flavor-packed meals to friends and family. The world of sous vide is yours to discover—one precisely cooked bite at a time.


I noticed the guide talks about essential gear for sous vide, like immersion circulators and vacuum sealers. Is it possible to get similar results using just zip-top bags and a regular pot, or does that compromise food quality or safety?
You can definitely start sous vide cooking with zip-top bags and a regular pot. Many home cooks use this setup with good results, especially for basics like chicken, steak, or eggs. Just make sure to use high-quality freezer bags, remove as much air as possible, and monitor the water temperature closely. Food safety is still achievable if you keep the water above the recommended temperatures and avoid cross-contamination.
I’m interested in trying sous vide, but as a parent, I worry about food safety, especially with chicken and eggs. Can you explain what the main safety risks are with these foods and how long it’s safe to keep them in the water bath without risking bacteria growth?
Chicken and eggs can be cooked safely with sous vide as long as you follow proper temperature and time guidelines. For chicken, keeping it at 140°F (60°C) or higher for at least 1–2 hours will pasteurize it and kill harmful bacteria. Eggs are safe at 135–140°F (57–60°C) for 1 hour. Avoid leaving foods in the water bath for more than 4 hours, as this minimizes risk of bacteria growth and texture changes. Always refrigerate promptly after cooking if not serving immediately.
When it comes to choosing essential sous vide gear, are there any budget-friendly vacuum sealers or immersion circulators you would specifically recommend for someone just starting out? Or is it worth investing more upfront for better long-term results?
For beginners, there are reliable entry-level vacuum sealers like the NutriChef PKVS or Geryon models that balance cost and performance well. For immersion circulators, the Inkbird ISV-100W and Anova Nano are popular, budget-friendly options. These can serve you well as you learn the process. If you anticipate frequent use or want more precision, investing a bit more upfront in brands like Anova or Breville Joule can pay off in durability and features, but it’s absolutely fine to start with affordable gear.
I’m curious about maintaining equipment—what are the key things to watch out for with home vacuum sealers and circulators? Are there common mistakes that can lead to them breaking down or affecting food safety?
For home vacuum sealers, the main issues are food particles or moisture getting into the seal area, which can damage the seal or cause weak seals. Clean the sealing strip regularly and avoid overfilling bags. For circulators, be sure not to let the water drop below the minimum level, as running them dry can cause overheating. Descale regularly if you have hard water. Both tools should be dried thoroughly after use to prevent mold or mineral buildup, which can affect performance and food safety.
Could you explain more about the safety protocols for sous vide mentioned in the article? I’m curious if home cooks need to worry about bacteria or any specific health risks when sealing and cooking food this way.
Sous vide cooking is generally safe if you follow proper protocols. The article highlights the importance of keeping food at temperatures above 130°F (54°C) to prevent bacteria like Salmonella or Listeria from thriving. Always use clean hands and equipment when sealing food, and chill cooked items rapidly if you’re not serving them right away. Vacuum sealing helps, but isn’t a substitute for safe temperature and handling practices. These steps greatly reduce health risks when cooking sous vide at home.
You brought up safety protocols for sous vide cooking. I’m concerned about cooking proteins like chicken safely—could you clarify the temperature and time guidelines to make sure everything is pasteurized and safe to eat?
To safely cook chicken using sous vide, you’ll want to set your water bath to at least 140°F (60°C) and keep the chicken submerged for a minimum of 27 minutes. For extra safety, many people choose 145°F (63°C) for 9.2 minutes. Both temperature and time matter: lower temps need longer times to fully pasteurize. Always check that your chicken reaches the target temp throughout before serving.
When starting out, how much should I expect to spend on essential sous vide equipment without splurging on high-end brands? Are budget-friendly immersion circulators and basic bags reliable enough for consistent results?
For beginners, a quality budget immersion circulator typically costs between $60 and $120, and basic vacuum sealer bags or heavy-duty zip-top bags add around $10 to $20. Many affordable circulators and bags are dependable and offer consistent results if you follow the recommended settings and safety tips. Spending more mostly adds convenience, so you can definitely start with budget-friendly gear and still achieve delicious sous vide meals.
When cooking vegetables like carrots or potatoes sous vide, is there a risk of them turning out too firm or undercooked if you don’t get the timing right? I’d love to hear more about what mistakes to watch for when starting with veggies.
Yes, with vegetables like carrots or potatoes, timing and temperature are crucial. If they’re cooked at too low a temperature or for too short a time, they can stay quite firm and even taste undercooked. For best results, follow recommended times and temps—usually 183–185°F for 1–2 hours. Another common mistake is overcrowding the bag, which can cause uneven cooking. Make sure veggies are spread out in a single layer and the bag is well-sealed to avoid water getting in.
I’m excited to get into sous vide for eggs and custards, but I’m worried about food safety. What’s the minimum equipment investment to ensure everything stays at safe temps the whole time, especially if I’m working with delicate dairy or eggs?
To safely cook eggs and custards sous vide, you’ll need a reliable immersion circulator, which precisely controls water temperature. Pair it with a well-insulated pot or container and a tight-fitting lid or plastic wrap to prevent temperature drops. For best safety, also use a digital thermometer to double-check water and finished food temps, especially with eggs and dairy.
You mention sous vide is good for vegetables like carrots and potatoes. Are there any special prep steps or mistakes people commonly make when cooking veggies sous vide compared to proteins? I’m hoping to avoid common pitfalls as a beginner.
When cooking vegetables sous vide, one key step is to cut them into uniform sizes so they cook evenly. Unlike proteins, veggies often need higher temperatures, usually 183°F–190°F. Avoid overcrowding the bag, as this can cause uneven cooking. Also, season or add a little fat (like olive oil) before sealing for better flavor. Lastly, make sure to vacuum seal tightly to prevent floating, since trapped air can affect results.
You talk about safety protocols for sous vide cooking—could you elaborate on what specific mistakes can make sous vide meals dangerous, and how to avoid them at home?
Some key mistakes that can make sous vide meals unsafe include setting the water temperature too low, which lets bacteria survive, and leaving food in the danger zone (40–130°F or 4–54°C) for too long. Always follow recommended temperature and time guidelines, fully submerge sealed bags, and chill or serve food immediately after cooking. Avoid using non-food-safe plastic bags, and clean your equipment thoroughly to prevent contamination.
You talked about the need for essential gear like immersion circulators and vacuum sealers. Is it absolutely necessary to buy a dedicated vacuum sealer, or are there any more budget-friendly alternatives that still work well for beginners?
You don’t have to buy a dedicated vacuum sealer to start with sous vide. Many beginners use the water displacement method with resealable zip-top bags, which is both affordable and effective for most foods. Just slowly lower the bag with food into water to push out the air before sealing. While a vacuum sealer offers a tighter seal and is handy for longer cooks, it’s not essential at the beginner level.
I’m curious about the safety protocols you referenced. What are some of the most common unsafe practices that new sous vide users might overlook, and how can I make sure I’m following proper food safety, especially when cooking proteins like chicken or fish?
Some common safety mistakes with sous vide include not sealing bags properly, cooking at too low a temperature, and leaving cooked food in the danger zone (40–140°F) for too long. To stay safe, always cook proteins like chicken or fish at the recommended temperature for long enough to pasteurize them, use a food-grade vacuum bag, and chill any leftovers rapidly in an ice bath before refrigerating.
I have an immersion circulator but don’t own a vacuum sealer yet. Are there any safe budget-friendly alternatives for sealing bags that you’d recommend for beginners who don’t want to invest a lot right away?
You can definitely start sous vide cooking without a vacuum sealer. A common, safe, and affordable method is the water displacement technique: place your food in a zipper-lock freezer bag, seal it most of the way, then slowly lower the bag into water so the pressure pushes air out before sealing completely. Just be sure to use high-quality freezer bags, as they’re less likely to leak or break during cooking.
The article talks about safety protocols for sous vide. Could you elaborate on what specific risks are involved with incorrect sous vide practices at home, especially regarding foodborne illnesses or equipment failures?
Incorrect sous vide practices can create risks like undercooking food, which allows harmful bacteria—such as Salmonella or Listeria—to survive. If food isn’t held at proper temperatures long enough, pathogens may not be destroyed. Also, improper vacuum sealing or using non-food-safe bags can lead to contamination. Equipment failures, like inaccurate temperature control, can result in unsafe cooking. Always use reliable thermometers and ensure food stays above 130°F for the recommended time to minimize these risks.
I noticed you talk about common beginner mistakes with sous vide cooking. One thing I’m still unsure about is how to prevent food from coming out mushy, especially vegetables like carrots or potatoes. Do you have specific tips for achieving the right texture?
To avoid mushy vegetables with sous vide, try cooking them at higher temperatures (usually 183–185°F or 84–85°C) for a shorter time, such as 1–2 hours. Make sure vegetables are cut to uniform size for even cooking, and avoid leaving them in the water bath much longer than the recommended time. Also, don’t overcrowd the bags, as this can cause uneven results.
I’m curious about the safety protocols you mention for home sous vide. Could you elaborate on what steps I should take to avoid any health risks, especially when cooking things like chicken or eggs?
To keep sous vide cooking safe, always use food-safe plastic bags or vacuum sealers, and make sure your water bath is at the proper temperature for the right amount of time. For chicken, cook at least 60°C (140°F) for an hour or more to kill bacteria. Eggs should be held at 63°C (145°F) for about 45 minutes. After cooking, serve food promptly or chill it quickly in an ice bath to prevent bacterial growth.
When it comes to vegetables, how do you know the right temperature and time to keep them from turning mushy but still fully cooked? Do different types of vegetables have very different sous vide requirements?
Vegetables do have different sous vide requirements based on type and texture. Most firm vegetables like carrots or potatoes need higher temps (around 183–185°F) for 1–2 hours, while tender ones like zucchini cook well at 180°F for 30–45 minutes. If you want them crisp-tender, keep to the lower end of time and check doneness before serving. Adjust as needed for your preferred texture.
You highlight food safety protocols in home sous vide cooking. Could you elaborate on what the key steps are for avoiding unsafe practices, especially when cooking proteins like chicken or fish for extended periods?
To avoid unsafe practices when sous vide cooking proteins like chicken or fish, always set your water temperature at or above the recommended minimum (usually 140°F/60°C for chicken). Seal food in proper vacuum bags, not regular plastic, and avoid cross-contamination by using clean tools and surfaces. Don’t leave cooked food at room temperature; chill it quickly if not serving right away, ideally in an ice bath. Following these steps helps prevent bacterial growth and ensures safe, delicious results.
When cooking vegetables like carrots or potatoes sous vide, is there a significant difference in flavor or texture compared to steaming or roasting them the traditional way? I’m considering menu changes and want to understand the benefits.
Sous vide cooking produces vegetables with a noticeably different texture and flavor than steaming or roasting. Carrots and potatoes cooked sous vide retain more of their natural sweetness, and their texture is very consistent—tender throughout but not mushy. You can also infuse them with herbs or seasonings in the bag. Roasting adds caramelization and a firmer exterior, while steaming preserves moisture but can be less flavorful. If your menu values precision and unique textures, sous vide is a great option.
The article says that immersion circulators are more affordable these days, but how low can I go price-wise before I start to sacrifice accuracy or reliability? I’m setting up my first sous vide setup and want to keep my gear budget pretty reasonable.
You can find reliable immersion circulators starting around the $60–$100 range. In that bracket, most reputable brands offer decent temperature accuracy and durability for home use. Models under $50 often cut corners on build quality or precision, so you may want to avoid going that low if consistent results matter to you. For your first setup, choosing a well-reviewed circulator in the $80–$120 range should balance affordability with reliable performance.
I’m curious about the timeframe for cooking vegetables with sous vide. If I want to meal prep carrots or potatoes for the week, can I cook a big batch at once, and if so, how long will they keep safely in the fridge after cooking?
You can absolutely cook a big batch of carrots or potatoes using sous vide for meal prep. Once cooked and properly chilled, they can be stored in the fridge for up to 5 to 7 days. Make sure to cool them quickly in an ice bath before refrigerating to keep them safe and maintain quality throughout the week.
When you brought up common beginner mistakes, I wondered if you could expand a bit on what specific errors could actually pose a health risk rather than just affecting taste or texture. What should I watch out for most closely as I try this in my shop?
Health risks with sous vide mostly stem from cooking food at too low a temperature or for too short a time, which may not kill harmful bacteria. Make sure you’re always using a precise thermometer and following recommended time and temperature guidelines for each type of food. Also, avoid cross-contamination by keeping raw and cooked foods separate, and never leave vacuum-sealed food at room temperature for extended periods.